Natural Language Processing (NLP) in Python – PC Can Recognise Your Speech | KoderShop

Natural Language Processing (NLP) in Python – PC Can Recognise Your Speech | KoderShop

natural language processing (NLP) python

Natural Language Processing in Python and its explanation

For computers it is not very clear to interpret unstructured information, such as human speaking or writing. But they are great at dealing with structured information, such as tables in databases. So that is where Natural Language Processing in Python comes in. Its goal is to make computers understand the unstructured text and regain the meaningful information from it. Unfortunately, computers cannot fully understand human language, but natural language coding can save a huge amount of time. Shortly, it is the subfield of AI (Artificial Intelligence) which interacts between humans and computers. With Python NLP developers can systematize and structure data to perform tasks such as translation, tonality analysis, speech recognition, and more. Python is probably the most convenient programming language for NLP. Programming languages such as Java and R are also used for NLP, but Python is clearly used more frequently. Natural Language Processing Python examples are Cortana, Siri, Alexa and others.

Rule-based NLP vs. Statistical NLP:

Rule-based NLP system relies on built-in linguistic rules. It analyzes text and creates characterization from where we can generate the text. A large set of rules is required for our actions. The software needs a complex set of rules, so after that it can transfer the grammatical correction from source language into targeted language. Actually, the translations need gigantic dictionaries. And users can add their own terminology so they can improve the stock translation quality.
Statistical system uses NLP machine learning Python algorithms. It utilizes statistical translation models whose parameters result from the analysis of corpora. It is fine to use large and qualified corpora, because statistical NLP provides good quality. This type of Natural Language Python is CPU intensive and requires an extensive hardware configuration.

Natural Language Understanding Python

Natural language understanding is one of the branches of AI that is needed to understand the input in the form of text or speech.

NLU helps humans to interact with computers. It is the ability to understand commands without special syntax of computer languages such as Python or C++. NLU also can make computers communicate back to the people in their languages, for example English, Spanish and French.

You can see inclusion of NLU in chat- and voice- bots that interact with people without any supervision. A lot of IT companies, such as Amazon, Apple, Google and Microsoft, successfully use NLU in their projects.

Natural Language Generation Python

When you have a data set and you want to produce written or spoken stories from it, the Natural language generation is your choice. The NLG is used for the ability that humans can interact with machines and machines can interact with humans, including natural language processing (NLP) and natural language understanding (NLU).

Natural Language Generation has a really fast speed of production so it can be especially useful for news production or other stories that are time-sensitive.

Natural Languages Processing Python packages (Libraries)

In Python there is the NLTK (Natural Language Toolkit) package that you can use for Python Natural Language Processing. NLTK is a free, open source project. NLTK is the main tool for natural language processing and machine learning. The command below can help you install it. 

$ python -m pip install nltk == 3.5

SpaCy is relatively young and very popular now. Its GitHub repository has over 22.4k stars and 3.7k branches, which is much higher than NLTK.  It was written in Python and Cython, making it fast and efficient when working with large datasets. This is an industrial library designed for use in production.

Some features of spaCy:

  • It provides support for linguistically motivated tokenization in over 60 languages.
  • It has 64 pipelines in 19 different languages.
  • It provides functions for named entity recognition, part-of-speech tagging, dependency analysis, sentence segmentation, text classification, lemmatization, morphological analysis, entity linking, and more.


Natural Language Processing algorithms list:

Tokenization

One of the most popular NLP techniques in Python is tokenization. This method allows you to divide the text into so-called tokens, into words or sentences. The long string line is broken in smaller parts that are named “tokens”(where the “tokenization” name comes from) and they constitute symbols, numbers, etc. Also, they help people understand what text means when developing NLP models Python. Tokenizers use empty symbols to separate tokens one from another. There are some challenges and limitations in tokenization tasks. Generally, tokenization is used only for text in French or English languages. But for example for Chinese, Japanese, Korean, Thai, Urdu and etc. it doesn’t work. So the first limitation is that you need to develop a tool that combines these languages. Despite this there are also other languages where tokenization is limited. For instance, Arabic text. Arabic language contains complicated morphology, for example: one Arabic word may contain up to seven tokens.

NLP Implementation (Tokenization):
import nltk
phrase = "I will go for a walk tomorrow so I hope the weather will be good."
nltk_tokens = nltk.word_tokenize(phrase)
print (nltk_tokens)
# output: ['I', 'will', 'go', 'for', 'a' 'walk', 'tomorrow', 'so', 'I', 'hope', 'the' 'weather', 'will', 'be' 'fine']

Stemming

The process that reduces inflection in words to their base form is called stemming. It is rule-based. It reduces a word to its stem word, which is created by removing the suffixes or prefixes used with a word. For example, a stemming algorithm truncates the words “feathers” and “feathered” to the root word “feather”. The two biggest problems in stemming are Overstemming and Understemming. When there are words that stem from the same root and that are of different stems, the overstemming is occured. Overstemming comes from when several words are stemmed from the same root that are of different stems. Understemming comes from when several words are stemmed from the same root that are not of different stems.


Python Implements Stemming:
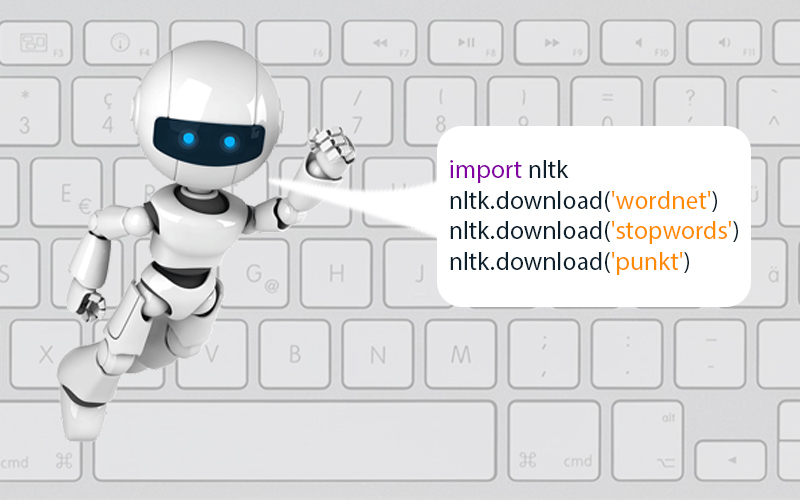
import nltk
nltk.download('wordnet')
nltk.download('stopwords')
nltk.download('punkt')
from nltk.tokenize import word_tokenize
from nltk.stem import PorterStemmer

stemmer = PorterStemmer()
phrase = "watching the films"
words = word_tokenize(phrase)

stemmed_words = []
for word in words:
stemmed_words.append(stemmer.stem(word))

Lemmatization

Lemmatization finds the dictionary word instead of reducing the original word. It allows you to bring the word form to the lemma (base form). Also you can add custom rules for analyzing words. It is completed by searching the forms in the table. The main difference between lemmatization and stemming is that the first one has regard to the context and converts the word to its root form, while the second one removes the last few characters.
Lemmatization NLP code:
import nltk
nltk.download('omw-1.4')
from nltk.stem import WordNetLemmatizer

lemmatizer = WordNetLemmatizer()
phrase = "watching the films"
words = word_tokenize(phrase)

lemmatized_wo
for word in words:
lemmatized_words.append(lemmatizer.lemmatize(word))

" ".join(lemmatized_words)
# output: watching the film

Named Entity Recognition (NER)

Named entity recognition (NER) can seek to locate and classify named entities in text like people, organizations, locations, date, time, percentages, etc. This process is one of the most used NLP algorithms Python.
NER NLP Python example:

import nltk
nltk.download('punkt') nltk.download('averaged_perceptron_tagger') nltk.download('maxent_ne_chunker') phrase = "One of the most popular physicists was Albert Einstein and he was born in Germany." for sent in nltk.sent_tokenize(phrase): for chunk in nltk.ne_chunk(nltk.pos_tag(nltk.word_tokenize(sent))): if hasattr(chunk, 'label'): print(chunk.label(), ' '.join(a[0] for a in chunk)) # output: PERSON Albert Einstein # GPE Germany

Named Entity Recognition (NER)

Named entity recognition (NER) can seek to locate and classify named entities in text like people, organizations, locations, date, time, percentages, etc. This process is one of the most used NLP algorithms Python.
NER NLP Python example:
import nltk 
phrase = "The weather is good today."
tokens = nltk.word_tokenize(phrase)

print(tagged)
# output: [('The', 'DT'), ('weather', 'NN'), ('is', 'VBZ'), ('good', 'JJ'), ('today', 'NN'), ('.', '.')]

Stop word removal

The preprocessing steps across NLP Python applications that are very often used are Stop word Removal. Stop word removal is removing words that frequently chance across all files in the whole text. The most common Stop words are articles and pronouns. These words have no meaning in some of the tasks in Python language processing such as searching for information. In reverse, removal of the stop words can have little impact in these NLP techniques Python. Mostly, the given language list of the stop words is a hand-picked words list that most often occurs in a collection of written texts.
Python Implementation (Stop Word Removal):
from nltk.tokenize import word_tokenize
from nltk.corpus import stopwords

stop_words = stopwords.words('english')

phrase = "Here is an example sentence"
words = word_tokenize(phrase)

stripped_phrase = []

for word in words:
if word not in stop_words:
stripped_phrase.append(word)

" ".join(stripped_phrase)
# output: Here example sentence

Sentiment Analysis

There are a lot of utilities contained in the NLTK library that help you analyze data. Sentiment analysis is one of them.

Sentiment analysis is a NLP technique that identifies the disposition of a given text. There are different kinds of sentiment analysis, but one of the most commonly used techniques divides data into positive, negative and neutral. You can analyze comments, and product reviews, to gain understanding from your audience.

TF – IDF

If you want to know how important a word is to a document in a collection of documents, you can use TF-IDF (term frequency-inverse document frequency). It is a static measurement that evaluates the word relevantion. It functions by multiplying two indicators: the amount of times the word appears in a document and the inverse frequency of the word in selection of documents. It is useful for assessment of words for Natural Language Processing with Python in machine learning algorithms. It works by proportionally increasing the number of times a word appears in a document, but is offset by the number of documents that contain the word. Therefore, words that occur frequently in each document, such as this, what, and if, are ranked low, even though they may appear many times, because they are not particularly relevant to that document.

Creating a User Registration Form with Validation using ASP.NET | Instruction by KoderShop

Creating a User Registration Form with Validation using ASP.NET | Instruction by KoderShop

Registration Form with validation ASP NET

Registration Form With Validation in ASP.NET


Below we will see the steps you need to follow in order to create a form in ASP.NET. But first lets get some information on what is ASP.NET.

Introduction

A web development platform called ASP.NET offers a programming model, a thorough software architecture, and a variety of services needed to create reliable web applications for PCs and mobile devices.

The HTTP protocol serves as the foundation for ASP.NET, which makes use of the HTTP commands and policies to establish browser-to-server collaboration.


A component of Microsoft’s.Net platform is ASP.NET. The extensible and reusable components or objects found in the.Net framework are used to create the compiled codes that make up ASP.NET applications. These scripts are capable of utilizing the whole class hierarchy in the.Net framework.

Any of the following languages may be used to create ASP.NET application code:

  • C#
  • Visual Basic.Net
  • Jscript
  • J#

On the internet, interactive, data-driven web applications are created with ASP.NET. It has many features, like text boxes, buttons, and labels, that are used to assemble, set up, and work with code to produce HTML pages.

ASP.NET Web Forms Model

The event-driven model of interaction is extended to web applications using ASP.NET web forms. A full markup page or HTML page is returned by the web server when the browser submits a web form to it.

All user actions performed on the client side are sent to the server for stateful processing. The server analyzes the results of client actions and starts the responses.
HTTP is a stateless protocol right now. The following are the components of the application state that are stored by the ASP.NET framework:

  • Page state
  • Session state

The client’s state, or the contents of the various input fields in the online form, is the page state. The information gathered from all the pages the user visited and interacted with throughout the session, or the total session state, is known as the session state. Let’s use a shopping cart as an example to help explain the idea.

Items are added by the user to a shopping cart. Items are chosen from one page, let’s say the items page, and the price and total amount gathered are displayed on another page, let’s say the cart page. Only HTTP is unable to manage all the data flowing from various pages. The data gathered across a session is tracked by the server side infrastructure and ASP.NET session state.

When creating ASP.NET runtime codes, the ASP.NET runtime combines the state of the server side components in hidden fields and transfers page state to and from the server across page requests.

This enables the server to function in a two-tiered connected manner and become aware of the total application status.

But what is net validation or an asp validator ?

ASP.NET validation controls validate the user input data to ensure that useless, unauthenticated, or contradictory data don’t get stored.

Validation Controls in ASP.NET

Validation controls are used to:

  • Implement presentation logic.
  • To validate user input data.
  • Data format, data type and data range is used for validation.

Validation is of two types:

  1. Client Side
  2. Serve Side

Although client-side validation is beneficial, we must rely on browser and scripting language support.
Users find client side validation convenient because they receive immediate feedback. The key benefit is that it delays posting a page to the server until client validation has been completed successfully.
From a developer’s perspective, the serve side is preferred because it is reliable and independent of the scripting language and browser.
To assure client and server validation, you can utilize ASP.NET validation. It will first work on client validation before moving on to server validation. Regardless of whether client validation is used or not, server validation will always function.
Being able to validate the data people provide is a crucial component of developing ASP.NET Web pages for user input. A collection of validation controls are available in ASP.NET, and they offer a simple but effective approach to check for mistakes and, if necessary, display alerts to the user.
There are six types of validation controls in ASP.NET:

  1. RequiredFieldValidation Control
  2. CompareValidator Control
  3. RangeValidator Control
  4. RegularExpressionValidator Control
  5. CustomValidator Control
  6. ValidationSummary

The controls and their operation are described in the table below.

Validation Control

RequiredFieldValidation

CompareValidator

RangeValidator

RegularExpressionValidator

CustomValidator

ValidationSummary

Description

Makes an input control a required field

Compares the value of one input control to the value of another input control or to a fixed value

Checks that the user enters a value that falls between two values

Ensures that the value of an input control matches a specified pattern

Allows you to write a method to handle the validation of the value entered

Displays a report of all validation errors occurred in a Web page

Validation Properties

Typically, user actions such clicking the submit button or entering data cause Validation to be triggered. Let’s say you want to validate the page once the user clicks the submit button.

Only when CauseValidation is set to true will server validation take place.

The ValidationGroup property allows you to enter the name of the validation group for which the Button control causes validation when the CausesValidation property value is set to true.

Page has a Validate() method. If it is true this methods is executed. Validate() executes each validation control.

To make this happen, simply set the CauseValidation property to true for submit button as shown below:

<asp:Button ID="Button2" runat="server" Text="Submit" CausesValidation=true />

Follow the below steps to create a registration form:

ASP.NET registration form

1. Lets add a Web Form to the project

WEB form project ASP NET

This form contains some default html code.

Validation form ASP NET
  1. We start Adding Controls to the form

Either by directly writing code or by dragging components from the toolbox, controls can be added to a form.

The code for a user registration form is located in the following file.

// WebControls.aspx

<%@ Page Language="C#" AutoEventWireup="true" CodeBehind="WebControls.aspx.cs" 
Inherits="WebFormsControlls.WebControls" %>
<!DOCTYPE html>
<html xmlns="http://www.w3.org/1999/xhtml">
<head runat="server">
<title></title>
<style type="text/css">
.auto-style1 { 
   width: 100%;
  }
.auto-style2 {
   width: 278px;
  }
.auto-style3 { 
   width: 278px;
   height: 23px;
  }
.auto-style4 {
   height: 23px;
  } 
</style>
</head>
<body>
<form id="form1" runat="server">
<div>
 <table class="auto-style1">
  <tr>
  <td>
    <asp:Label ID="Label1" runat="server" Text="User Name"></asp:Label>
  </td> 
  <td> 
    <asp:TextBox ID="username" runat="server" required="true"></asp:TextBox></td>
  </tr>
  <tr>
  <td>
    <asp:Label ID="Label6" runat="server" Text="Email ID"></asp:Label>
  </td>
  <td>
    <asp:TextBox ID="EmailID" runat="server" TextMode="Email"></asp:TextBox></td>
  </tr> 
  <tr>
  <td>
    <asp:Label ID="Label2" runat="server" Text="Password"></asp:Label></td>
  <td>
    <asp:TextBox ID="TextBox2" runat="server" TextMode="Password"></asp:TextBox></td>
  </tr>
  <tr>
  <td>
    <asp:Label ID="Label3" runat="server" Text="Confirm Password"></asp:Label></td>
  <td>
    <asp:TextBox ID="TextBox3" runat="server" TextMode="Password"></asp:TextBox></td>
  </tr>
  <tr>
  <td>
    <asp:Label ID="Label4" runat="server" Text="Gender"></asp:Label></td>
  <td>
    <asp:RadioButton ID="RadioButton1" runat="server" GroupName="gender" Text="Male" />
    <asp:RadioButton ID="RadioButton2" runat="server" GroupName="gender" Text="Female" /></td>
  </tr>
  <tr>
  <td>
    <asp:Label ID="Label5" runat="server" Text="Select Course"></asp:Label>s</td>
  <td>
    <asp:CheckBox ID="CheckBox1" runat="server" Text="J2SEE" />
    <asp:CheckBox ID="CheckBox2" runat="server" Text="J2EE" />
    <asp:CheckBox ID="CheckBox3" runat="server" Text="Spring Framework" />
  </td>
  </tr>
  <tr>
  <td>
  </td>
  <td>
  <br />
    <asp:Button ID="Button1" runat="server" Text="Register" CssClass="btn btn-primary" OnClick="Button1_Click"/>
  </td> 
  </tr> 
  </table>
    <asp:Label ID="message" runat="server" Font-Size="Medium" ForeColor="Red"></asp:Label>
</div>
</form>
 <table class="auto-style1">
  <tr> 
  <td class="auto-style2">
    <asp:Label ID="ShowUserNameLabel" runat="server" ></asp:Label></td>
  <td>
    <asp:Label ID="ShowUserName" runat="server" ></asp:Label></td>
  </tr>
  <tr>
  <td class="auto-style2">
<asp:Label ID="ShowEmailIDLabel" runat="server" ></asp:Label></td> <td> <asp:Label ID="ShowEmail" runat="server" ></asp:Label></td> </tr> <tr> <td class="auto-style3"><asp:Label ID="ShowGenderLabel" runat="server" ></asp:Label></td> <td class="auto-style4"> <asp:Label ID="ShowGender" runat="server" ></asp:Label></td> </tr> <tr> <td class="auto-style2"><asp:Label ID="ShowCourseLabel" runat="server" ></asp:Label></td> <td> <asp:Label ID="ShowCourses" runat="server" ></asp:Label></td> </tr> </table> </body> </html>

3. Handling Submit Request

We are including a message in the code-behind file that only appears when the user submits the registration form. The following code is present in this file.

using System; 
using System.Collections.Generic;
using System.Linq;
using System.Web;
using System.Web.UI;
using System.Web.UI.WebControls;
namespace WebFormsControlls
 {
   public partial class WebControls : System.Web.UI.Page
    {
      protected System.Web.UI.HtmlControls.HtmlInputFile File1;
      protected System.Web.UI.HtmlControls.HtmlInputButton Submit1;
      protected void Page_Load(object sender, EventArgs e)
    {
    }
      protected void Button1_Click(object sender, EventArgs e)
    {
      message.Text = "Hello " + username.Text + " ! ";
      message.Text = message.Text + " <br/> You have successfuly Registered with the following details.";
      ShowUserName.Text = username.Text;
      ShowEmail.Text = EmailID.Text;
      if (RadioButton1.Checked)
       {
         ShowGender.Text = RadioButton1.Text;
       }
      else ShowGender.Text = RadioButton2.Text;
      var courses = "";
      if (CheckBox1.Checked)
       {
         courses = CheckBox1.Text + " ";
       }
      if (CheckBox2.Checked)
       {
         courses += CheckBox2.Text + " ";
       }
      if (CheckBox3.Checked)
      {
         courses += CheckBox3.Text;
      }
      ShowCourses.Text = courses;
      ShowUserNameLabel.Text = "User Name";
      ShowEmailIDLabel.Text = "Email ID";
      ShowGenderLabel.Text = "Gender";
      ShowCourseLabel.Text = "Courses";
      username.Text = "";
      EmailID.Text = "";
      RadioButton1.Checked = false;
      RadioButton2.Checked = false;
      CheckBox1.Checked = false;
      CheckBox2.Checked = false;
      CheckBox3.Checked = false;
    }
  }
}

  1. Run User Registration Form

Simply right-click this form and choose the option to view it in a browser to execute it. In our illustration, we did it.

User form ASP

Output:

User form NET

After completing the form and registering, the user is greeted with a message.

Validation form ASP

After submit the registration details you can see them so that you can verify them

ASP Registrasion form

SOLID Principles Using C# as an Example | Detailed Instructions by KoderShop

SOLID Principles Using C# as an Example | Detailed Instructions by KoderShop

SOLID principles c

Solid Principles in C#

Since the early 2000s, object-oriented developers have adhered to the SOLID principles. They established best practices for programming in OOP languages, as well as for agile development and other areas. SOLID programs scale more effectively, take less time to develop, and adapt to change more quickly. Employers will always favor those who have a solid understanding of SOLID principles.

Let’s examine a few design flaws that frequently cause harm to any software:

  • When we increase the pressure on particular courses by giving them more obligations that have nothing to do with those classes.
  • When they are firmly coupled or when we force the class to hinge on one another.
  • Duplicate code is used in the application 

We can use the following strategies to overcome these worries:

  • We need to choose the best architecture for the application.
  • We must follow the design guidelines created by professionals.
  • To create the software in accordance with its requirements and specifications, we must choose the appropriate design patterns.


The principles of SOLID are:

  • Single-responsibility principle
  • Open-closed principle
  • Liskov substitution principle
  • Interface segregation principle
  • Dependency inversion principle

Lest start with, S: Single Responsibility Principle (SRP)

Single Responsibility Principle (SRP)

“A class should only have a single responsibility, that is, only changes to one part of the software’s specification should be able to affect the specification of the class.”

The Single Responsibility Principle, one of the most widely used design concepts, aids in achieving object-oriented objectives. By putting the single responsibility principle into practice, we may reduce dependencies between functionalities and better manage our code so that we can add new features in the long run. Every class, method, or module in your software should only handle one responsibility, according to the single-responsibility principle (SRP). Each should accept the position for a specific program functionality. The class should only contain variables and methods necessary for its operation.

Classes can work together to complete more challenging jobs, but before passing the output to another class, each class must complete a function from beginning to end. Martin stated, “A class should have only one cause to change,” in describing this. The “reason” in this case is that we want to change the sole functionality that this class aspires to. If we don’t decide to change just this one functionality, we won’t ever change this class because every part of the class should be related to that behavior.

 SRP makes it straightforward to follow encapsulation, another renowned OOP principle. When all methods and data for a job fall under the precise single-responsibility class, it is easy to hide data from the customer. A single-responsibility class that uses a getter and setter technique satisfies the requirements for an encapsulated class. The benefit of using SRP-compliant programs is that you can change a function’s behavior by changing the one class that controls it. Additionally, you can be certain that only that class will malfunction if a single functionality fails because you know exactly where the issue is in the code.

public class BankAccount
{             
    public BankAccount()  {}
    public string AccountNumber { get; set; }
    public decimal AccountBalance { get; set; }
    public decimal CalculateInterest()
    {
        // Code to calculate Interest
    }

Here, the BankAccount class includes the account’s information and calculates the interest on the account. Look at the change request we got from the company now:

  • Introduce a new Property AccountHolderName, please.
  • Incorporating a new rule into the interest calculation process.

These request types for changes are incredibly diverse. One modifies features, whilst the other modifies functionality. We have two distinct types of justifications for changing one class, which is against SRP.

We will use SRP to resolve this problem:

public interface IBankAccount
 {
   string AccountNumber { get; set; }
   decimal AccountBalance { get; set; }
 }
public interface IInterstCalculator
 {
   decimal CalculateInterest();
 }
public class BankAccount : IBankAccount
 {
public string AccountNumber { get; set; }
public decimal AccountBalance { get; set; }
 }
public class InterstCalculator : IInterstCalculator
 {
public decimal CalculateInterest(IBankAccount account)
 {
// Write your logic here
return 1000;
}
}

Only the properties of the bank account fall inside the purview of our BankAccount class. We don’t need to update the BankAccount class if we want to add any extra business rules for the calculation of interest. In the event that a new Property AccountHolderName needs to be added, the InterestCalculator class does not require any changes. As a result, the Single Responsibility Principle is being put into practice.


O: Open Closed Principle (OCP)

Open Closed Principle (OCP)

This is Solid Principles’ second tenet, which is explained as follows:
“A software class or module should be open for extension but closed for modification”

If a class has been written, it must be adaptable enough that we may add new features to it without affecting its existing code, but we should wait to do so until bugs have been fixed before making changes (closed for modification). This principle emphasizes the requirement for classes to be able to add functionality without having to change their existing source code. Specifically, it must be possible to change the software’s behavior without changing the way it is currently implemented at its core. In essence, it says to design your classes or code in a way that adding new capabilities to the software doesn’t require changing any already existing code.

When a code implementation is described as “open for expansion,” it means that you should design it such that you can use inheritance to add additional features to your program. Your design should be such that adding a new class that derives from the base class and adding new code to this derived class is preferred over changing the existing class. Consider interface inheritance above class inheritance when considering inheritance. You are creating a dependency that is a tight connection between the derived class and the base if the derived class is built around the implementation in the base class. By adding a new class that uses the interface, you can add new features without changing the interface itself or superseding other classes. The interface also makes it easier for classes that implement the interface to work together loosely.

Code Example:

public class GarageStation
{
public void DoOpenGate()
{
//Open the gate functinality
}

public void PerformService(Vehicle vehicle)
{
//Check if garage is opened
//finish the vehicle service
}

public void DoCloseGate()
{
//Close the gate functinality
}
}

When extending functionality, we can use OCP by utilizing interfaces, abstract classes, abstract methods, and virtual methods. I’ve merely used an interface here as an example; however, you can change it to suit your needs.

interface IAccount
{
// members and function declaration, properties
decimal Balance { get; set; }
decimal CalcInterest();
}

//regular savings account 
public class RegularSavingAccount : IAccount
{
public decimal Balance { get; set; } = 0;
public decimal CalcInterest()
{
decimal Interest = (Balance * 4) / 100;
if (Balance < 1000) Interest -= (Balance * 2) / 100;
if (Balance < 50000) Interest += (Balance * 4) / 100;

return Interest;
}
}

//Salary savings account 
public class SalarySavingAccount : IAccount
{
public decimal Balance { get; set; } = 0;
public decimal CalcInterest()
{
decimal Interest = (Balance * 5) / 100;
return Interest;
}
}

//Corporate Account
public class CorporateAccount : IAccount
{
public decimal Balance { get; set; } = 0;
public decimal CalcInterest()
{
decimal Interest = (Balance * 3) / 100;
return Interest;
}
}

By extending IAccount, the three new types normal saving account, salary saving account, and corporate account are generated in the code above.

This resolves the issue of class modification, and by extending the interface, functionality can be expanded.

As each class only performs one duty and we are just extending the class, the code above implements both the OCP and SRP principles.

L: Liskov Substitution Principle (LSP)

“Objects in a program should be replaceable with instances of their subtypes without altering the correctness of that program.”

In 1987, Barbara Liskov presented the Liskov Substitution Principle as the opening keynote for a symposium on data abstraction. Data abstraction and hierarchy in a computer program was the main heading. A few years later, they co-authored a study with Jeanette Wing in which they defined the principle as follows:

Let Φ (x) be a property that can be proven to apply to objects x of type T. Then, for objects y of type S—a subtype of T— Φ (y) must be true.

This perspective seems to be more didactic than useful. Using abstractions to create your solution hierarchy while keeping the logic sound and unaltered is what the Liskov Substitution Principle is all about. If the academic definition must be clarified, an object B inherits from or extends from an object A. Therefore, if B is handed to any logic that expects A, it should execute correctly. If you already work with an OOP (Object Oriented Programming) language, you probably already know that most compilers perform static checking to make sure that if class B inherits from class A, then class B contains every member of class A. As a result, this is not the real issue. You must do this yourself because the compiler won’t detect it.


Code Example:

Polymorphism is used in the majority of LSP implementations to produce class-specific behavior for the same calls. Let’s examine how we may modify a fruit categorization program to apply LSP in order to illustrate the LSP principle.


This illustration does not include to LSP:

namespace SOLID_PRINCIPLES.LSP
{
class Program
{
static void Main(string[] args)
{
Apple apple = new Orange();
Debug.WriteLine(apple.GetColor());
}
}
public class Apple
{
public virtual string GetColor()
{
return "Red";
}
}
public class Orange : Apple
{
public override string GetColor()
{
return "Orange";
}
}
}

Because the Orange class could not replace the Apple class without changing the program’s output, this does not adhere to LSP. The Orange class overrides the GetColor() method, thus it would return that an apple is orange if it were called.

namespace SOLID_PRINCIPLES.LSP
{
class Program
{
static void Main(string[] args)
{
Fruit fruit = new Orange();
Debug.WriteLine(fruit.GetColor());
fruit = new Apple();
Debug.WriteLine(fruit.GetColor());
}
}
public abstract class Fruit
{
public abstract string GetColor();
}
public class Apple : Fruit
{
public override string GetColor()
{
return "Red";
}
}
public class Orange : Fruit
{
public override string GetColor()
{
return "Orange";
}
}
}

Thanks to the class-specific behavior of GetColor, any Fruit class subtype (such as Apple or Orange) can now be replaced with the opposite subtype without causing an error (). As a result, the LSP principle is now realized by this program.

I: Interface segregation principle

“Many client-specific interfaces are better than one general-purpose interface.”

According to the ISP (interface segregation principle), classes can only engage in behaviors that are beneficial to attaining their intended functionality. Classes do not consist of non-useful behaviors. Here, we’re referring to the first SOLID principle. ISP and OCP principles eliminate all practices, actions, or variables that do not directly advance their function. The entire process should contribute to the end result. This principle states that the client shouldn’t be forced to rely on strategies that it won’t use. Since it will allow clients to select the necessary interfaces and implement them, this principle promotes the adoption of multiple tiny interfaces as opposed to a single large interface.
This idea aims to divide the software into smaller classes that don’t handle the interface or methods that the class won’t utilize. This will make it easier to keep the class stationary, compact, and independent of dependencies. This idea suggests that instead of forcing classes to implement a single large interface, they should have a choice among numerous smaller interfaces. The interface that the class incorporates must be closely tied to the task that the class will carry out. We should build interfaces in accordance with Solid Principles’ Single Responsibility Principle. Since larger interfaces will necessitate more methods and not all implementors would need multiple methods, we should strive to make our interfaces as compact as possible. The Single Responsibility Principle may also be violated if we maintain a big size for interfaces, which could lead to a huge number of functions in the implementor class.

ISP has the advantage of decomposing complicated procedures into simpler ones that are more precise. As a result, the program is easier to debug for the reasons listed below:

  • Only a little amount of code is shared between classes. Fewer bugs imply less code.
  • A narrower variety of behaviors can be handled by one approach. You only need to review the minor methods if there is a problem with a behavior.

There will be a bug if the class tries to use an unsupported behavior if a general method with several behaviors is transferred to a class that doesn’t support all behaviors, such as calling for a property that the class doesn’t own.

Code Example:

Let’s examine how a program alters with and without adhering to the ISP principle to see how it appears in code.

First, the application that does not include ISP

// Not following the Interface Segregation Principle 
public interface IWorker 
{ 
string ID { get; set; } 
string Name { get; set; } 
string Email { get; set; } 
float MonthlySalary { get; set; } 
float OtherBenefits { get; set; } 
float HourlyRate { get; set; } 
float HoursInMonth { get; set; } 
float CalculateNetSalary(); 
float CalculateWorkedSalary(); 
} 

public class FullTimeEmployee : IWorker 
{ 
public string ID { get; set; } 
public string Name { get; set; } 
public string Email { get; set; } 
public float MonthlySalary { get; set; } 
public float OtherBenefits { get; set; } 
public float HourlyRate { get; set; } 
public float HoursInMonth { get; set; } 
public float CalculateNetSalary() => MonthlySalary + OtherBenefits; 
public float CalculateWorkedSalary() => throw new NotImplementedException(); 
} 

public class ContractEmployee : IWorker 
{ 
public string ID { get; set; } 
public string Name { get; set; } 
public string Email { get; set; } 
public float MonthlySalary { get; set; } 
public float OtherBenefits { get; set; } 
public float HourlyRate { get; set; } 
public float HoursInMonth { get; set; } 
public float CalculateNetSalary() => throw new NotImplementedException(); 
public float CalculateWorkedSalary() => HourlyRate * HoursInMonth; 
}

This program does not  include the ISP because the FullTimeEmployee class doesn’t need the CalculateWorkedSalary() function, and the ContractEmployee class doesn’t need the CalculateNetSalary().

Both of these techniques help these classes achieve their objectives. Instead, they are used since they are IWorker interface-derived classes.

The software could be refactored in the following way to adhere to the ISP principle:

// Following the Interface SegregationPrinciple 
public interface IBaseWorker 
{ 
string ID { get; set; } 
string Name { get; set; } 
string Email { get; set; } 

} 

public interface IFullTimeWorkerSalary : IBaseWorker 
{ 
float MonthlySalary { get; set; } 
float OtherBenefits { get; set; } 
float CalculateNetSalary(); 
} 

public interface IContractWorkerSalary : IBaseWorker 
{ 
float HourlyRate { get; set; } 
float HoursInMonth { get; set; } 
float CalculateWorkedSalary(); 
} 

public class FullTimeEmployeeFixed : IFullTimeWorkerSalary 
{ 
public string ID { get; set; } 
public string Name { get; set; } 
public string Email { get; set; } 
public float MonthlySalary { get; set; } 
public float OtherBenefits { get; set; } 
public float CalculateNetSalary() => MonthlySalary + OtherBenefits; 
} 

public class ContractEmployeeFixed : IContractWorkerSalary 
{ 
public string ID { get; set; } 
public string Name { get; set; } 
public string Email { get; set; } 
public float HourlyRate { get; set; } 
public float HoursInMonth { get; set; } 
public float CalculateWorkedSalary() => HourlyRate * HoursInMonth; 
}

In this version, the main interface IWorker has been divided into three child interfaces: IFullTimeWorkerSalary, IContractWorkerSalary, and IBaseWorker.  

All workers share several methods in the general interface. The child interfaces divide up techniques according to the type of employee: Full-Time with a salary or Contract with hourly pay.

In order to access all methods and attributes in the base class and the worker-specific interface, our classes can now implement the interface for that type of worker.

Now, the end classes only have the methods and properties necessary to accomplish their purpose and adhere to the ISP principle.


D: Dependency inversion principle

Dependency inversion principle

“One should depend upon abstractions, [not] concretions.”

There are two aspects to the dependency inversion principle (DIP):

  • It is not advisable for high-level modules to rely on low-level ones. Both should rely on abstractions instead (interfaces)
  • Details shouldn’t be the basis for abstractions. Abstractions ought to be dependent on specifics (like concrete implementations).

Traditional OOP program architecture is reversed in the first portion of this approach. Without DIP, programmers frequently create programs with deliberately coupled high-level (less specific, more abstract) and low-level (specific) components to carry out tasks.


DIP binds both high-level and low-level components to abstractions rather of decoupling them. While high-level and low-level components can still complement one another, a change in one shouldn’t always affect the other.

This aspect of DIP has the benefit because detached programs are easier to alter. Your application has a web of dependencies, which means a single change might have an impact on numerous independent components.

Changes will be more localized and take less time to locate all affected components if dependencies are kept to a minimum.

“The abstraction is not altered if the details are modified” might be seen as the second clause. The user-facing portion of the program is the abstraction.


The precise implementations that take place in the background to produce the user-visible program behavior are known as the details. In a DIP program, we could completely rewrite how the software achieves its behavior behind the scenes without the user’s knowledge.

Refactoring is the term for this process.

As a result, you won’t need to hard-code the interface to only use the most recent information (implementation). This maintains the flexibility of our code and gives us the ability to later refactor our implementations.


Code Example:

A general business application will be developed, complete with an interface, high-level, low-level, and detailed components.

Let’s start by implementing the getCustomerName() method in an interface. The users will see this.

public interface ICustomerDataAccess
{
string GetCustomerName(int id);
}

We’ll now put the finishing touches on the ICustomerDataAccess interface-dependent details. The second component of the DIP principle is achieved by doing this.

public class CustomerDataAccess: ICustomerDataAccess
{
public CustomerDataAccess() {
}
public string GetCustomerName(int id) {
return "Dummy Customer Name"; 
}
}

The next step is to develop a factory class that implements the abstract interface ICustomerDataAccess and provides a usable version of it. Our low-level component is the CustomerDataAccess class that was returned.

public class DataAccessFactory
{
public static ICustomerDataAccess GetCustomerDataAccessObj() 
{
return new CustomerDataAccess();
}
}

The high-level component CustomerBuisnessLogic, which also implements the interface ICustomerDataAccess, will be the last thing we implement. Keep in mind that our high-level component only uses our low-level component rather than implementing it.

public class CustomerBusinessLogic
{
ICustomerDataAccess _custDataAccess;
public CustomerBusinessLogic()
{
_custDataAccess = DataAccessFactory.GetCustomerDataAccessObj();
}

public string GetCustomerName(int id)
{
return _custDataAccess.GetCustomerName(id);
}
}

Here is the complete script in both code and graphic form:

public interface ICustomerDataAccess
{
string GetCustomerName(int id);
}
public class CustomerDataAccess: ICustomerDataAccess
{
public CustomerDataAccess() {
}
public string GetCustomerName(int id) {
return "Dummy Customer Name"; 
}
}
public class DataAccessFactory
{
public static ICustomerDataAccess GetCustomerDataAccessObj() 
{
return new CustomerDataAccess();
}
}
public class CustomerBusinessLogic
{
ICustomerDataAccess _custDataAccess;
public CustomerBusinessLogic()
{
_custDataAccess = DataAccessFactory.GetCustomerDataAccessObj();
}
public string GetCustomerName(int id)
{
return _custDataAccess.GetCustomerName(id);
}
}

Test Plan vs Test Strategy in Detail About the Differences

Test Plan vs Test Strategy in Detail About the Differences

test plan vs test strategy

Test plan vs Test strategy: Where do they differ


Consider the following scenario: Over the course of many years, you and your development team worked very hard to design and create a product. There has been a lot of work put into making sure that all the proper stages and procedures were used while designing your product. There comes a time when you can finally release your product, and you are eager to do so. However, after the software is deployed, a number of flaws and faults are found by the users. Being in this circumstance is sad, and you frequently wonder, “How could this have been avoided?”

Software testing is what you need to do, therefore that’s the basic solution. Software testing is the process of running tests to detect any product flaws, such as errors, gaps, or unmet requirements, and comparing the finished result to the expected requirements to see if they match. It may also result in a decrease in the software’s overall cost. This approach involves things like product observation, analysis, and evaluation. Two crucial terms—”Test Plan” and “Test Strategy”—are frequently employed in the context of the process during software testing. These two concepts are frequently misused and used synonymously, which can cause misunderstanding. In order to avoid this, let’s look at what the phrases actually represent and what a test plan vs test strategy is.

What is a Test Plan?

A test plan is a document that details all of the procedures that will be used during testing, from a development approach to specific error detection standards. This document also outlines how to address any concerns that are found. It outlines the methodology, resources, and timetable for the anticipated testing operations. The scope and goal of the software testing process, the numerous aspects that must be tested, the duties that must be performed during testing, the methods used to design the tests, and much more are all identified. In essence, it documents the entire process of organizing tests that must be run on the product.

Test Plan Document

A test plan is a document that fully describes the testing tasks involved in a software project. It offers information about the testing’s scope, types, objectives, methodology, effort, risks, and contingencies, as well as the release criteria and test deliverables. It maintains track of potential tests that might be performed after coding on the system.

It is clear that the test schedule will change. On the basis of the project’s clarity at the outset, a draft test plan will be created first. The project’s basic plan will change as it goes along. The test plan document may be created by the test team manager or test lead. It describes the Specifications and may vary in accordance with those.

The test plan will specify who will conduct the tests, what will be tested, when, and how. A list of issues, dependencies, and underlying hazards will be sorted by Test Plan.

What types of Test Plan are there?

  • These plans are made for each level or type of testing. Level Specific Test Plans (Unit level, Integration level, System level, and Acceptance level).
  • Test plans that are specifically tailored to a certain type of test, such as functional test plans, performance test plans, etc., are known as type-specific test plans.
  • The product’s aims and objectives are contained in a single, high-level document called the master test plan. It contains all of the product’s other test programs.

Test plans are essential because they serve a lot of purposes. They make sure that you and your team are concordant at all times. They act as a guide and ensure that your final product is error-free and meets the expected requirements. They also help other individuals who aren’t part of your team, to understand the testing process. Since test plans detail everything regarding the testing process, they can be easily reviewed and re-used for testing similar products. These are built by test managers or test leads taking into account the input from team members. One important aspect to test plans is that they can constantly change and can vary from one product to another.

what is test plan

What is a Test Strategy?

The test design and the manner in which the testing process will be carried out are both determined by a test strategy, which is a set of instructions, principles, or rules. It creates criteria for the testing procedure. The test strategy document serves as the source of content for documents like test plans. A product’s review and approval prior to its official release can include the principles used to describe the scope and overview of the testing process, testing methodology, testing environment specifications, testing tools, release control, risk analysis, and mitigation, and release control.

Test Strategy Document

The test strategy’s goal is to specify the testing technique, the different kinds of tests to be conducted, the testing environments to be used, the testing tools to be used, and the broad strokes of how the test strategy will be in line with other processes. The test strategy document is meant to be a live document that will be updated** as more information about the requirements, SLA parameters, test environment, build management strategy, etc. becomes available.

The entire project team, which consists of project sponsors, business SMEs, application/integration development partners, system integration partners, data conversion teams, and build/release management teams, including technical leads, architecture leads, deployment, and infrastructure teams, is intended to use the test strategy.

** Some contend that a test technique should never be revised. In the majority of testing initiatives, it typically gets updated as the project moves forward.

The crucial sections a test strategy document needs to have are listed below:

Project Overview

An introduction of the company can be included in this area, followed by a succinct outline of the current project. It may contain the information below:

  • What was the project’s need?
  • What goals will the project achieve?

Table of Abbreviations It is preferable to add a table with acronyms that the reader of the text might think of when referring to it.

Scope overview

Application scope and functional scope are examples of requirements scope.

Application The system being tested and the effects of any new or altered functionality are both defined by the scope. Also defined are systems that are related.

Test strategy

High-Level Test Plan

A different document is the test plan. A high-level test plan may be incorporated into the test approach. Test scope and objectives might be included in a high-level test strategy. Both in-scope and out-of-scope activities should be specified in the test scope.

Test Approach

The testing strategy that will be used throughout the testing life cycle is described in this section. Testing will be carried out in two parts, namely test strategy and planning and test execution, as shown in the following diagram. In contrast, to test execution phases, test strategy and planning phases will be repeated for each cycle of the overall program. The execution approach is represented in the following diagram with its various phases, stages, and deliverables (outcomes).   The test strategy should cover the subsections below. a) Test Schedule: Describe in this part the intended project schedule. Using this subsection gives an overview of each step and its corresponding entry and exit criteria. b) Functional Testing Approach Unit testing, System testing, System Integration testing, User Acceptance Testing, and End-to-End Testing are the many testing steps. C) Test key performance indicators.
  • Establish the test case prioritizing strategy so that the test team may execute high-priority scenarios in the event of a time crunch. The project’s stakeholders should come to an understanding of the potential risks involved in not carrying out all of the planned scenarios.
  • Prioritizing defects is the next subject we’ll talk about in this section. Set each priority level’s description, such as “critical,” “high,” “medium,” etc. Also
Fault Turnaround Time: The time between when a defect is first reported and when it is corrected and ready for retesting is referred to as the defect turnaround time. Speedy testing and adherence to the project schedule are ensured by the quick turnaround.

Test Coverage

This section outlines the procedures the QA team will use to ensure that test scenarios and test cases adequately meet business/functional requirements. Use the Requirement Traceability Matrix (RTM) to link each requirement to its appropriate test cases and test scenarios.

Test Environment

Describe the many QA environments that are available. Mention what testing will be done, by whom, and in what setting. To handle emergencies, create a backup plan for the environment. Each environment’s access needs to be controlled and clearly identified.

This section can also indicate the testing tools that will be used:

  • HP ALM – used for Test Management
    JIRA – Defect Management

Defect Management

Create a defect workflow, a defect tracking technique, and a defect triage procedure to clearly describe a defect management strategy. Mention the duties of each tester’s responsibilities for defects. Periodic root cause and defect analysis will raise testing’s general level of quality.

Communication Management

Establish standards for status meetings, reporting, and onsite-offshore communication.

Assumptions, Risks, and Dependencies

Describe the underlying premise(s) of the project. Timing, resources, and system capabilities are a few examples. Describe any dependencies that might affect the project, such as those on other projects, the availability of temporary resources, or other deadlines.

Appendix

Include in this area information like Roles & Responsibilities, Work Time Zone, and References.

What types of Test Strategies are there?

Analytical Strategy – using this, testing based on requirements is carried out. To determine the parameters for testing, these needs are further examined. Finally, the tests are created and executed in accordance with these specifications.

Model-Based Strategy – This tactic is used when the testing team chooses the existing circumstance and creates a test model for it based on the tasks, inputs, outputs, and potential behaviors.

Methodical Strategy – This tactic enables test teams to adhere to a predetermined set of testing requirements. Checklists are included in specific testing types in this.

This test approach requires the test engineer to adhere to a set of processes that have been given forth by a group of industry experts as Standard Compliant or Process Compliant guidelines.

Reactive Strategy – Only after the final program has been created and delivered can we in this case design and run tests. This strategy’s testing is based on the product flaws found in the current version.

Consultative Strategy –  This approach is used to choose the test conditions scope and gather input from important stakeholders.

Regression averse Strategy –The test engineer gets to highlight the declining risks of regression for different product shares in this.

A test strategy’s major goal is to make sure that all of the stakeholders are aware of and comprehend all of the established aims. The project manager establishes these rules.

Key variations

We can now concentrate on the distinction between a test plan and a test strategy since we have a better understanding of what each term means. But let’s first look at the primary distinctions between the two instead of diving right in with the specific differences. The “how” questions related to testing are addressed by a test plan. in terms of the execution of the test plan. A test strategy, on the other hand, addresses the “what” elements. This covers inquiries like “What are the testing process’s objectives?” and “What is the testing process’ scope?” A test strategy is utilized at the organizational level, whereas a test plan varies from project to project. Additionally, the specifics of a test strategy remain somewhat more static while those of a test plan vary and are dynamic.

Difference Between Test Plan and Test Strategy

It’s time to concentrate on the specific variations between the test plan and test strategy now that we have seen their main distinctions. We must keep in mind the nuanced nature of these variations.

Parameter

Definition

Objective

Purpose

Level

Repetition

Change Susceptibility

Components

Performed by

Scope

Derivation

Existence

Basis

Types

Influence

Narration

Test Plan

A test plan is a written description of the scope and various steps involved in the testing procedure.

Determining how to test a product, what to test it on, when to test it, who will test it, and who will verify the results is the main objective here.

The goal is to find any potential inconsistencies in the finished product and eliminate them through testing.

It is only utilized at the project level.

It is very rarely used again and is only utilized by one project.

It is a dynamic document that is constantly subject to change based on testing requirements.

Its elements consist of the test plan ID, the features that must be tested, the procedures to be used, the testing tasks, the pass or fail criterion, timetables, etc.

A test plan is often written by a testing manager or lead and includes information on how, when, who, and what will be tested.

It fully describes all testing activities.

Use case documents, software requirement specification documents, and product description documents are used to derive it.

Typically, a test plan is discovered to exist independently.

It is founded on testing methods.

The various forms of test plans include level-specific test plans, type-specific test plans, and master test plans.

At any given time, just one project is impacted.

It describes the typical requirements for testing a certain project.

Test Strategy

A test strategy is a high-level document that includes the rules and ideas that will be used to conduct the testing procedure.

Here, defining the guidelines to be followed during the testing process is the main objective.

It is a strategy for the testing procedure over the long term.

On an organizational level, it is utilized.

It is utilized by numerous projects and is repeatable frequently.

As a static document, it cannot be altered.

Its elements consist of goals and parameters, documentation, test procedures, etc.

The project manager creates a test strategy as part of the testing procedure. The document details the technique to employ and the modules that should be examined.

It only concentrates on advanced test techniques and methodologies.

It comes from a document called the business requirement specification.

Test plans may include a test strategy, much like smaller projects sometimes do.

It is founded on previously established norms.

The various test strategies include analytical strategy, model-based strategy, methodical strategy, standard-compliant strategy, reactive strategy, consultative strategy, and regression-averse strategy.

Numerous projects are impacted at once.

It describes the methods used in testing.

Summary

One of the most frequent areas of uncertainty for QA aspirants is the distinction between a test plan and a test strategy. The aforementioned sections have discussed how the two differ from one another in a number of ways. Based on all we have discovered thus far, it is clear that these documents are a fundamental and crucial component of every project. This testing procedure will produce a top-notch product if it is carried out correctly. However, there is a potential that the finished output will still have defects if any phases are neglected. Therefore, being able to distinguish between the two will go a far way in assisting you.

C# Math Classes – Mathematic Functions Tutorial | KoderShop

C# Math Classes – Mathematic Functions Tutorial | KoderShop

C# Math class

c#_math_class

What is math class?

C# math provides constants and static methods for trigonometric, logarithmic, and other common mathematical functions. The Math library in C# gives programmers access to a number of general, trigonometric, statistical, and logarithmic mathematical functions and properties. This library is plug-and-play and ready to use. The library derives from Csuper #’s parent class, the Object class. The System namespace is where it sits.

Mathematical  properties in C#

E4

In mathematical equations, the little letter “e” designates the logarithmic base, which is known as E. The value of the natural logarithmic base is stored in this static attribute.

Code example:

 using System;
 public class Program
  {
    public static void Main()
     {
       Console.WriteLine("The value of logarithmic base E is " + Math.E);
     }
  }

Output:

math_class_1

PI

The reciprocal of the ratio of a circle’s circumference to its diameter is known as pi, which is often written as the letter p. (roughly 3.14). The value of p is contained in this static constant.

Code example:

 using System;
 public class Program
  {
    public static void Main()
     {
       Console.WriteLine("The value of PI is " + Math.PI);
     }
  }

Output:

math_class_2

Functions on C# Math

Abs-Absolute Function

Returns a given number’s absolute value (integer, decimal, floating-point, etc.). The highest conceivable decimal value that is higher than or equal to 0 but less than or equal to the number itself is the absolute value of any number.

Code example:

 using System;
 public class Program
  {
    public static void Main()
     {
       int num1 = 231;
       double num2 = -1.23456789;
       Console.WriteLine("The absolute value of {0} is {1} ", num1, Math.Abs(num1));
       Console.WriteLine("The absolute value of {0} is {1} ", num2, Math.Abs(num2));
     }
  }

Output:

math_class_3

BigMul-Big Multiplication

This function delivers the entire result of multiplying two extremely large integer numbers. It requires two 32-bit integer inputs and outputs a 64-bit result of the multiplication.
Code example:

 using System;
 public class Program
  {
    public static void Main()
     {
       int num1 = Int32.MaxValue;
       Console.WriteLine("Multiplication of {0}x{0} without Math function - {1}",num1, num1*num1);
       Console.WriteLine("Multiplication of {0}x{0} by Math BigMul function - {1}",num1, Math.BigMul(num1, num1));
     }
  }

Output:

math_class_4

Floor and Ceiling

The floor() and ceiling() functions provide back a number’s floor and ceiling values. Any number’s floor value is its greatest integer that is less than or equal to 1. The smallest integer larger than or equal to the given number is the ceiling value of any number.

Code example:

 using System;
 public class Program
  {
    public static void Main()
     {
       double num1 = 548.65;
       Console.WriteLine("Floor value of {0} is {1}", num1, Math.Floor(num1));
       Console.WriteLine("Ceil value of {0} is {1}", num1, Math.Ceiling(num1));
     }
  }

Output:

math_class_5

Sin, Cos and Tan

The sine, cosine, and tangent values of the supplied angle are provided by these trigonometric functions.

Code example:


 using System;
 public class Program
  {
    public static void Main()
     {
       double angle = 120.5;
       Console.WriteLine("Sine value of {0} is {1}", angle, Math.Sin(angle));
       Console.WriteLine("Cosine value of {0} is {1}", angle,Math.Cos(angle));
       Console.WriteLine("Tangent value of {0} is {1}", angle, Math.Tan(angle));
     }
  }

Output:

math_class_6

Tanh–Hyperbole, Cosh and Sinh

The hyperbolic sine, cosine, and tangent values of the specified angle are provided by these trigonometric functions.

Code example:

 using System;
 public class Program
  {
    public static void Main()
     {
       double angle = 120.5;
       Console.WriteLine("Hyperbolic Sine value of {0} is {1}", angle, Math.Sinh(angle));
       Console.WriteLine("Hyperbolic Cosine value of {0} is {1}", angle, Math.Cosh(angle));
       Console.WriteLine("Hyperbolic Tangent value of {0} is {1}", angle,Math.Tanh(angle));
     }
  }

Output:

math_class_7

Atan, Acos and Asin

The angles to which the supplied number is the sine, cosine, or tangent value are returned by these trigonometric functions.

Code example:

 using System;
 public class Program
  {
    public static void Main()
     {
       double value = 1;
       Console.WriteLine("The angle of sin({0}) is {1}", value, Math.Asin(value));
       Console.WriteLine("The angle of cos({0}) is {1}", value, Math.Acos(value));
       Console.WriteLine("The angle of tan({0}) is {1}", value, Math.Atan(value));
      }
  }

Output:

math_class_8

Remainder and DivRem–Division

This function figures out the outcome of dividing two numbers. A fractional value is not included in the returned result. Instead, the function’s return value is the quotient, and the remaining value is returned as an output parameter.

Code example:

 using System;
 public class Program
  {
    public static void Main()
     {
       int divisor = 8;
       int dividend = 45;
       int remainder = 0;
       int quotient = Math.DivRem(dividend, divisor, out remainder);
       Console.WriteLine("{0} divided by {1} results in {2} as the quotient and {3} as the remainder.", dividend, divisor, quotient, remainder);
     }
  }

Output:

math_class_9

Log, Log2, & Log10-Logarithm

The log function returns the base-specific logarithm of a given number. The natural logarithm is produced if no base is supplied; the default base is e.

Note that Log2 was made available in .Net Core. the .Net Framework does not have this technique.

Code example:

 using System;
 public class Program
  {
    public static void Main()
     {
       double num1 = 4.5;
       int new_base = 12;
       Console.WriteLine("Log({0}) to the base 'e' is {1}.", num1, Math.Log(num1));
       Console.WriteLine("Log({0}) to the base 10 is {1}.", num1,Math.Log10(num1));
       Console.WriteLine("Log({0}) to the base 2 is {1}.", num1,Math.Log(num1, 2));
       Console.WriteLine("Log({0}) to the base {1} is {2}.", num1,new_base, Math.Log(num1, new_base));
     }
  }

Output:

math_class_10

Round

The round() function rounds a provided number to the nearest integer or to a specified number of decimal places after the integer, as the name implies.

There are several significant modifications to the round() function. Either two or three arguments are required.

  • The amount to be rounded is the first input.
  • The amount of digits following the decimal point is the second input. The number is rounded to the nearest integer if this is not given.
  • The mode of rounding is the third argument. This is a list of two values that were taken from the enumeration MidpointRounding.

There are two modes:

  • AwayFromZero: A number is rounded to the next number that is farther from zero when it is midway between two numbers.
  • ToEven: A number is rounded to the next even number when it is exactly halfway between two numbers.

The mode AwayFromZero is the default mode if it is not provided.

Code example:

 using System;
 public class Program
  {
    public static void Main()
     {
       double num1 = 2.45;
       double num2 = 24.5;
       Console.WriteLine("{0} rounded to the nearest integer is {1}", num1, Math.Round(num1));
       Console.WriteLine("{0} rounded to the nearest single-point decimal is {1}", num1, Math.Round(num1, 1));
       Console.WriteLine("{0} rounded to the nearest single-point decimal away from zero is {1}", num1, Math.Round(num1, 1, MidpointRounding.AwayFromZero));
       Console.WriteLine("{0} rounded to the nearest single-point decimal to even is {1}", num1, Math.Round(num1, 1, MidpointRounding.ToEven));
       Console.WriteLine("\n{0} rounded to the nearest integer away from zero is {1}", num2, Math.Round(num2, MidpointRounding.AwayFromZero));
       Console.WriteLine("{0} rounded to the nearest integer to even is {1}", num2, Math.Round(num2, MidpointRounding.ToEven));
     }
  }

Output:

math_class_11

Min & Max

These operations compare the two supplied numbers and output the smaller or greater of the two.

Code example:

 using System;
 public class Program
  {
    public static void Main()
     {
       double num1 = 4.5;
       double num2 = -3.4;
       int num3 = 981;
       int num4 = 123;
       Console.WriteLine("Minimum of {0} and {1} is {2}.", num1, num2,Math.Min(num1, num2));
       Console.WriteLine("Maximum of {0} and {1} is {2}.", num1, num2,Math.Max(num1, num2));
       Console.WriteLine("Minimum of {0} and {1} is {2}.", num3, num4,Math.Min(num3, num4));
       Console.WriteLine("Maximum of {0} and {1} is {2}.", num3, num4,Math.Max(num3, num4));
     }
  }

Output:

math_class_12