Deciphering the Migration Maze: Strategies for Seamless Transition in Odoo

Deciphering the Migration Maze: Strategies for Seamless Transition in Odoo

Odoo Migration
Odoo Migration

Navigating the Maze: A Guide to Migration in Odoo

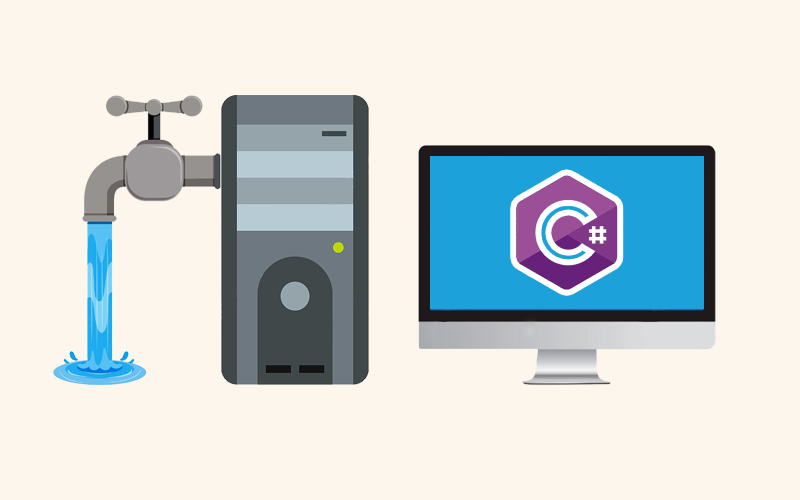
Odoo, the versatile open-source ERP software, can be a boon for businesses of all sizes. But as your company grows and evolves, so too do your software needs. This often necessitates migration – moving your data and processes to a new Odoo version or even a different system altogether. While the prospect of migration might seem daunting, with the right preparation and approach, it can be a smooth and successful journey.

Understanding the Landscape:

Before embarking on your migration adventure, it’s crucial to map the terrain. Here’s what you need to consider:
  • Source and Target: Are you migrating between Odoo versions, editions, or to another system entirely? Each scenario presents unique challenges and considerations.
  • Data Scope: What data needs to be migrated? Prioritize critical information like customers, invoices, and inventory while evaluating the feasibility of moving less essential data.
  • Customizations: Do you have custom modules or integrations? These will require special attention during the migration process.
  • Resources: Assess your internal technical expertise and consider seeking professional help if needed.
Remember, migration is not a one-time event. As your business continues to evolve, new migrations might be needed. By understanding the process, having a solid plan, and seeking help when needed, you can ensure smooth and successful journeys as you navigate the ever-changing Odoo landscape.

What are Ways of Migration in Odoo?

By following these guidelines and leveraging available resources, you can transform your Odoo migration from a daunting task into a strategic step towards growth and improved business efficiency.

Module Migration with Next Version:


  1. Identify the Target Version: Determine which version of Odoo you want to migrate to. Check the Odoo documentation or release notes to understand the changes and improvements in the target version.

  2. Set Up a New Server or Environment: Provision a new server or create a separate environment (e.g., a virtual machine, cloud instance) where you’ll install the new Odoo version. Ensure that the server meets the system requirements for the chosen Odoo version (Python, PostgreSQL, etc.).

  3. Install Dependencies and Odoo Packages: Log in to the new server using SSH or any other preferred method. Update the package repositories:
sudo apt update (for Debian/Ubuntu)

or equivalent for other systems.Install necessary dependencies:

sudo apt install python3-pip python3-dev libxml2-dev libxslt1-dev zlib1g-dev libsasl2-dev libldap2-dev build-essential libssl-dev libffi-dev libmysqlclient-dev libjpeg-dev libpq-dev libjpeg8-dev liblcms2-dev libblas-dev libatlas-base-dev

Install Odoo using pip:

sudo pip3 install odoo

4. Transfer Custom Modules (Addons):
Locate your custom modules (addons) from the old Odoo server. Copy these modules to the new server. You can use tools like rsync or scp for secure file transfer. Place the modules in the appropriate Odoo addons directory (usually /opt/odoo/addons).

5. Update Configuration Files:
Edit the Odoo configuration file (odoo.conf) on the new server. Save the configuration file.

6. Restart the Odoo Service:
Restart the Odoo service to apply the changes:

sudo systemctl restart odoo

Monitor the logs (/var/log/odoo/odoo.log) for any errors during startup.

Database Migration Using Odoo Tools:

  1. Backup your existing databases from the old Odoo server. Use tools like pg_dump (for PostgreSQL databases) or other database-specific backup methods.
  2. Restore the backups on the new Odoo server. Set up the new Odoo server where you intend to migrate your databases. Transfer the backup files (usually in .sql format) to the new server. Use the appropriate database management system (e.g., PostgreSQL) to restore the backups.
  3. Use the Odoo database management tools to upgrade the databases to the target version. Log in to your new Odoo instance and navigate to Settings > Database Structure > Upgrade Database.
  4. Test the migrated databases thoroughly.

How to Migrate Data in Odoo?

  1. Transaction-Driven Approach: Identify Critical Transactions. Begin by identifying the essential transactions that need to be migrated. These typically include:
    • Sales Orders: Customer orders, quotations, and invoices.
    • Purchase Orders: Supplier orders, purchase invoices, and receipts.
    • Inventory Movements: Stock transfers, adjustments, and stock counts.
    • Financial Transactions: Payments, journal entries, and bank reconciliations.
    Prioritize these transactions based on their impact on business operations. Develop Custom Scripts or Use Odoo’s Tools. If you have specific requirements, consider developing custom Python scripts to extract and transform data. Alternatively, Odoo provides built-in data migration tools (such as the Data Import feature) that allow you to map fields and import data from CSV files. Ensure Data Consistency. During migration, maintain data consistency: Handle dependencies (e.g., invoice lines linked to sales orders), validate data integrity (e.g., ensure product references match existing products), test the migration thoroughly to avoid data discrepancies.
  2. Table-Driven Approach: Analyze the Database Schema. Study the structure of your existing database (tables, fields, relationships). Identify relevant tables or entities that contain critical data. Understand how data is stored (e.g., which tables hold customer information, product details, etc.). Extract Data Using SQL Queries or Odoo’s ORM. Write SQL queries to extract data from the old database. Leverage Odoo’s Object-Relational Mapping (ORM) to access data programmatically. Extract relevant records from tables like sale_order, account_invoice, stock_move, etc.
    • Sometimes, data needs transformation to match the new schema: Convert units (e.g., currency conversion, weight units).
    • Normalize data (e.g., merging duplicate records).
    • Adjust date formats or other field values.

    Load Transformed Data into the New Odoo Database. Create corresponding records in the new Odoo database. Use Odoo’s ORM to create new sales orders, invoices, etc. Map old data to new fields (e.g., product IDs, partner references). Ensure consistency during the loading process.
Battling Memory Leaks: Keeping Your C# Applications Lean

Battling Memory Leaks: Keeping Your C# Applications Lean

C # memory leaks
C # memory leaks

C# Memory Mishaps: Forgotten Objects and Resource Hogs

In C#, your program might mistakenly hoard memory by creating objects it doesn’t clean up later. This gradually increases the application’s memory usage, potentially leading to sluggish performance or crashes if the system runs out of memory.
Memory leaks can be tricky to find and fix because they often happen subtly.
Being able to identify, resolve, and prevent memory leaks is a valuable skill. There are well-established practices for detecting leaks in your application, pinpointing the culprit, and applying a solution.
With a garbage collector (GC) in play, the term “memory leak” might seem odd. How can leaks occur when the GC is there to free up unused memory?
There are two main culprits. The first involves objects that are still referenced even though they’re no longer needed. Since they’re referenced, the GC won’t remove them, leaving them to occupy memory indefinitely. This can happen, for instance, when you subscribe to an event but forget to unsubscribe.
The second culprit is when you allocate memory that isn’t managed by the GC (unmanaged memory) and neglect to release it. This is easier than you might think. Many .NET classes themselves allocate unmanaged memory. This includes anything related to threading, graphics, the file system, or network calls (all handled behind the scenes). These classes typically provide a Dispose method to free up memory. You can also directly allocate unmanaged memory using specific .NET classes like Marshal or PInvoke.

Here’s a simple example to illustrate a memory leak:

public class MyClass
{
    public void WriteToFile(string fileName, string content)
    {
        FileStream fs = new FileStream(fileName, FileMode.OpenOrCreate); // Open the file
        StreamWriter sw = new StreamWriter(fs); // Write content
        sw.WriteLine(content);

        // **Leak! fs and sw are not disposed of**
    }
}

In this example, the WriteToFile method opens a FileStream (fs) and a StreamWriter (sw) to write to a file. However, it doesn’t dispose of them after writing. This means the memory allocated for these objects will remain occupied even after the method finishes, causing a leak if called repeatedly.

To fix the leak, we need to release the unmanaged resources by disposing of them properly:

public class MyClass
{
public void WriteToFile(string fileName, string content)
{
using (FileStream fs = new FileStream(fileName, FileMode.OpenOrCreate)) // Use using statement
{
using (StreamWriter sw = new StreamWriter(fs)) // Use using statement
{
sw.WriteLine(content);
}
} // fs and sw are disposed of automatically here
}
}

The using statement ensures that fs and sw are disposed of (their Dispose() methods are called) when the code block within the using exits, even if an exception occurs. This guarantees proper resource management and prevents memory leaks.

Detecting Memory Leaks Is Important!

Memory leaks can cripple your application! Let’s explore a handy technique to identify them. Have you ever dismissed the “Diagnostic Tools” window after installing Visual Studio? Well, it’s time to give it a second look!
This window offers a valuable service: pinpointing memory leaks and garbage collector strain (GC Pressure). Accessing it is simple: just navigate to Debug > Windows > Show Diagnostic Tools.
Once open, if your project uses garbage collection (GC), you might see yellow lines. These indicate the GC actively working to free up memory. However, a steadily rising memory usage signifies potential memory leaks.
Understanding GC Pressure: This occurs when you create and discard objects so rapidly that the garbage collector struggles to keep pace.
While this method doesn’t pinpoint specific leaks, it effectively highlights a potential memory leak issue – a crucial first step. For more granular leak detection, Visual Studio Enterprise offers a built-in memory profiler within the Diagnostic Tools window.

Task Manager, Process Explorer or PerfMon – Also Help With Detecting Memory Leaks

Another simple way to identify potential memory leaks is by using Task Manager or Process Explorer (a tool from SysInternals). These applications show how much memory your program is using. If that number keeps climbing, it might be a leak.

While a little trickier, Performance Monitor (PerfMon) offers a helpful graph of memory usage over time. It’s important to remember that this method isn’t foolproof. Sometimes, you might see a memory rise because the garbage collector hasn’t cleaned things up yet. There’s also the complexity of shared and private memory, which can lead to missed leaks or misdiagnosing someone else’s problem. Additionally, you might confuse memory leaks with GC Pressure. This occurs when you create and destroy objects so rapidly that the garbage collector struggles to keep pace, even though there’s no actual leak.

Despite the limitations, we included this technique because it’s easy to use and might be the only tool readily available. It can also serve as a general indicator of something amiss, especially if the memory usage keeps rising over a very extended period.

Using a Memory Profiler to Detect Leaks

Just like a chef relies on a sharp knife, memory profilers are essential tools for battling memory leaks. While there might be simpler or cheaper alternatives (profilers can be costly), mastering at least one is crucial for effectively diagnosing and eliminating memory leaks.
Popular .NET profilers include dotMemory, SciTech Memory Profiler, and ANTS Memory Profiler. If you have Visual Studio Enterprise, there’s also a built-in “free” option.

All profilers share a similar approach. You can either connect to a running program or analyze a memory dump file. The profiler then captures a “snapshot” of your process’s memory heap at that specific moment. This snapshot allows for in-depth analysis using various features.
You can view details like the number of instances for each object type, their memory usage, and the chain of references leading back to a “GC Root.”

A GC Root is an object that the garbage collector can’t remove. Consequently, anything linked to a GC Root is also immune to deletion. Examples of GC Roots include static objects, local variables, and currently active threads.
The most efficient and informative profiling technique involves comparing two snapshots taken under specific conditions. The first snapshot is captured before a suspected memory leak-causing operation, and the second one is taken after. Here’s an example workflow:

  1. Begin with your application in an idle state, like the main menu.
  2. Use your memory profiler to capture a snapshot by attaching to the process or saving a dump.
  3. Execute the operation suspected of causing the leak. Once finished, return to the idle state.
  4. Capture a second snapshot using the profiler.
  5. Compare these snapshots within your profiler.
  6. Focus on the “New-Created-Instances” list, as they might be potential leaks. Analyze the “path to GC Root” to understand why these objects haven’t been released.

Identifying Memory Leaks With Object IDs

Do you suspect a particular class might be leaking memory? In other words, you think instances of this class stay referenced after a script runs, preventing garbage collection. Here’s how to verify if the garbage collector is doing its job:

  1. Set a Breakpoint: Place a breakpoint where your class instance is created.
  2. Inspect the Variable: Pause execution at the breakpoint, then hover over the variable to bring up the debugger tooltip. Right-click and choose “Make Object ID” (or similar functionality depending on your debugger).
  3. Verify Object ID: To confirm successful creation of the Object ID, you can type $1 (or the assigned name) in the immediate window of your debugger.
  4. Run Leak-Causing Script: Complete the script execution that you believe might be causing the memory leak, potentially leaving the instance referenced.
  5. Force Garbage Collection: Simulate a memory cleanup by invoking the following lines (these may vary slightly depending on your environment):

GC.Collect();
GC.WaitForPendingFinalizers();
GC.Collect();

6. Check for Collected Object: In the debugger’s immediate window, type $1 (or the assigned name) again. If the result is null, the garbage collector successfully collected your object, indicating no memory leak. If it returns a value, you’ve likely found a memory leak.

Use the Dispose Template to Prevent Unmanaged Memory Leaks

In the world of .NET, your applications often interact with resources that aren’t directly managed by the .NET system itself. These are called unmanaged resources. The .NET platform itself actually uses quite a bit of unmanaged code under the hood to make things run smoothly and efficiently. This unmanaged code might be used for things like threading, graphics, or even accessing parts of the Windows operating system.
When you’re working with .NET code that relies on unmanaged resources, you’ll often see a class that implements a special interface called IDisposable. This is because these resources need to be properly cleaned up when you’re done with them, and the Dispose method is where that happens. The key for you as a developer is to remember to call this Dispose method whenever you’re finished using the resource. An easy way to handle this is by using the using statement in your code.

public void Foo()
{
using (var stream = new FileStream(@"C:\..\KoderShop.txt",
FileMode.OpenOrCreate))
{
// do stuff

 }// stream.Dispose() will be called even if an exception occurs

The using statement acts like a behind-the-scenes helper, transforming your code into a try…finally block. Inside this block, the Dispose method gets called when the finally part executes.

Even without explicitly calling Dispose, those resources will eventually be released. This is because .NET classes follow the Dispose pattern. In simpler terms, if Dispose hasn’t been called yet, the garbage collector will call it on the object’s finalization (also known as finalizer). However, this finalization only happens if there are no memory leaks.

When you’re directly managing unmanaged resources (resources not handled by the garbage collector), using the Dispose pattern becomes essential.

Here’s an example:

public class DataHolder : IDisposable
{
private IntPtr _dataPtr;
public const int DATA_CHUNK_SIZE = 1048576; // 1 MB (same value in bytes)
private bool _isReleased = false;

public DataHolder()
{
_dataPtr = Marshal.AllocHGlobal(DATA_CHUNK_SIZE);
}

 protected virtual void ReleaseResources(bool disposing)
{
if (_isReleased)
return;

 if (disposing)
{
// Free any other managed objects here.
}

 // Free any unmanaged objects here.
Marshal.FreeHGlobal(_dataPtr);
_isReleased = true;
}

 public void Dispose()
{
ReleaseResources(true);
GC.SuppressFinalize(this);
}

 ~DataHolder()
{
ReleaseResources(false);
}
}

This pattern lets you explicitly release resources when you’re done with them. It also provides a safety net. If you forget to call Dispose(), the garbage collector will still clean up the resources eventually using a method called Finalizer.
GC.SuppressFinalize(this) is crucial because it prevents the Finalizer from being called if the object has already been properly disposed of. Objects with Finalizers are handled differently by the garbage collector and are more costly to clean up. These objects are added to a special queue, allowing them to survive for a bit longer than usual during garbage collection. This can lead to additional complexities in your code.

Monitoring Your Application’s Memory Footprint

There are situations where tracking your application’s memory usage might be beneficial. Perhaps you suspect a memory leak on your production server. Maybe you want to trigger an action when memory consumption hits a specific threshold. Or, you might simply prioritize keeping an eye on memory usage as a good practice.
Fortunately, the application itself provides valuable insights. Retrieving the current memory usage is a straightforward process:

Process currentProcess = Process.GetCurrentProcess();
var bytesInUse = currentProcess.PrivateMemorySize64;

For more information, you can use PerformanceCounter, a class that is used for PerfMon:

PerformanceCounter privateBytesCounter = new PerformanceCounter("Process", "Private Bytes", Process.GetCurrentProcess().ProcessName);
PerformanceCounter gen0CollectionsCounter = new PerformanceCounter(".NET CLR Memory", "# Gen 0 Collections", Process.GetCurrentProcess().ProcessName);
PerformanceCounter gen1CollectionsCounter = new PerformanceCounter(".NET CLR Memory", "# Gen 1 Collections", Process.GetCurrentProcess().ProcessName);
PerformanceCounter gen2CollectionsCounter = new PerformanceCounter(".NET CLR Memory", "# Gen 2 Collections", Process.GetCurrentProcess().ProcessName);
PerformanceCounter gen0HeapSizeCounter = new PerformanceCounter(".NET CLR Memory", "Gen 0 heap size", Process.GetCurrentProcess().ProcessName);

// ...

Debug.WriteLine("Private bytes = " + privateBytesCounter.NextValue());
Debug.WriteLine("# Gen 0 Collections = " + gen0CollectionsCounter.NextValue());
Debug.WriteLine("# Gen 1 Collections = " + gen1CollectionsCounter.NextValue());
Debug.WriteLine("# Gen 2 Collections = " + gen2CollectionsCounter.NextValue());
Debug.WriteLine("Gen 0 heap size = " + gen0HeapSizeCounter.NextValue());

While performance monitor counters provide valuable insights, they only scratch the surface.
For a deeper dive, consider CLR MD (Microsoft.Diagnostics.Runtime). It grants access to the inner workings of the heap, allowing you to extract a wealth of information. Imagine examining all the types currently loaded in memory, along with how many instances exist and how they’re being held in memory. With CLR MD, you can essentially build your own custom memory profiler.
For a practical example of CLR MD’s capabilities, explore Dudi Keleti’s DumpMiner tool.
This data can be saved to a file, but for better analysis, consider integrating it with a telemetry tool like Application Insights.

Uncovering Memory Issues: A Simple Approach

Catching memory leaks before they cause problems is crucial, and the good news is, it’s achievable! This template provides a handy starting point…

[Test]
void MemoryLeakTest()
{
var weakReference = new WeakReference(leakyObject)
// Ryn an operation with leakyObject
GC.Collect();
GC.WaitForPendingFinalizers();
GC.Collect();
Assert.IsFalse(weakReference.IsAlive);
}

For more in-depth testing, memory profilers such as SciTech’s .NET Memory Profiler and dotMemory provide a test API:

MemAssertion.NoInstances(typeof(MyLeakyClass));
MemAssertion.NoNewInstances(typeof(MyLeakyClass), lastSnapshot);
MemAssertion.MaxNewInstances(typeof(Bitmap), 10);

Steer Clear Of These Memory Leak Culprits

While we’ve covered detection methods, here are some coding practices to avoid altogether. Memory leaks aren’t inevitable, but certain patterns increase the risk. Be extra cautious with these and use the detection methods mentioned earlier to be proactive.

Common Memory Leak Traps:

  • .NET Events: Subscribing to events can lead to memory leaks if not handled carefully.

public class MyClass
{
private MyOtherClass _otherClass;

 public MyClass()
{
_otherClass = new MyOtherClass(); // Create an instance of the other class
_otherClass.MyEvent += OnEvent; // Subscribe to the event of the other class
}

 private void OnEvent(object sender, EventArgs e)
{
// Perform some action on the event
}

 // This method is never called, but the subscription keeps the MyClass instance alive
~MyClass()
{
_otherClass.MyEvent -= OnEvent; // Ideally unsubscribe here, but finalizer might not be called
}
}

In this example, MyClass subscribes to the MyEvent of MyOtherClass. If MyClass is not properly disposed of, the subscription remains active even if it’s no longer needed. This can lead to a memory leak because MyClass holds a reference to MyOtherClass, and MyOtherClass might hold other references, preventing garbage collection.

  • Static Variables, Collections, and Events: Treat static elements with suspicion, especially static events. Since the garbage collector (GC) considers them “roots,” they’re never collected.

public static class MyStaticClass
{
public static event EventHandler MyStaticEvent;

 public static void TriggerEvent()
{
MyStaticEvent?.Invoke(null, EventArgs.Empty); // Raise the static event
}
}

public class MyClass
{
public MyClass()
{
MyStaticClass.MyStaticEvent += OnStaticEvent; // Subscribe to the static event
}

 private void OnStaticEvent(object sender, EventArgs e)
{
// Perform some action on the static event
}
}

Here, MyStaticEvent is a static event in MyStaticClass. Since it’s static, the garbage collector considers it a “root” and never collects it. If MyClass subscribes to this event and is never disposed of, the reference chain keeps both classes in memory even if they are no longer in use.
Caching: Caching mechanisms can be double-edged swords. While they improve performance, excessive caching can overflow memory and cause “OutOfMemory” exceptions. Consider strategies like deleting old items or setting cache limits.

public class MyCache
{
private static Dictionary<string, object> _cache = new Dictionary<string, object>();

 public static object GetFromCache(string key)
{
if (_cache.ContainsKey(key))
{
return _cache[key];
}
return null;
}

 public static void AddToCache(string key, object value)
{
_cache.Add(key, value);
}
}

This code implements a simple in-memory cache using a static dictionary. If entries are never removed from the cache, it can grow indefinitely and lead to memory exhaustion. Consider implementing strategies like:

  • Least Recently Used (LRU): Evict the least recently used entries when the cache reaches a size limit.
  • Time-To-Live (TTL): Set an expiration time for each cache entry. Entries are automatically removed after the TTL expires.
  • WPF Bindings: Be mindful of WPF bindings. Ideally, bind to a “DependencyObject” or something that implements “INotifyPropertyChanged.” Otherwise, WPF might create a strong reference to your binding source (like a ViewModel) using a static variable, leading to a leak.

public class MyViewModel
{
public string MyProperty { get; set; }
}

public partial class MainWindow : Window
{
private MyViewModel _viewModel;

 public MainWindow()
{
InitializeComponent();
_viewModel = new MyViewModel();
DataContext = _viewModel; // Set the DataContext to the ViewModel
}

// This property is not a DependencyObject and doesn' t implement INotifyPropertyChanged
public string MyNonBindableProperty { get; set; }

 private void ButtonClick(object sender, RoutedEventArgs e)
{
MyNonBindableProperty = _viewModel.MyProperty; // Bind to a non-suitable property
}
}

In this WPF example, MainWindow binds its MyNonBindableProperty to the MyProperty of the MyViewModel in the ButtonClick method. The problem is MyNonBindableProperty is not a DependencyObject and doesn’t implement INotifyPropertyChanged. WPF might create a hidden reference to the MyViewModel using a static variable to track changes, potentially causing a leak if the view model isn’t properly disposed of.

  • Captured Members: Event handler methods clearly reference the object they belong to. But anonymous methods that capture variables also create references. This can lead to memory leaks, as shown in the example below:

public class NetworkMonitor { // Changed class name for clarity
private int _signalStrengthChanges = 0; // Renamed variable

 public NetworkMonitor(NetworkManager networkManager) { // Different network class
networkManager.onSignalStrengthChange += (sender, event) -> _signalStrengthChanges++; // Lambda with sender argument (optional)
}
}

  • Threads that run forever, without ever stopping, can cause memory leaks. Each thread has its own “Live Stack,” which acts like a special kind of memory haven for objects it uses. As long as the thread is alive, the garbage collector won’t touch any objects referenced by the thread’s stack variables. This includes timers – if the code that runs when your timer triggers is a method, the method itself becomes a reference and avoids getting collected.
    Let’s look at an example to illustrate this kind of memory leak…

public class MyClass
{
public MyClass(NetworkManager networkManager)
{
Timer timerStart = new Timer(HandleTick);
timerStart.Change(TimeSpan.FromSeconds(5), TimeSpan.FromSeconds(5));
}

 private void HandleTick(object state)
{
// do something
}

Time Mastery in Odoo 17: Unleashing the Potential of Date and Datetime Fields

Time Mastery in Odoo 17: Unleashing the Potential of Date and Datetime Fields

Odoo Date Datetime
Odoo Date Datetime

Mastering Time in Odoo 17: A Guide to Date and Datetime Fields

Managing time effectively is crucial for any business, and Odoo 17 provides robust tools to handle dates and times with precision. This article delves into the world of Date and Datetime fields, equipping you with the knowledge to leverage them optimally in your Odoo workflows.

What are Date and Datetime Fields:

Date Field – Stores only the date information (year, month, day), excluding time. Ideal for recording birthdays, order dates, or deadlines.
Datetime Field – Stores both date and time information (year, month, day, hour, minute, second). Perfect for tracking timestamps, appointment schedules, or delivery timeframes.

Working with Date and Datetime Fields:

Simply click on the field and enter the desired date or datetime using various formats (calendar pop-up, manual typing). Use operators like “equals,” “greater than,” or “between” to filter records based on date or datetime criteria. Utilize the search bar for quick datetime-based searches.

Develop Custom Integrations With Workflow Automation:

Use Odoo’s workflow automation tools or integrations with platforms like Zapier to automate actions based on specific dates or datetimes. For example, automatically send reminder emails before an invoice due date or trigger purchase orders when inventory stock reaches a minimum level on a specific date.
Leverage date and datetime fields to schedule tasks and meetings within Odoo or integrate with calendar applications like Google Calendar for a unified view.

Reporting and Analysis With Dates:

Utilize date and datetime fields to group data in reports for insightful analysis. For example, analyze sales trends by month, identify peak delivery periods, or track project progress over time. Also you can calculate metrics like project duration, average invoice processing time, or customer response time using date and datetime fields, gaining valuable insights into your business processes.
Create charts and graphs: Visualize date and datetime-related data through charts and graphs for more impactful presentations and decision-making.

Datetime Gets More Security and Access Control:

Restrict access based on dates and datetime fields to control user access to specific records or functionalities within Odoo. For instance, allow access to sensitive financial reports only during business hours or grant temporary access to specific projects based on defined date ranges.

Connect With External Systems

Integrate Odoo with other applications that utilize date and datetime fields, such as accounting software, logistics platforms, or customer relationship management (CRM) systems, for seamless data exchange and synchronized information management.

Usage of Odoo Studio for Datetime Fields:

  • Use Odoo Studio to modify how date and datetime fields are displayed within views. For instance, create custom calendar pop-ups, add visual indicators for upcoming deadlines, or display time zones alongside datetimes.
  • Develop custom filters and reports: Leverage Studio to create advanced filters and reports based on date and datetime criteria, catering to specific use cases and data analysis needs.

As an advanced feature you can calculate dates or datetimes based on other fields (e.g., automatically calculate due dates based on order placement date and lead time). For example, calculate a project’s “estimated completion date” by adding the “lead time” to the “start date.” Display dates and datetimes in different formats depending on the user’s locale or preferences.

Examples Of Use Cases About Datetime In Odoo 17:

  • Inventory Management: Track product expiry dates with Date fields, schedule deliveries with Datetime fields.
  • Sales and CRM: Filter leads based on creation date, set deadlines for quotes with Datetime fields.
  • Project Management: Manage project timelines with Datetime fields for task start and end dates, monitor milestones effectively.

By mastering Date and Datetime fields in Odoo 17, you gain control over time-sensitive information, streamline workflows, and enhance data accuracy. Explore the advanced features and best practices to unlock the full potential of these versatile fields, ultimately driving efficiency and success in your business operations.
Navigating the Depths: A Guide to Mastering Search in Odoo 17

Navigating the Depths: A Guide to Mastering Search in Odoo 17

Odoo search
Odoo search

Conquering the Chaos: Mastering Search in Odoo 17

Finding the needle in the haystack of data can be frustrating, especially in robust platforms like Odoo 17. But fear not, for the search functionality within Odoo offers a powerful solution to navigate your records efficiently. This article delves into the depths of Odoo 17 search, guiding you through adding and configuring it to fit your specific needs.

Unveiling the Search Bar:

The search bar, your gateway to streamlined information retrieval, resides prominently at the top of most Odoo views. Simply type your desired keyword or phrase, and a list of relevant records will populate dynamically. However, the real magic lies in customizing the search experience.

Adding Search Fields is the Main Point:

  1. Navigate to the desired view: Go to the specific module and view where you want to enhance search capabilities. To add search fields to the “Products” list view in the “Inventory” module, go to Inventory > Products.
  2. Activate Developer Mode: Click on the gear icon in the top right corner and enable “Developer Mode.”
  3. Access View Customization: Click on the “Edit” button within the developer mode options.
  4. Add Search Fields: In the XML code, locate the <search> tag and define additional fields using the <field> tag. Specify the field name and desired attributes like “string” for the display label. Here is an example:
<search>
    <field name="name"/>
    <field name="default_code"/>

    <field name="categ_id" string="Category"/>
    <field name="available_in_pos" string="Available in POS"/>
</search>

5. Save and Refresh: Save the changes and refresh the view to see your newly added search fields in action. Refresh the view (usually by pressing F5 or clicking the refresh icon) to see the new search fields in action.

Second Point: Configuring Search Filters

  1. Activating Filters: The “Filters” button, usually located next to the search bar, unlocks this power. Click it to reveal a panel where you can build your filter criteria.

  2. Crafting Individual Filters:
    • Selecting or Typing a Field: Choose the field you want to filter by (e.g., “Customer Name” in Sales Orders). You can type the field name or select it from a dropdown.
    • Choosing an Operator: Select an operator that defines the filter’s logic. Common options include:
      • Equals: Find exact matches (e.g., “Customer Name equals ‘John Smith'”).
      • Contains: Search for records containing the specified value (e.g., “Customer Name contains ‘Doe'”).
      • Greater/Less Than: Filter based on numerical values (e.g., “Order Amount greater than 100”).
      • Between: Specify a range of values (e.g., “Order Date between ‘2023-12-01’ and ‘2024-01-31′”).
    • Entering the Filter Value: Depending on the chosen operator, input the specific value you want to match or use the calendar for date ranges.
    • Applying the Filter: Click the “Apply” button to activate the filter and see the results instantly updated.
  3. Combining Filters for Precision:
    • Logical Operators: Use “AND” or “OR” to combine multiple filters.
      • AND: Only records matching all applied filters will appear (e.g., “Customer Name equals ‘John Smith’ AND Order Date is ‘2024-02-05′”).
      • OR: Records matching any of the applied filters will appear (e.g., “Product Category equals ‘Electronics’ OR Product Brand equals ‘Apple'”).
    • Nesting Filters: Use parentheses to create complex filter combinations. This allows for more granular control over your search criteria.
  4. Saving Custom Filters: Frequently used filters can be saved for quick access later. Click the “Save” button in the “Filters” panel and give your filter a descriptive name. Saved filters can be accessed and applied with a single click, saving you time in the future.

Unleashing Search Power with Studio:

Odoo Studio unlocks exciting possibilities for customizing search functionality beyond basic field additions and filters. Let’s explore how to leverage Studio for a truly personalized search experience.
  1. Enter Studio Mode: To enter Studio Mode activate developer mode as discussed previously, click the “Edit” button and select “Start Studio.”

  2. Customize Search Bar:
    • Position and Size: Drag and drop the search bar element to your desired location within the view. Resize it using the handles to fit your layout.
    • Default Filters: Click the “Configure” button on the search bar element. Here, you can set default filters to automatically apply when the view loads. For example, pre-filter products by a specific category.
    In the “Sales Orders” view, move the search bar to the top right corner and make it wider to accommodate more search terms. Set a default filter to show only open orders.
  3. Create Custom Filters:
    • Go to the “Filters” panel in Studio. You’ll see existing filters and the option to create new ones.
    • Click “Create” and choose the field you want to filter on.
    • Define the filter condition using operators like “equals,” “contains,” “greater than,” etc. You can even combine multiple conditions using “AND” or “OR” logic.
    Create a custom filter in the “Customers” view to find customers whose orders exceed a certain amount in the past month. Use the “amount_total” field with the “greater than” operator and specify a date range filter.

  4. 4. Publish Your Changes:
    • Click the “Publish” button to make your search customizations live for other users. You can choose to publish for specific user groups or globally.
Remember about Odoo documentation for detailed instructions based on your module and version. Also there are community Resources where you can leverage online forums and community modules for advanced search customizations and troubleshooting. By mastering search in Odoo 17, you transform data exploration from a chore into an efficient breeze. Implement these tips to tailor search to your specific needs, empowering you to locate information quickly and confidently, ultimately boosting your overall productivity within the Odoo platform. Bonus Tip: Explore advanced search features like domain operators and context filters for even more granular control over your searches.