How to implement Swagger in ASP.NET Core 6

Let’s start with what is Swagger?
Swagger is an open source set of RESTful API development and documentation rules, specifications, and tools. Developers can use the Swagger framework to create interactive, machine- and human-readable API documentation.
API specifications typically include information such as supported operations, parameters and outputs, authorization requirements, endpoint availability, and license requirements. Swagger can automatically generate this information from the source code by asking the API to return a documentation file based on its annotations.
Swagger assists users in creating, documenting, testing, and consuming RESTful web services. It is compatible with both top-down and bottom-up API development approaches. Swagger can be used to design an API before any code is written in the top-down, or design-first, method. Swagger generates documentation from code written for an API in the bottom-up, or code-first, method.
Swagger component:
Swagger offers a number of open source API tools, including:
- Swagger Editor- This tool allows developers to create, design, and describe new APIs as well as edit existing ones. The web-based editor renders OpenAPI specifications visually, handles errors, and provides real-time feedback.
- Swagger Codegen enables developers to generate client library code and SDKs for various platforms.
- Swagger User Interface- This is a completely customizable tool that assists engineers in creating documentation for a variety of platforms. It can run in any environment.
- Swagger Inspector is an API documentation testing tool. APIs can be validated without restriction, and the results are automatically saved and accessible in the cloud.
What are the benefits of using Swager
Swagger provides several additional benefits in addition to its goal of standardizing and simplifying API practices.
- It has a user-friendly interface that serves as a blueprint for APIs.
- Both developers and non-developers, such as clients or project managers, can understand the documentation.
- Human and machine readable specifications
- Produces interactive, testable documentation.
- Over 40 languages are supported for the creation of API libraries.
- JSON and YAML formats are acceptable for easier editing.
- Facilitates the automation of API-related processes.
How to add Swagger on .Net Core 6
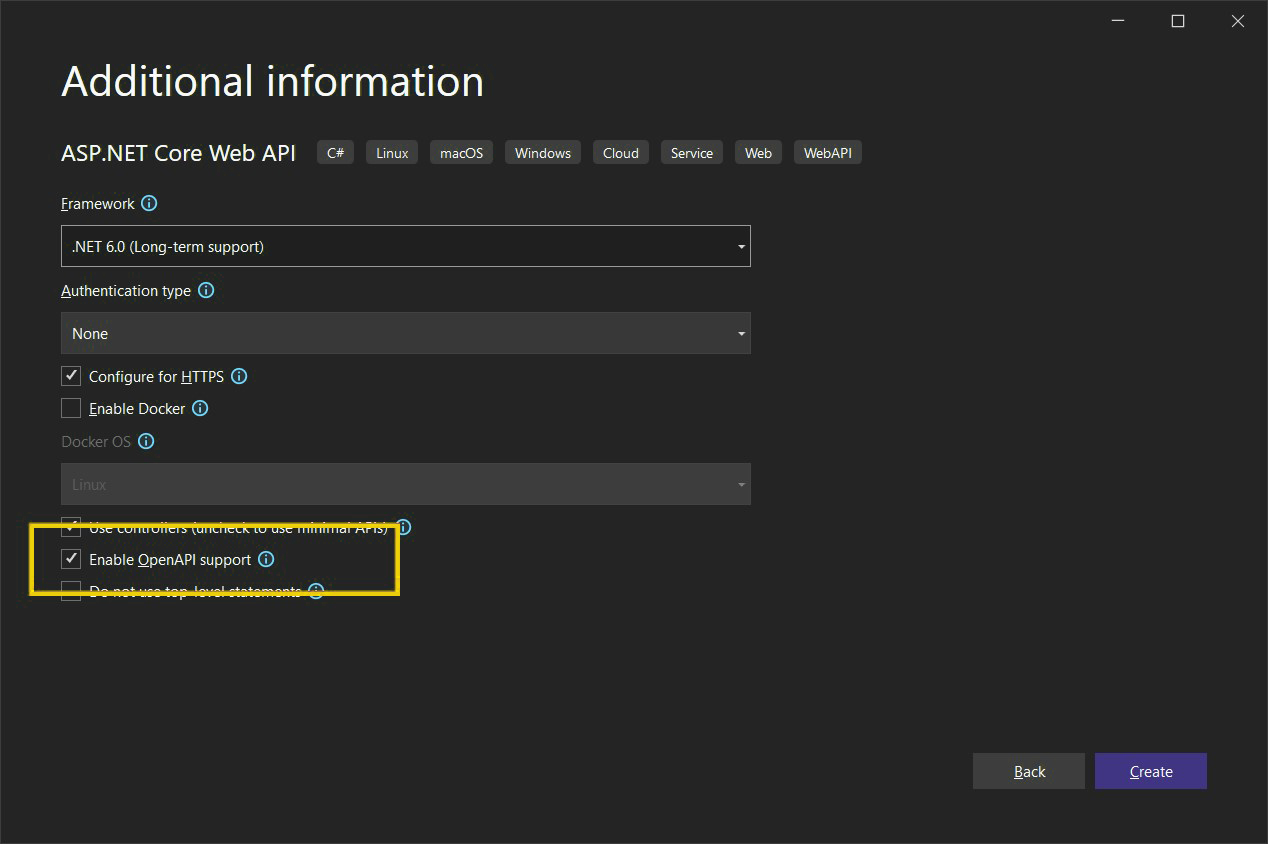
When starting an ASP.NET Core 6 project in Visual Studio 2022, you can integrate Swagger to an ASP.NET Core 6 application. The “Enable OpenAPI support” check box in the Visual Studio 2022 project creation wizard is selected by default. This option guarantees the installation of all swagger-related nuget packages and the presence of the Program’s necessary swagger-enabling Program.cs.
Program.cs, why? Because Startup.cs and Program.cs files are now integrated for an uniform experience with ASP.NET Core 6.0.
As you will see on the below image the Enable OpenAPI support checkbox is checked.

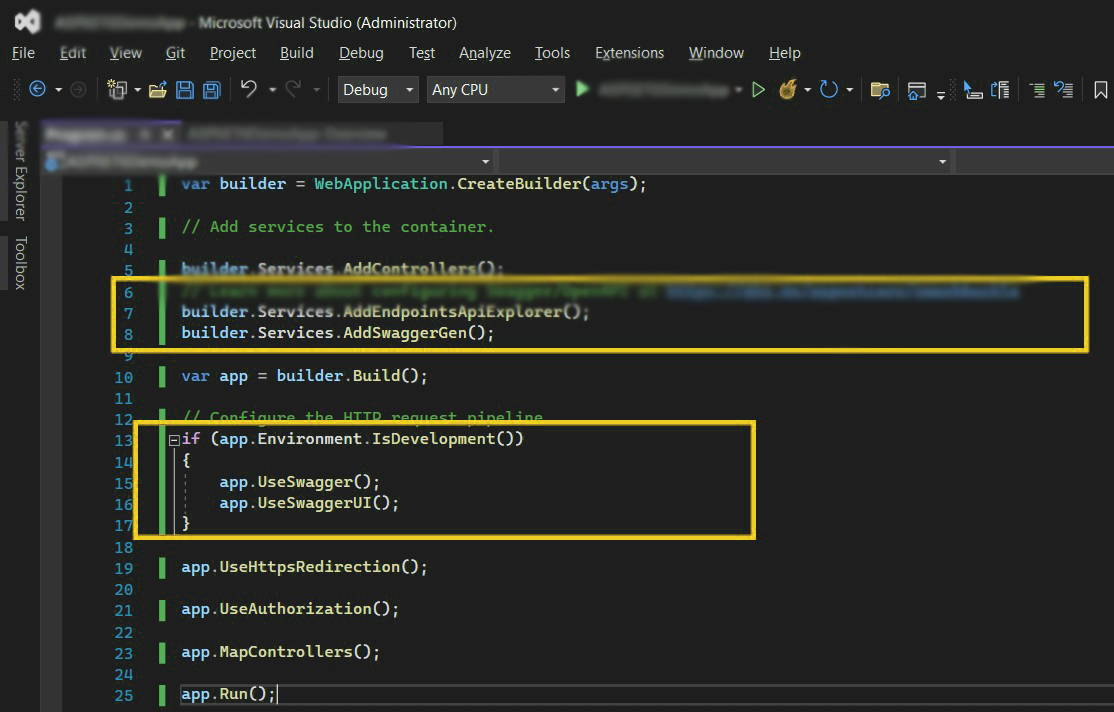
You can observe that Swagger-related code is already there in Program.cs. The middleware for the development environment is added, and the Swagger service is registered. You can see that the Swashbuckle nuget package has automatically installed for you in Solution Explorer.

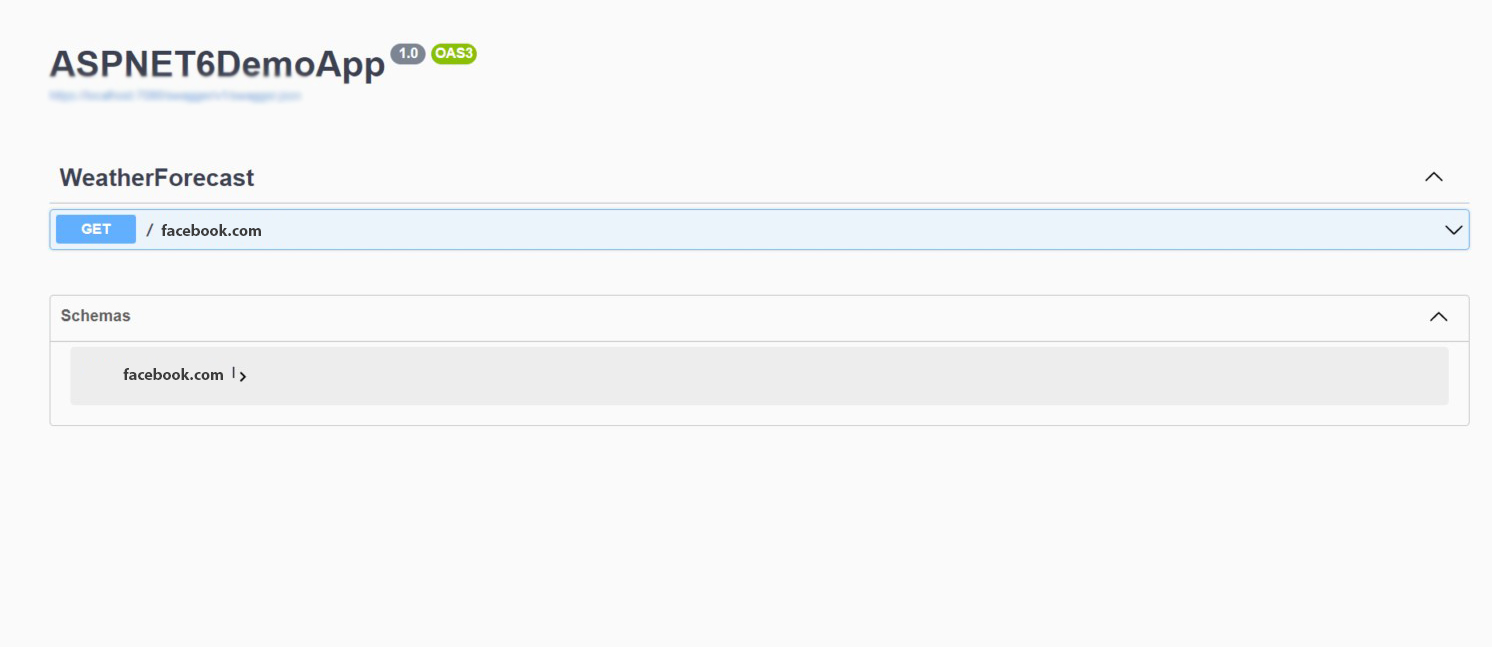
Without adding anything extra, if you try and execute the application it will open the Swagger UI for the Weather Forecast API.
And is the weather forecast controller will be created and it will contain the following code:
using Microsoft.AspNetCore.Mvc;
namespace SwaggerDemo.Controllers
{
[ApiController]
[Route(“[controller]”)]
public class WeatherForecastController : ControllerBase
{
private static readonly string[] Summaries = new[]
{
“Freezing”, “Bracing”, “Chilly”, “Cool”, “Mild”, “Warm”, “Balmy”, “Hot”, “Sweltering”, “Scorching”
};
private readonly ILogger _logger;
public WeatherForecastController(ILogger logger)
{
_logger = logger;
}
[HttpGet(Name = “GetWeatherForecast”)]
public IEnumerable Get()
{
return Enumerable.Range(1, 5).Select(index => new WeatherForecast
{
Date = DateTime.Now.AddDays(index),
TemperatureC = Random.Shared.Next(-20, 55),
Summary = Summaries[Random.Shared.Next(Summaries.Length)]
})
.ToArray();
}
}
}

But why is it that it is automatically redirecting to Swagger UI? Well, it is automatically redirecting there because of “launchUrl”: “swagger” is already set in the launchsettings.json file.
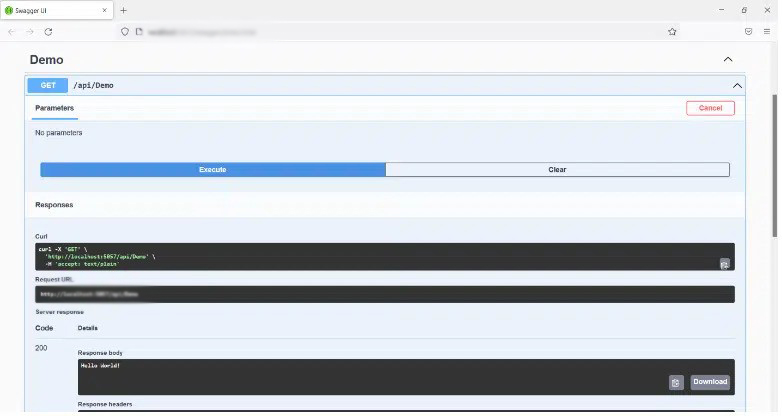
When you execute the HttpGet method in Swagger, here is how the output will appear:

Conclusion
I can say with great confidence that Swagger is a fantastic tool for API documentation. It also offers an interface for using the action method executions. Swagger can be modified to meet your needs. For instance, you may adjust how Swagger tests your API and add more information to the documentation for your API.
