Repetitive tasks can take up valuable time when employees have to manually update records, send notifications, or follow up on routine activities. Odoo business automation helps reduce this work by triggering actions automatically when specific conditions are met or at scheduled intervals. Depending on the workflow, Odoo can update records, create activities, send notifications, and handle recurring processes without manual intervention. This guide explains how Odoo automation works, how to configure automation rules, and which tools to use when standard automation is not enough. The first step is to identify the workflow you want to automate and make sure the required Odoo functionality is in place.
- Odoo's standard features cover common workflow automation needs, so check what is already available before creating custom rules or developments. Using native functionality can simplify maintenance and reduce customization.
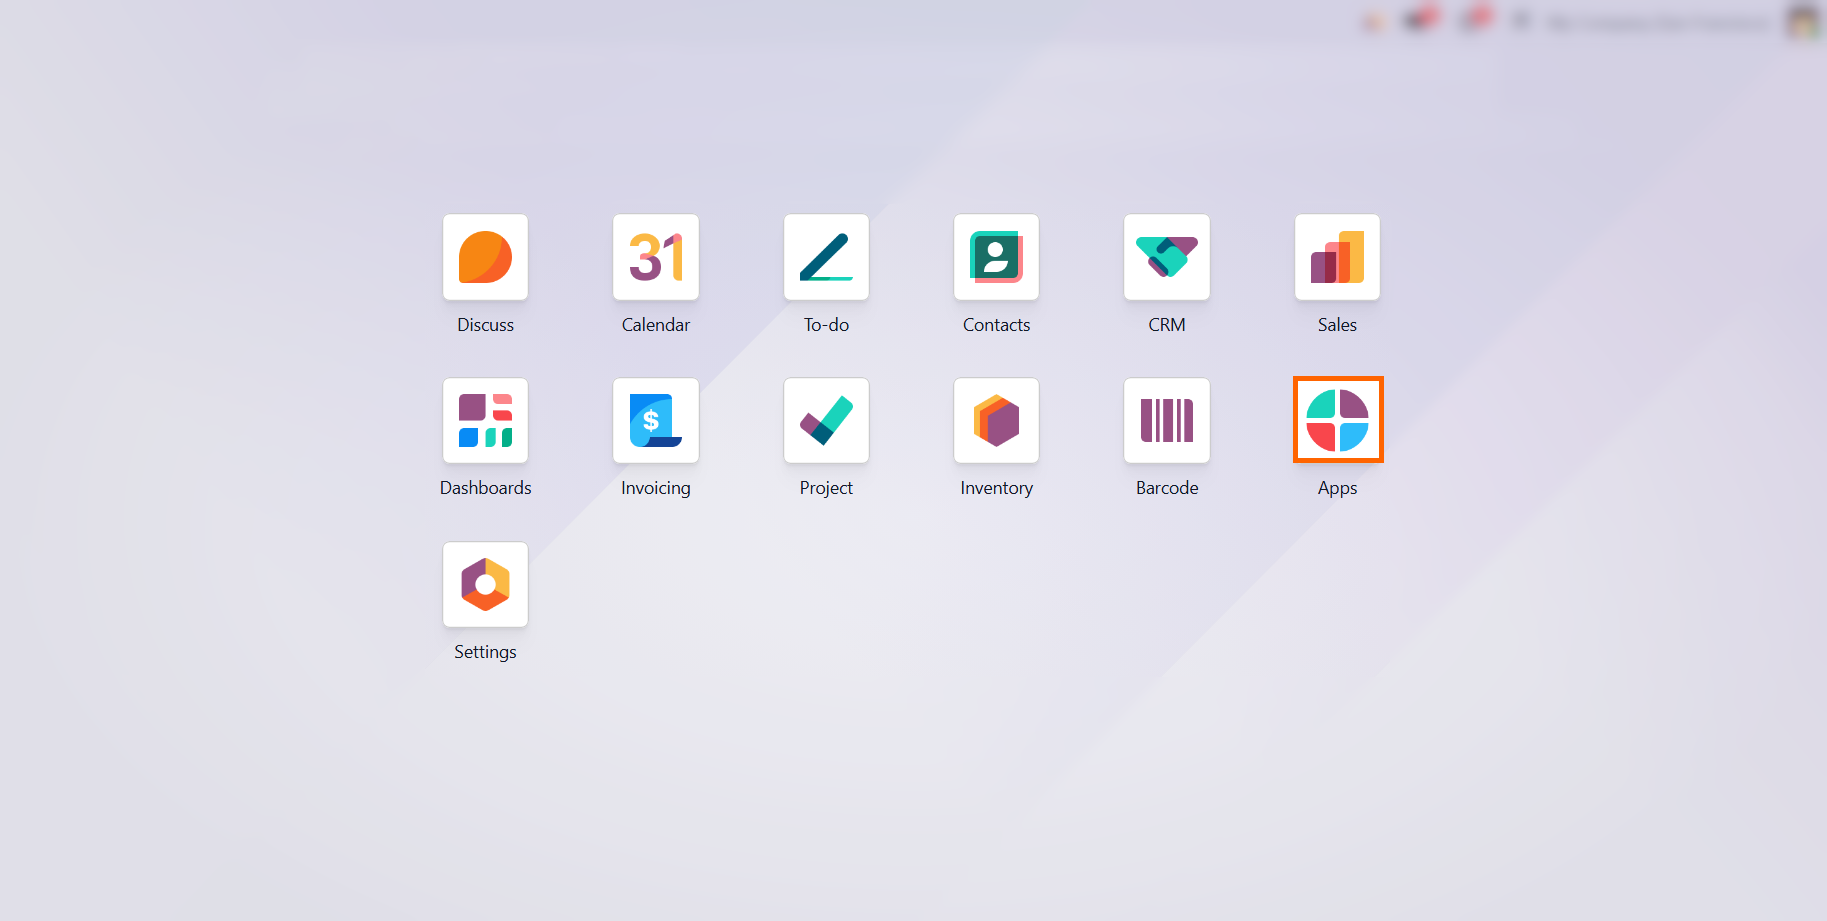
Check that the required modules are installed for your workflow, such as Sales, CRM, and Inventory for the example used in this guide. These modules provide the records and workflows involved in the automation.
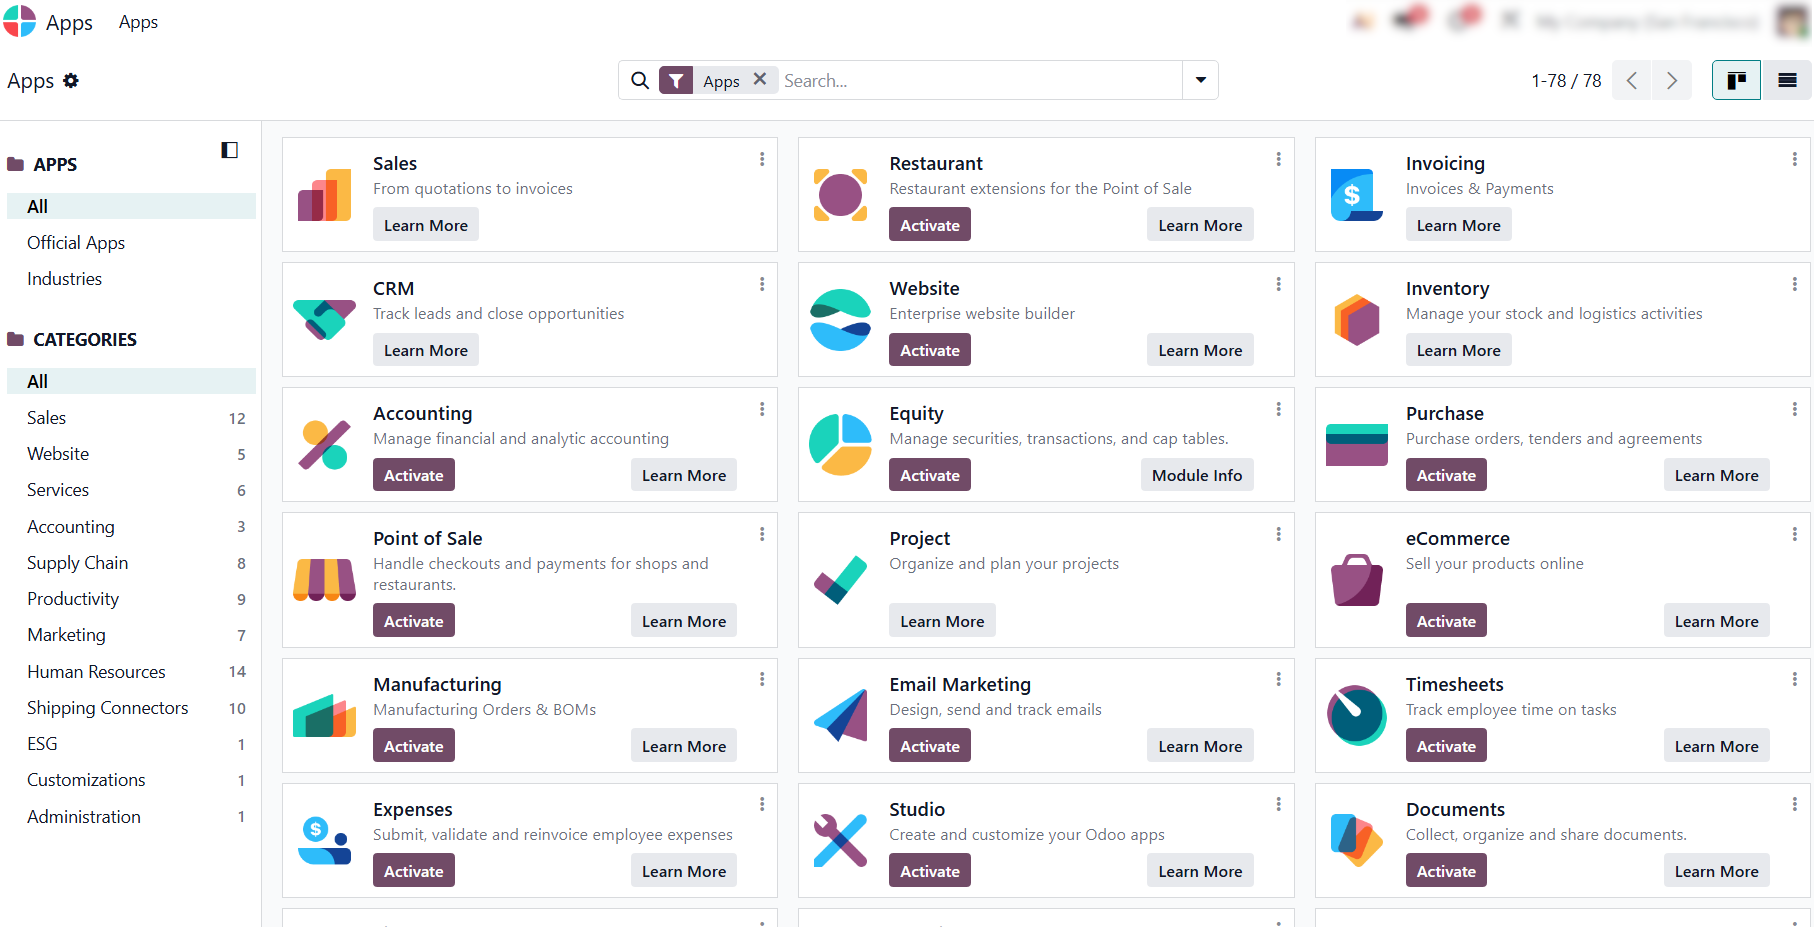
For example, opening the Contacts module displays the list of available contacts. You can also access its settings to configure how contact records are managed and prepare the module for automated workflows.
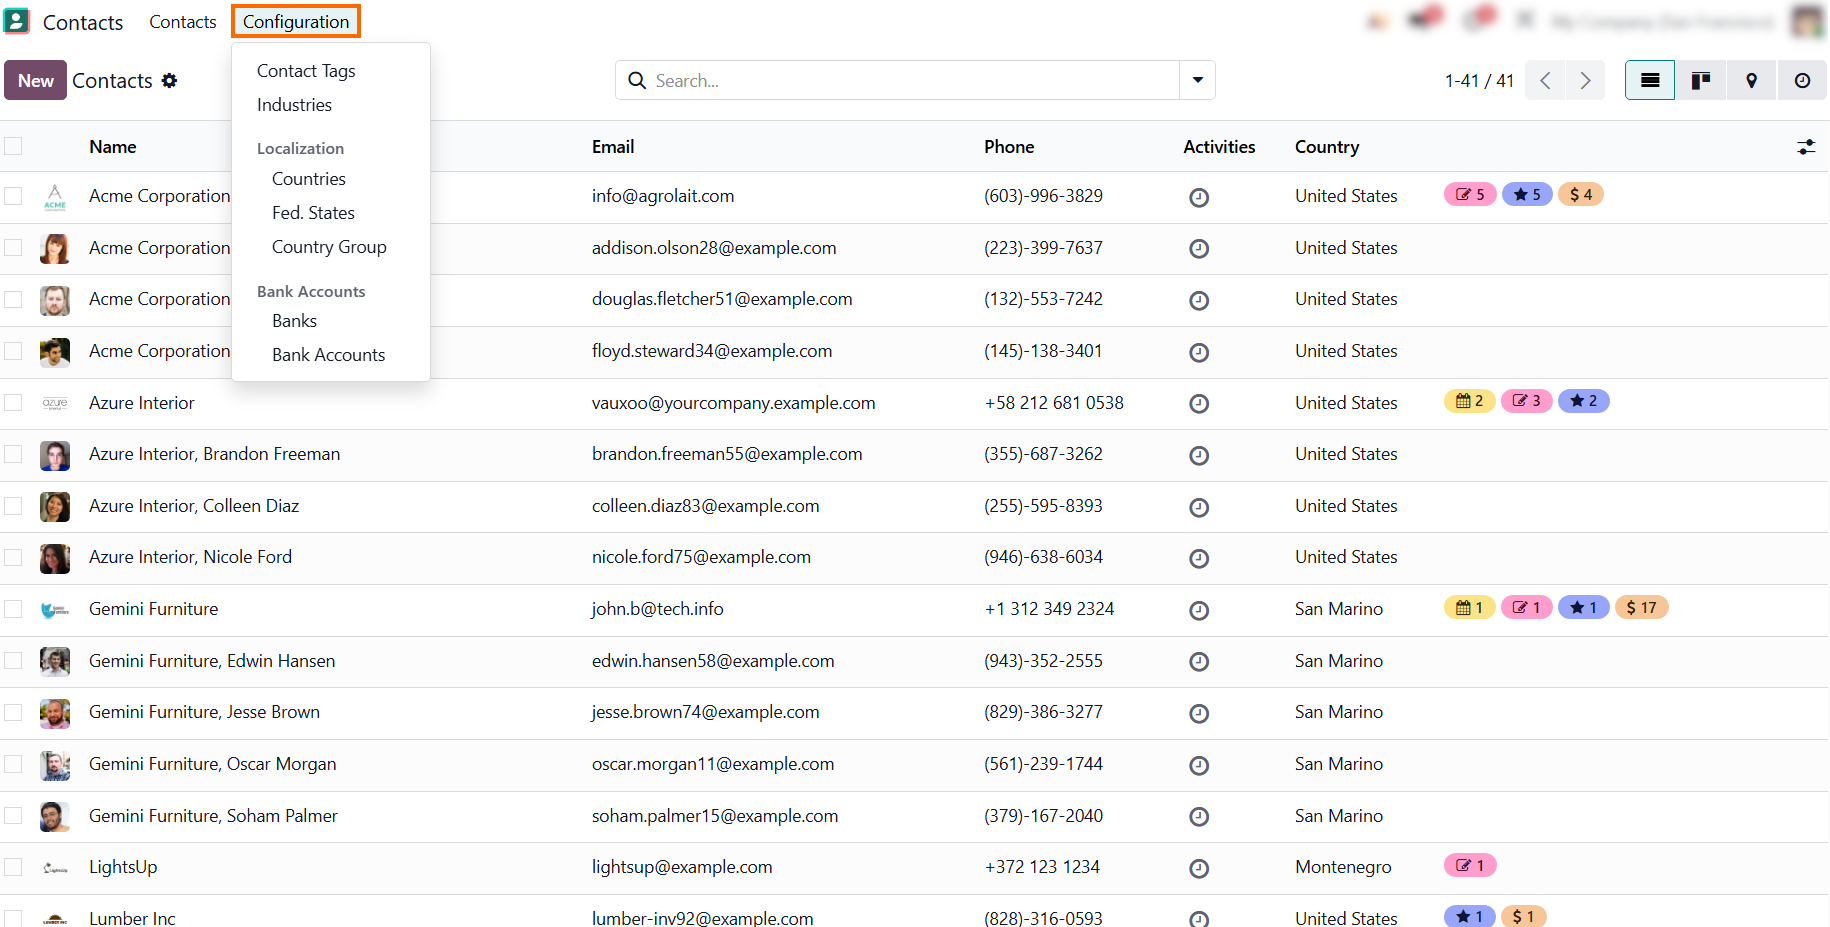
Use Contact Tags in the Contacts Configuration menu to create structured markers, such as VIP, directly from the list view and categorize records for downstream business
processes.
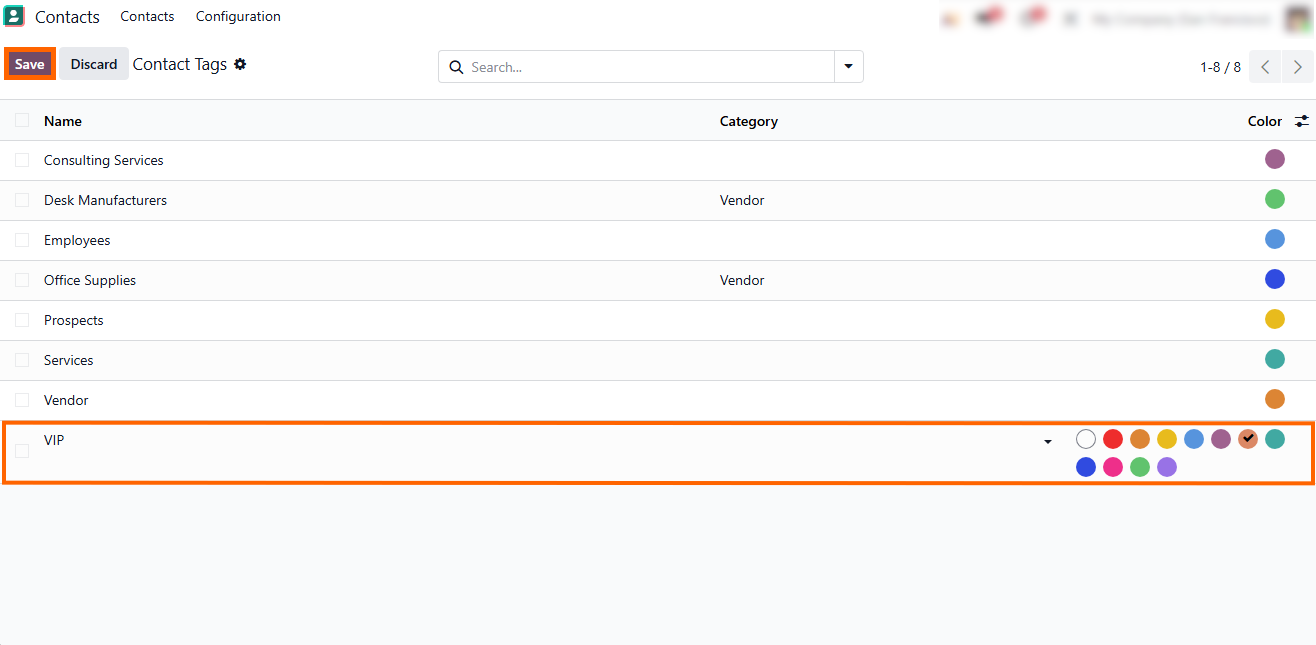
- Accessing Activity Types under Configuration in CRM provides native controls for setting up routine tasks and automated follow-up triggers directly linked to your managed contact records.
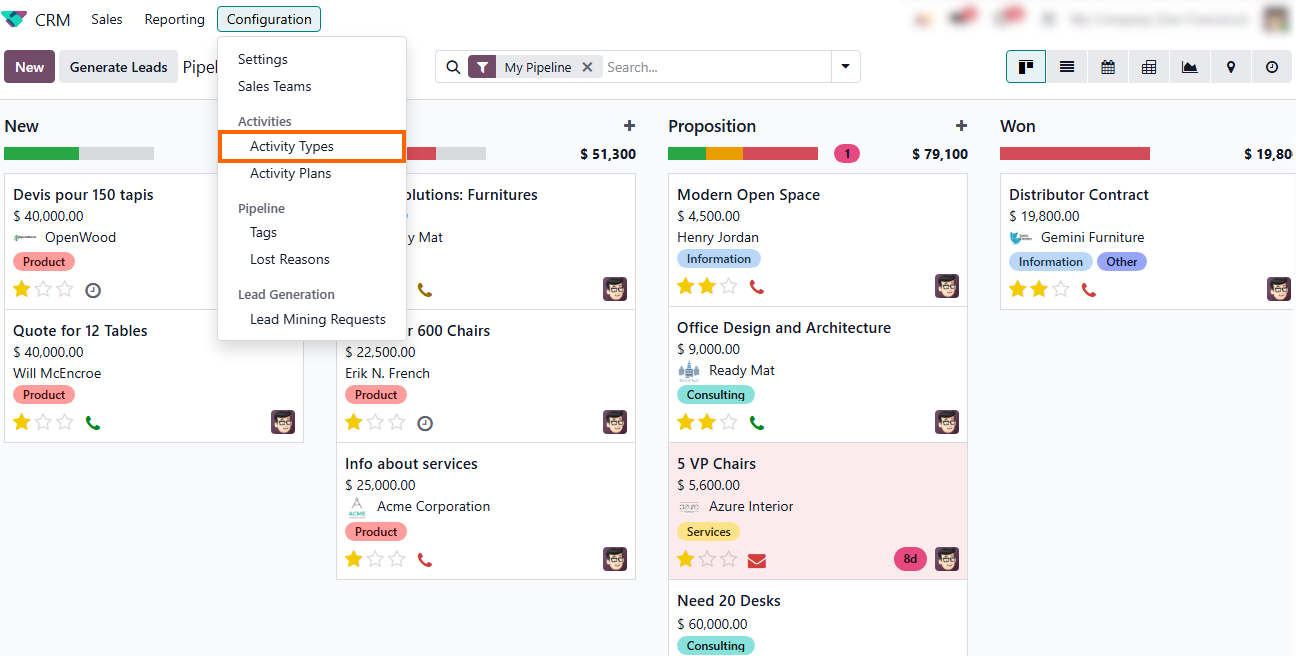
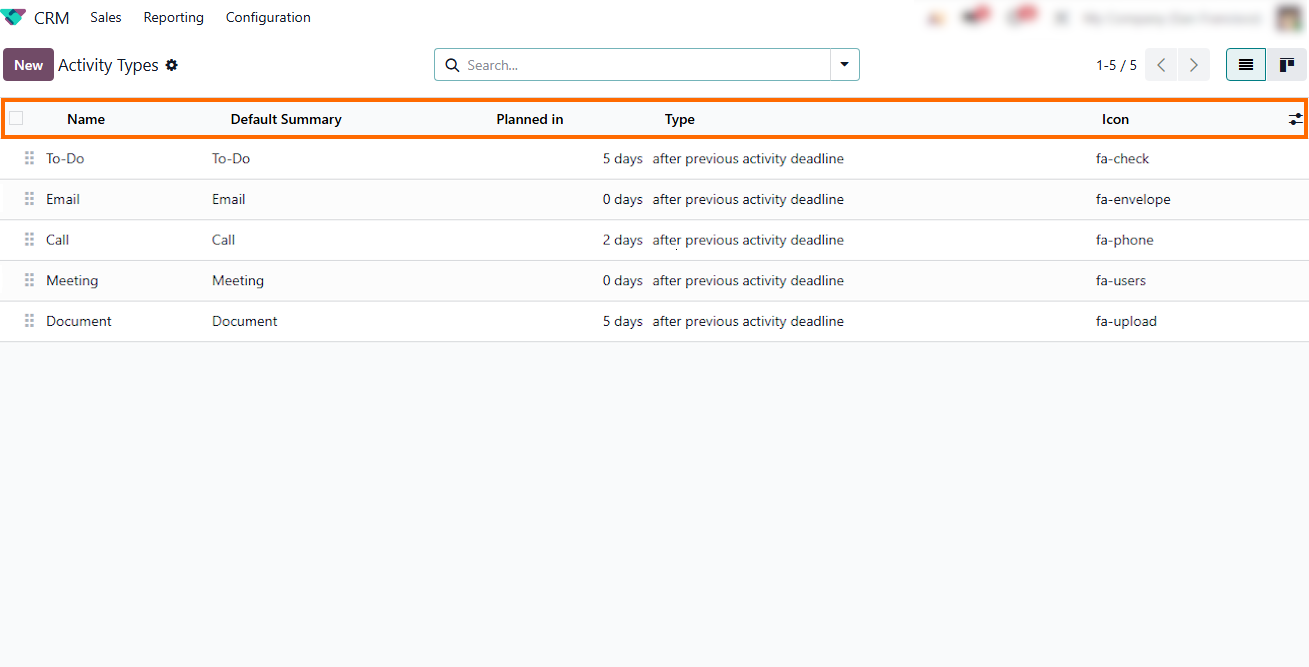
Reviewing the main list lets you inspect pre-configured completion deadlines and execution delays, such as setting follow-up tasks several days after a previous activity
is marked done.
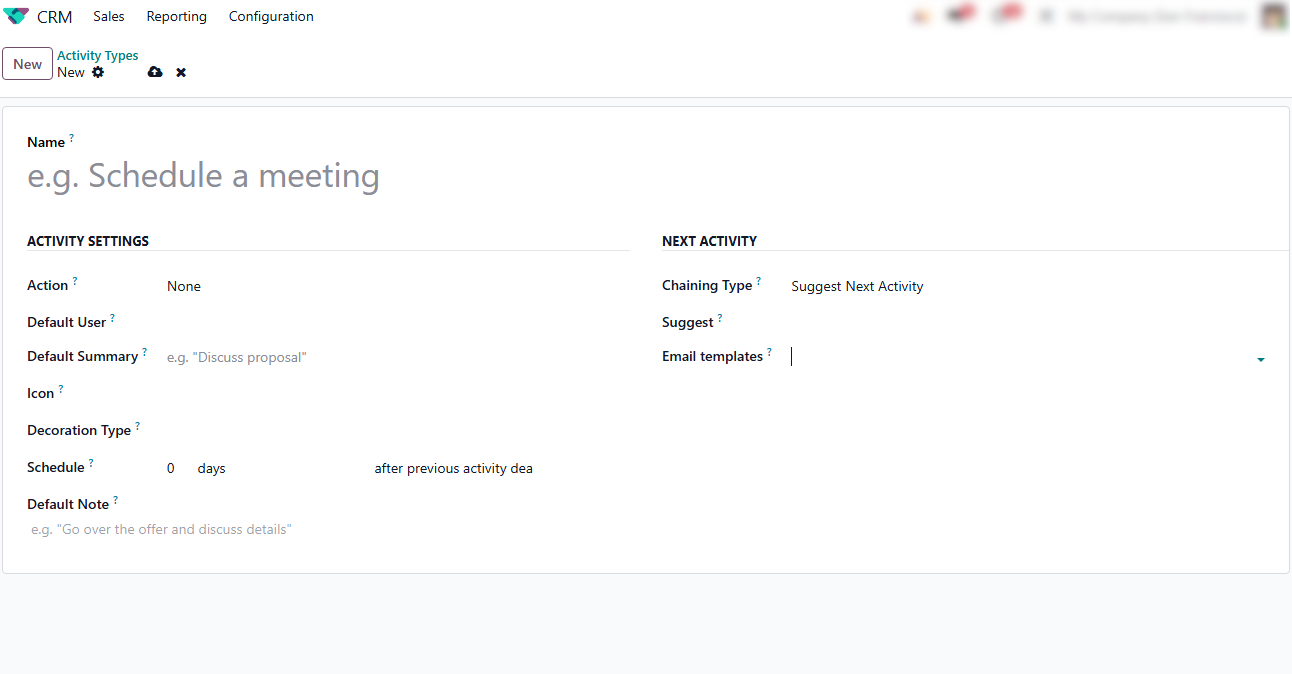
- Opening an activity form allows you to define its execution delay under Schedule and set up automated follow-ups via Chaining Type to prompt or trigger the next action upon completion.
Unlocking Odoo Automation Rules
with Developer Mode
Odoo 19 combines standard automation tools with options for customizing workflows when your business processes require more flexibility. While built-in module settings can handle common tasks, more advanced workflows may require specific triggers, such as updating fields, reassigning records, or sending notifications when data changes. Activating Developer Mode provides access to additional automation settings for configuring Odoo automation rules and tailoring automated actions to your workflow requirements. This is particularly useful when the available module settings do not provide the trigger or action needed for a specific process. Developer Mode can therefore extend Odoo process automation when standard tools do not cover the required workflow logic.
- Return to Settings, scroll to Developer Tools under General Settings, and click Activate the Developer Mode to access the technical settings for creating and managing automation rules.
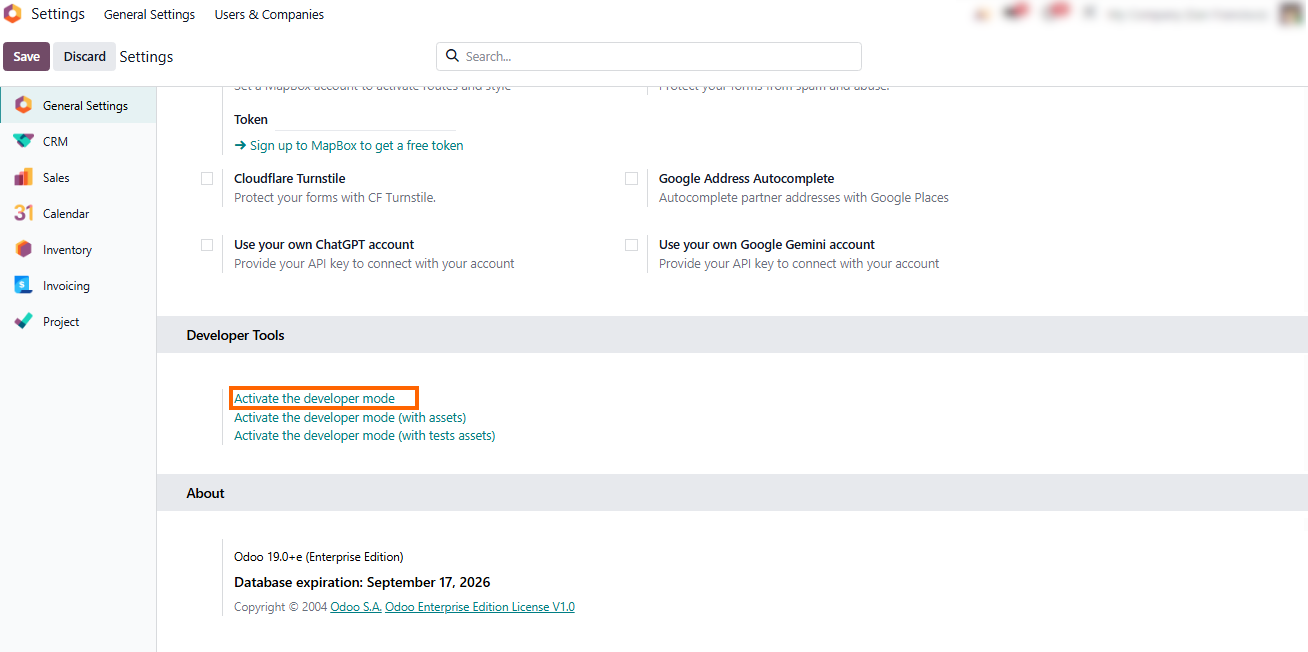
Once Developer Mode is activated, a debug icon appears in the top navigation bar, granting quick access to technical parameters, model structures, and advanced administrative tools.
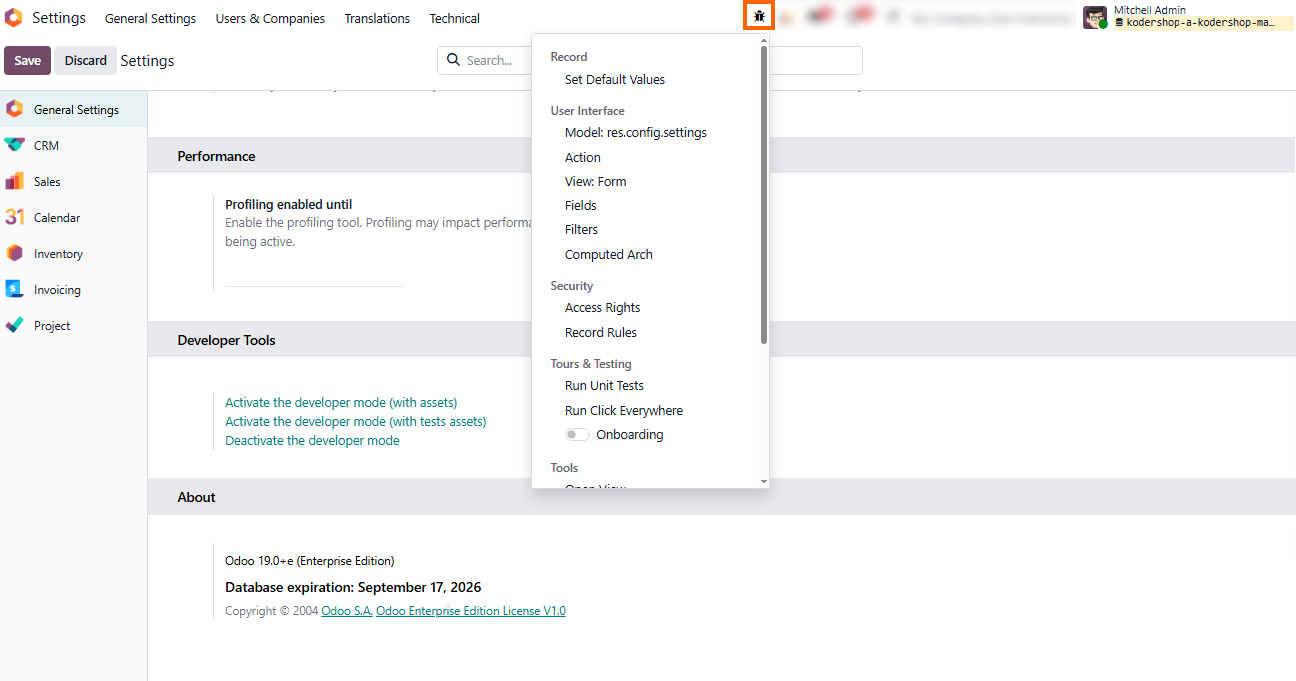
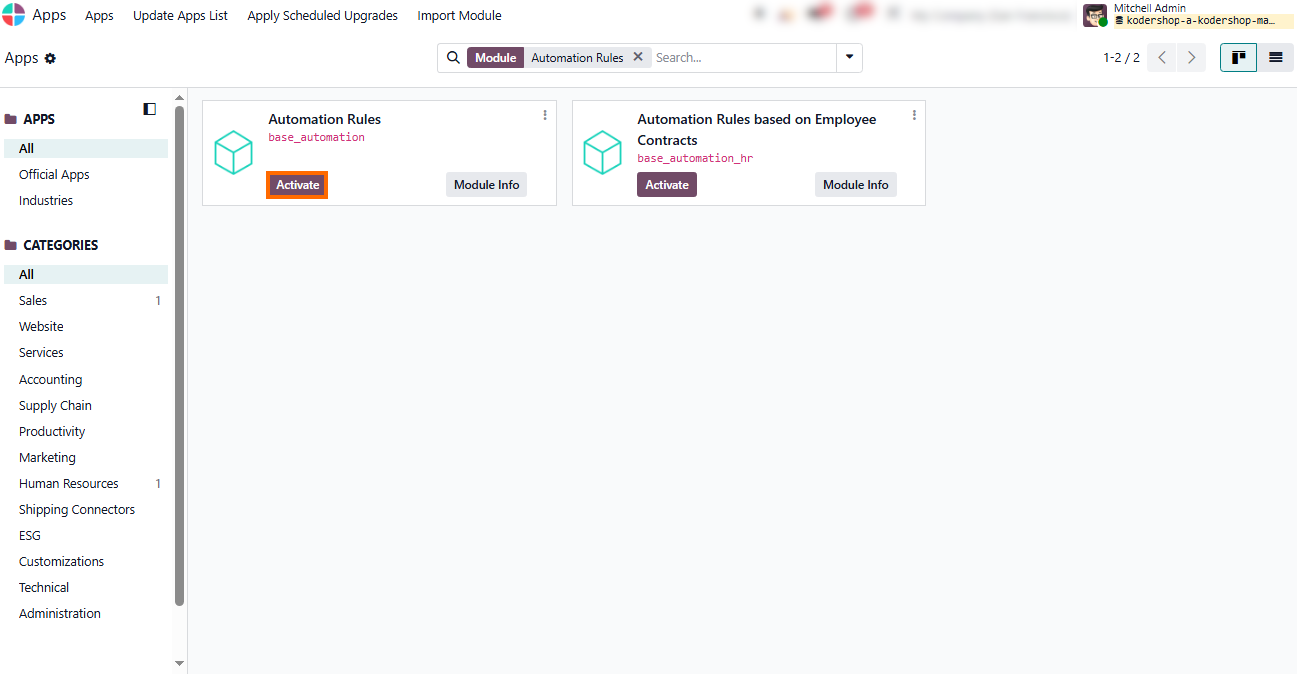
- If Automation Rules are not available in the configuration
menus after activating Developer Mode, go to Apps and remove the default
“Apps” filter from the search bar.
Search for Automation Rules and click Activate.
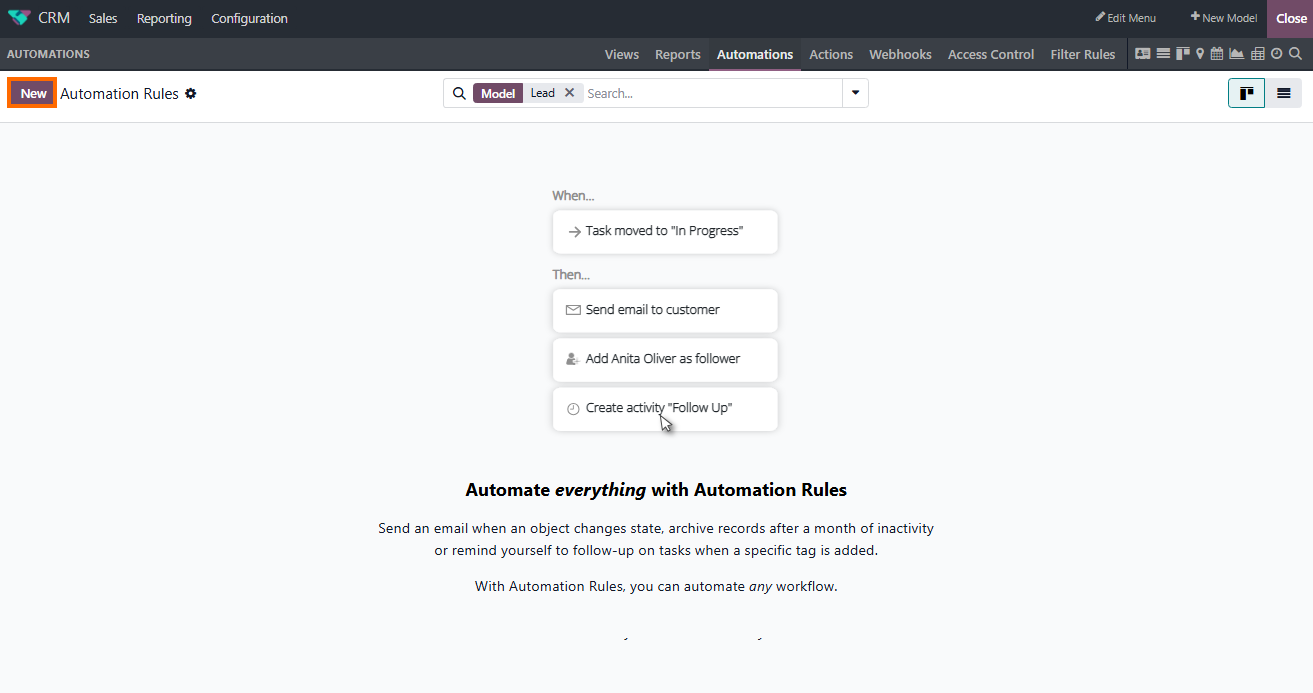
- Click New in the top-left corner of the Automations dashboard to start configuring custom triggers and automated actions for the selected model. The automation rule form opens for configuration.
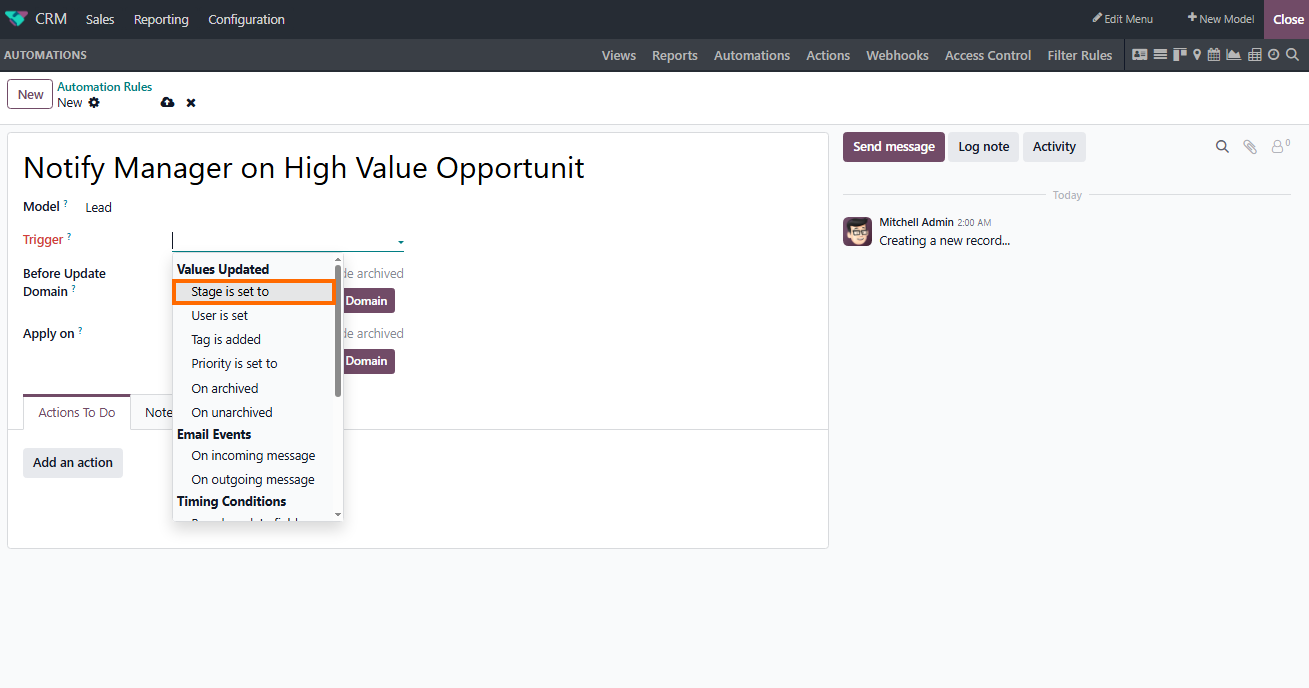
- Specify the rule name and select a trigger to define the
exact event or condition that
automatically executes the action (such as updating a field or moving an opportunity to
a new stage in CRM).
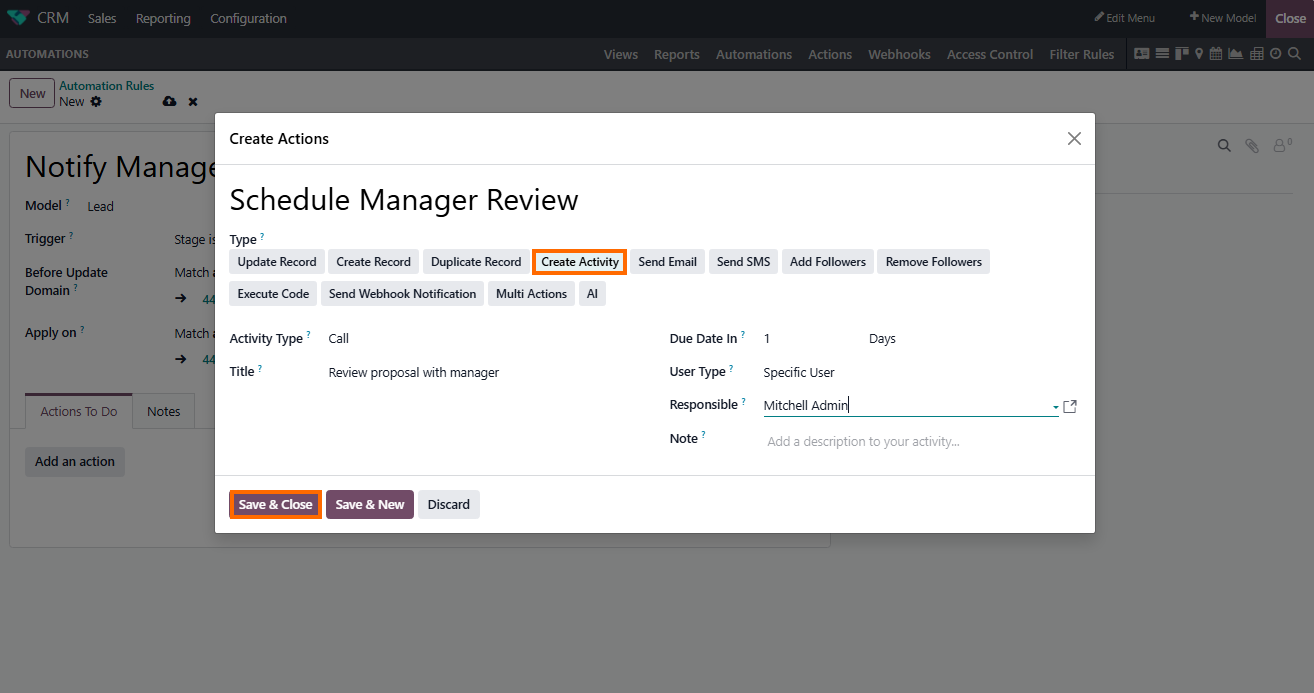
- Click Add an action under the Actions To Do tab to open the
Create Actions pop-up window, select the action type (such as Create
Activity), set the parameters like title
and responsible user, and click Save & Close.
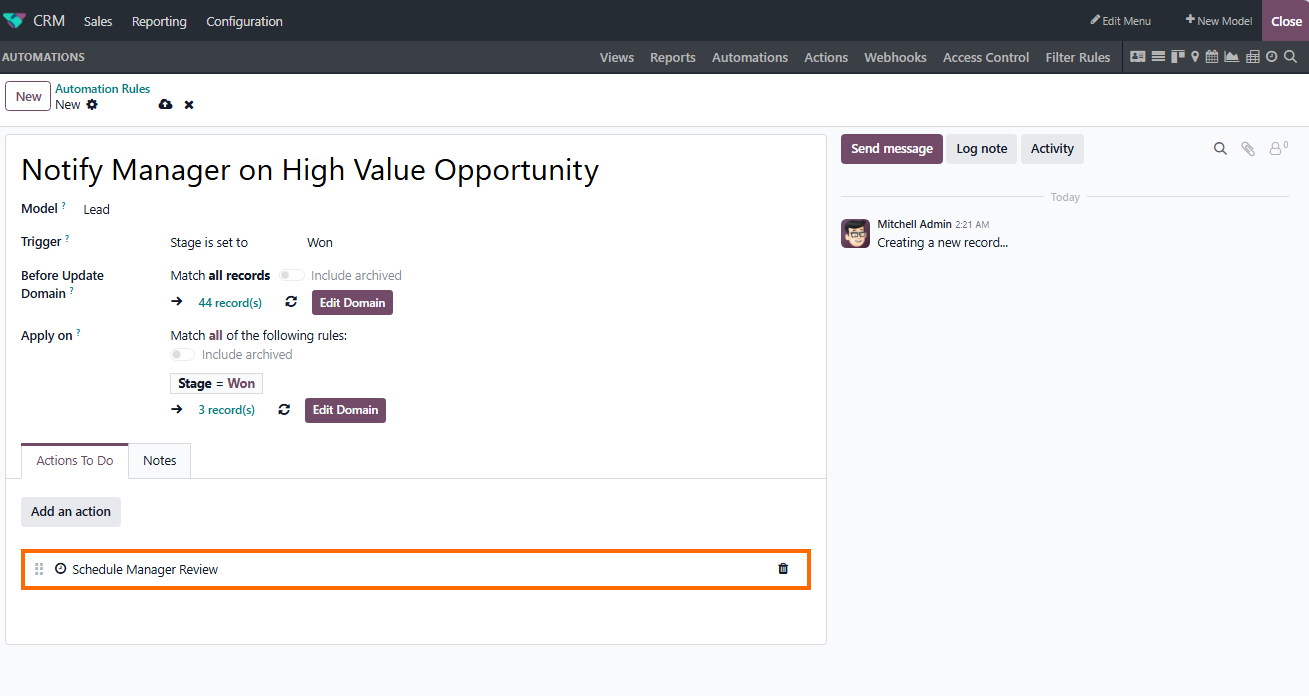
- Once saved, the configured action immediately appears under the Actions To Do tab, allowing you to review its settings, reorder execution steps, or edit and delete actions at any point to fine-tune your CRM automation logic.
Applying Your Odoo Automation Rules in
a Live Workflow
Once your Odoo automation rules are configured, the next step is to apply them to a real business workflow. A live CRM scenario shows how the rule responds to the defined conditions and applies automated actions within an existing process. It demonstrates how individual automation settings work together to support a complete business process rather than a single isolated task, while showing how routine actions can be handled automatically as part of the broader workflow. By moving recurring follow-up steps into an automated workflow, teams can reduce manual work, keep processes consistent, and spend more time on higher-value activities.
- Select an opportunity that matches the target parameters.
Once its status is updated to Won, the system automatically triggers a
scheduled activity for the responsible
manager.
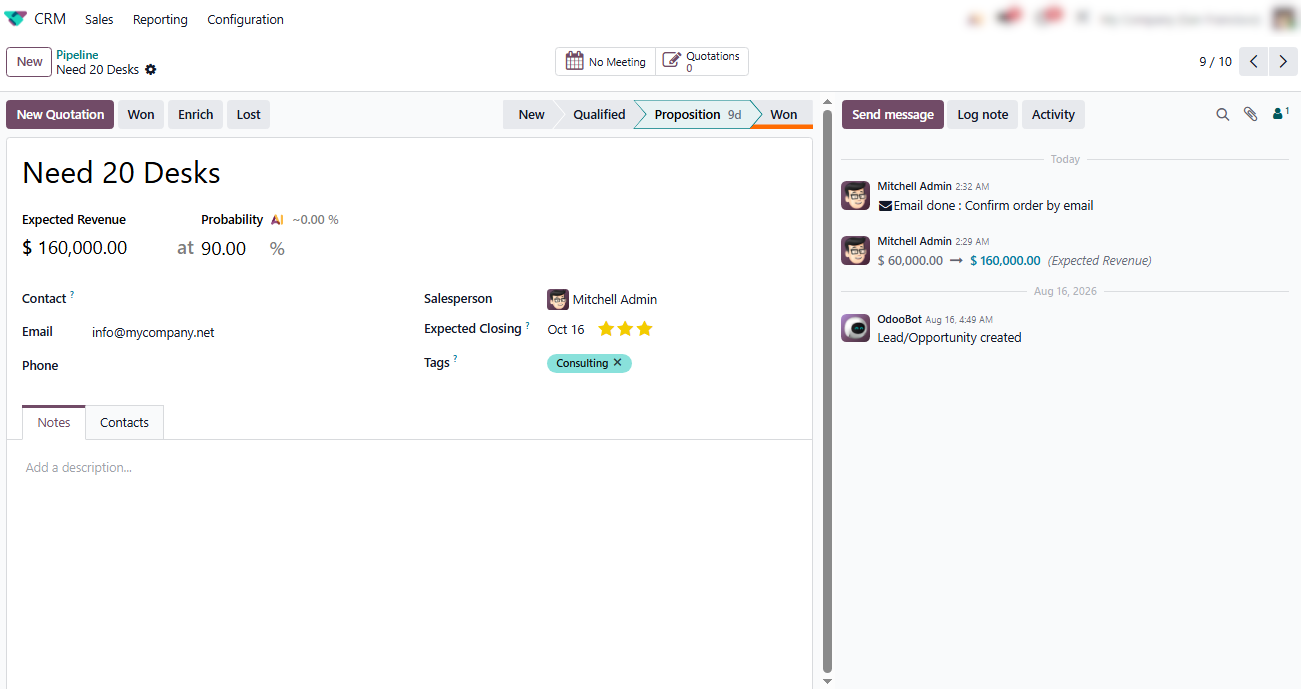
- The system updates the deal status to Won and executes the configured Odoo automated actions in the background, scheduling the manager review task under Planned Activities in the chatter while displaying a success notification.
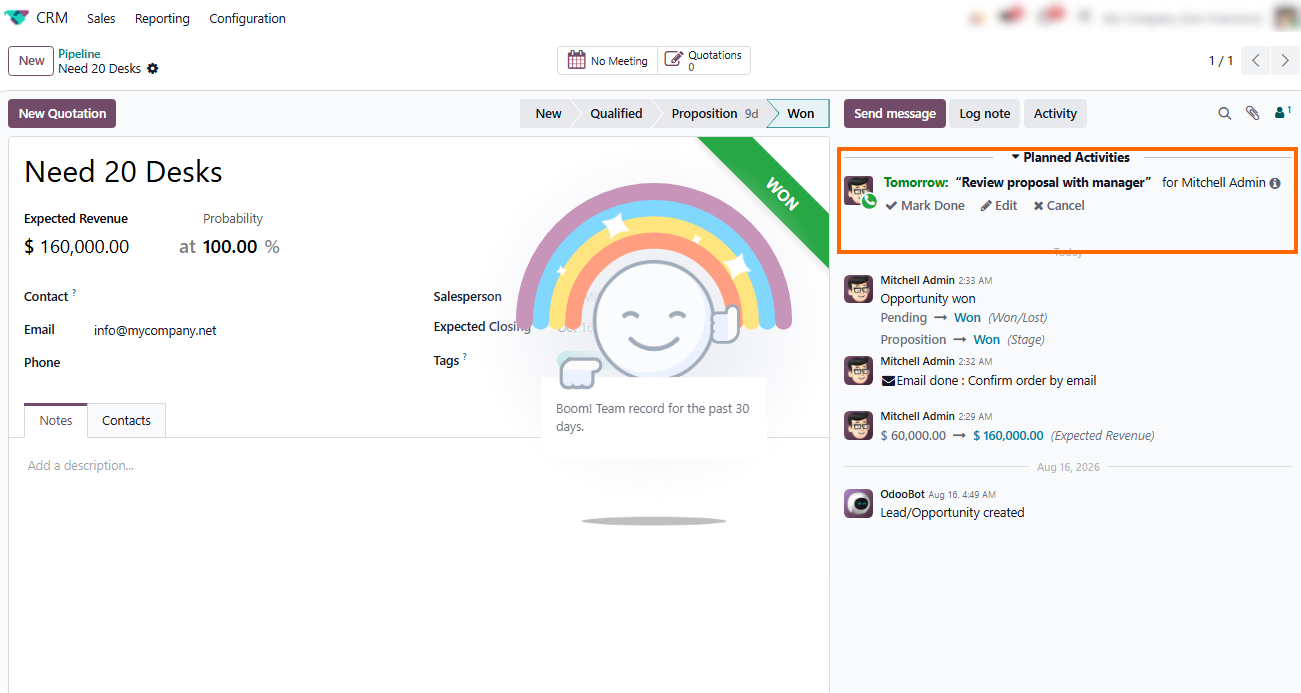
The scheduled activity will appear as a notification for the assignee. If needed, you can easily adjust the event details, due date, or assigned user by clicking Edit.
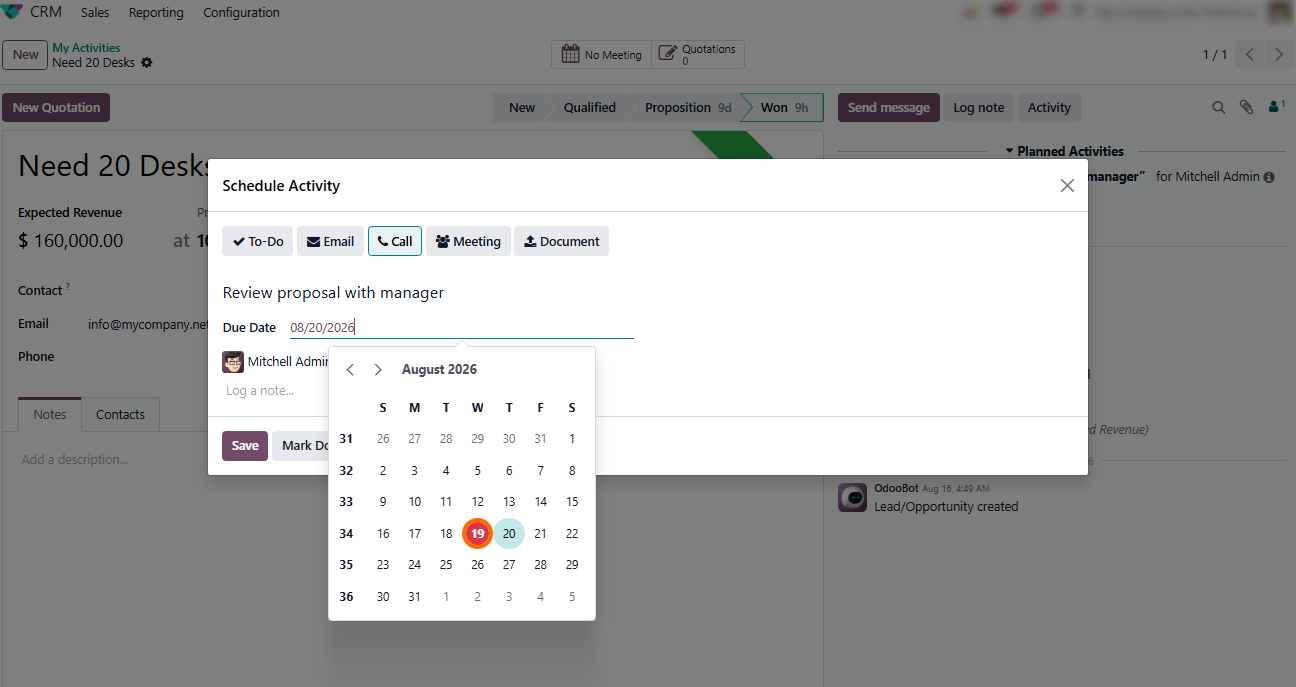
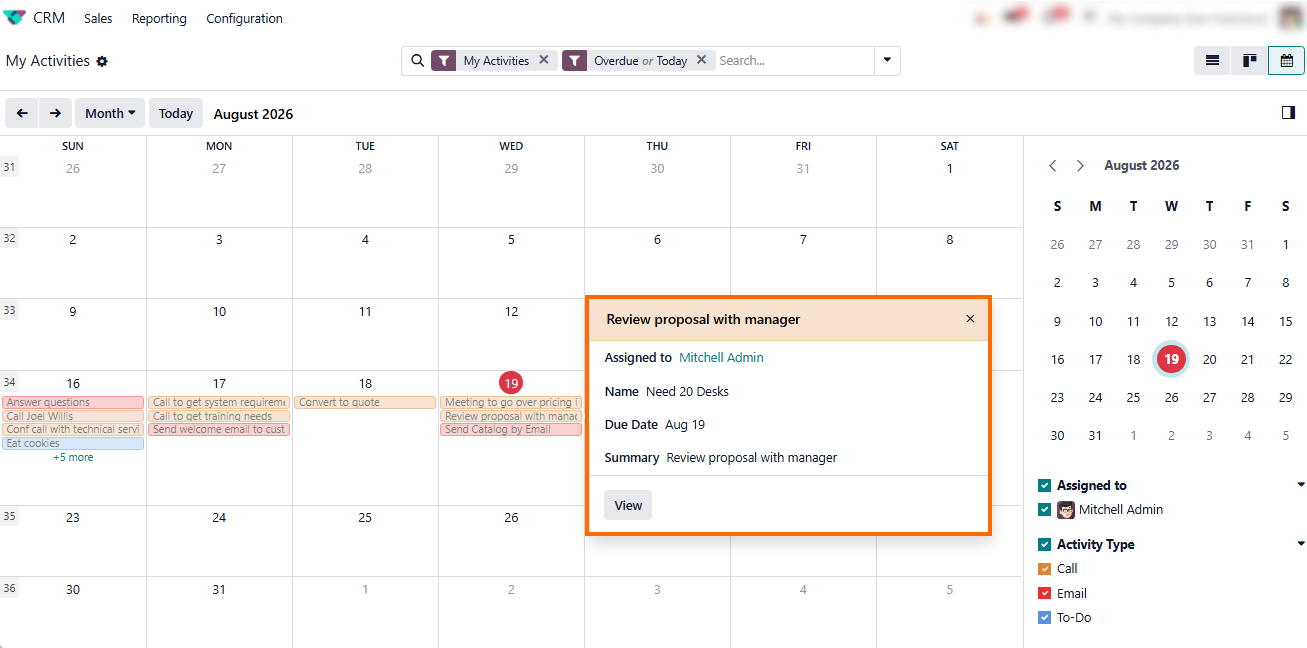
- Finally, all automated tasks appear in the manager's Calendar view, making it easy to track, manage, and execute scheduled activities alongside daily priorities. This keeps automated follow-ups visible and organized in one place.
Extending Odoo Business Automation with Studio
When standard module settings and basic triggers are not enough, Studio provides a low-code environment for customizing business models, adding custom fields, and extending automated workflows directly within Odoo. This allows teams to adapt Odoo automation to changing business requirements without relying on custom development for every adjustment. Studio can also be used to add the fields and workflow elements needed to support more specific automation rules and automated actions. This makes it possible to extend standard automation while keeping the required customization within Odoo. The next step is to use Studio to add the required fields and connect them to an existing automated process.
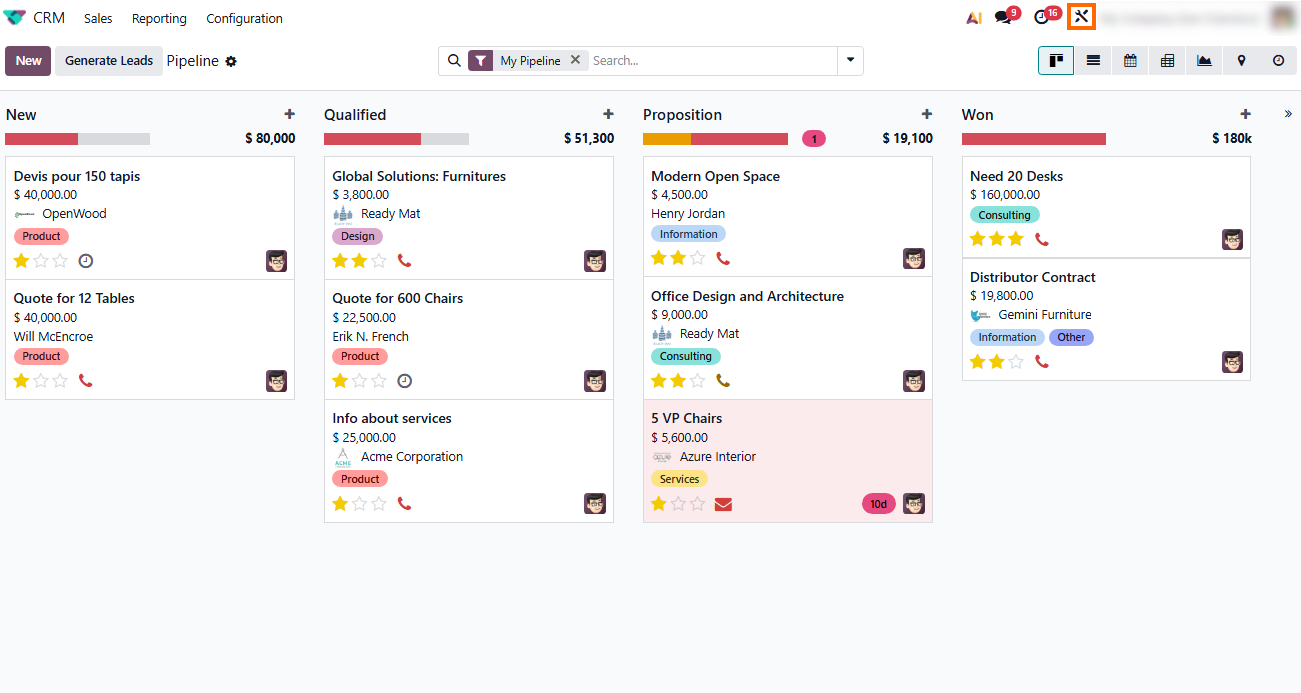
- Click the Studio icon in the top-right corner of any module to open the visual drag-and-drop customization interface. From here, you can modify the current view and add fields or other elements to support the automated workflow.
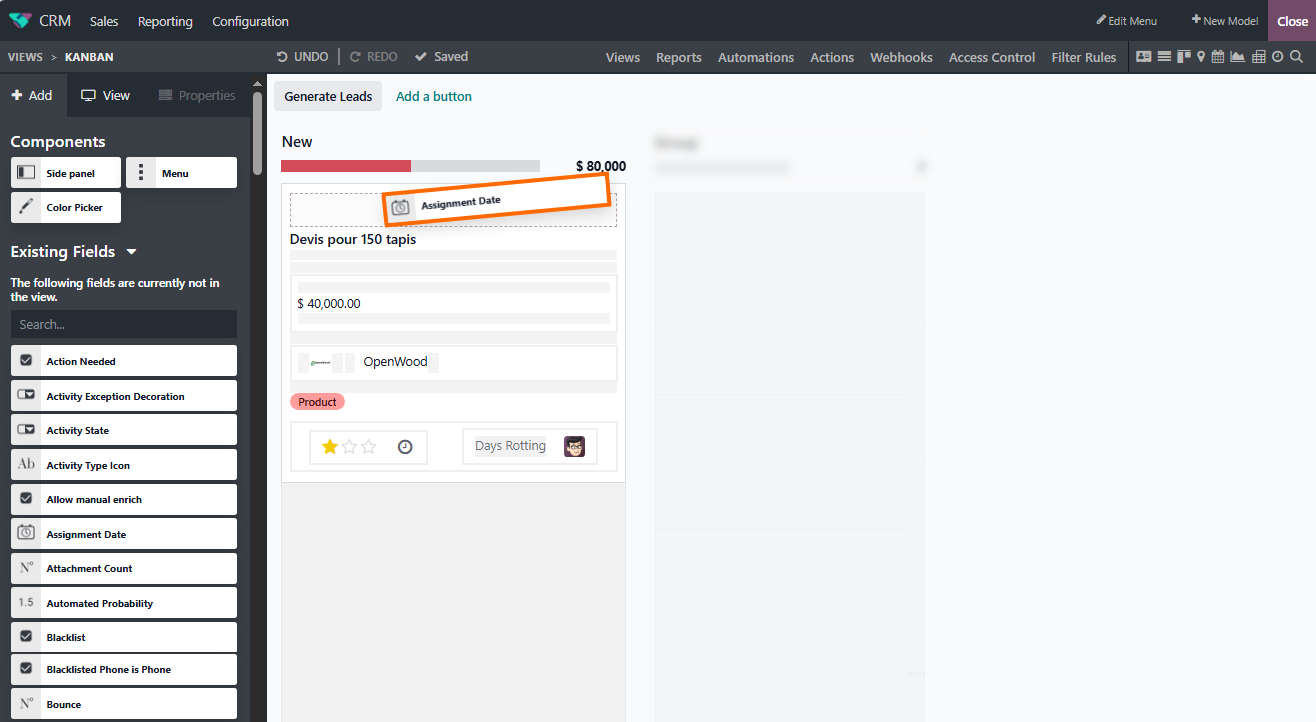
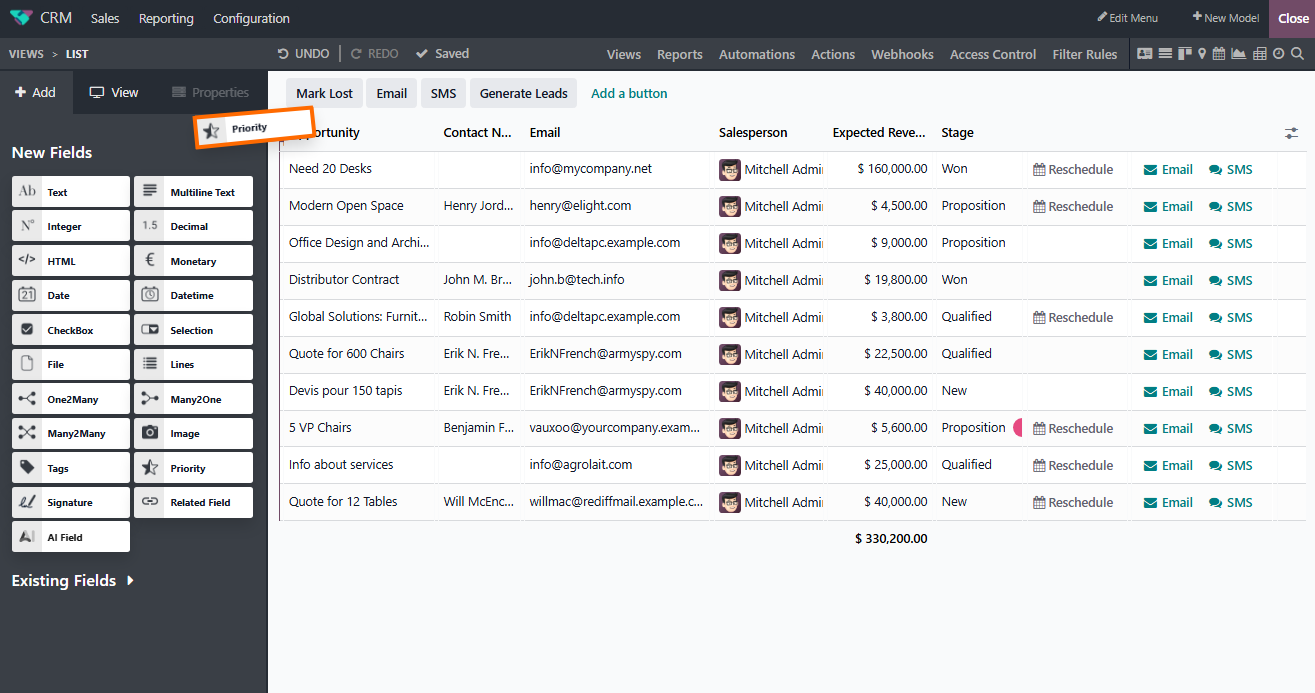
Switch to the + Add tab or choose a field from Existing Fields, then drag and drop the selected element directly onto the Kanban card layout to add it to the view and make the information visible at a glance.
Whether you are working in Kanban or List view, Odoo Studio lets you customize the layout to match the needs of your workflow. Simply drag a widget like Priority from New Fields and drop it directly into your table.
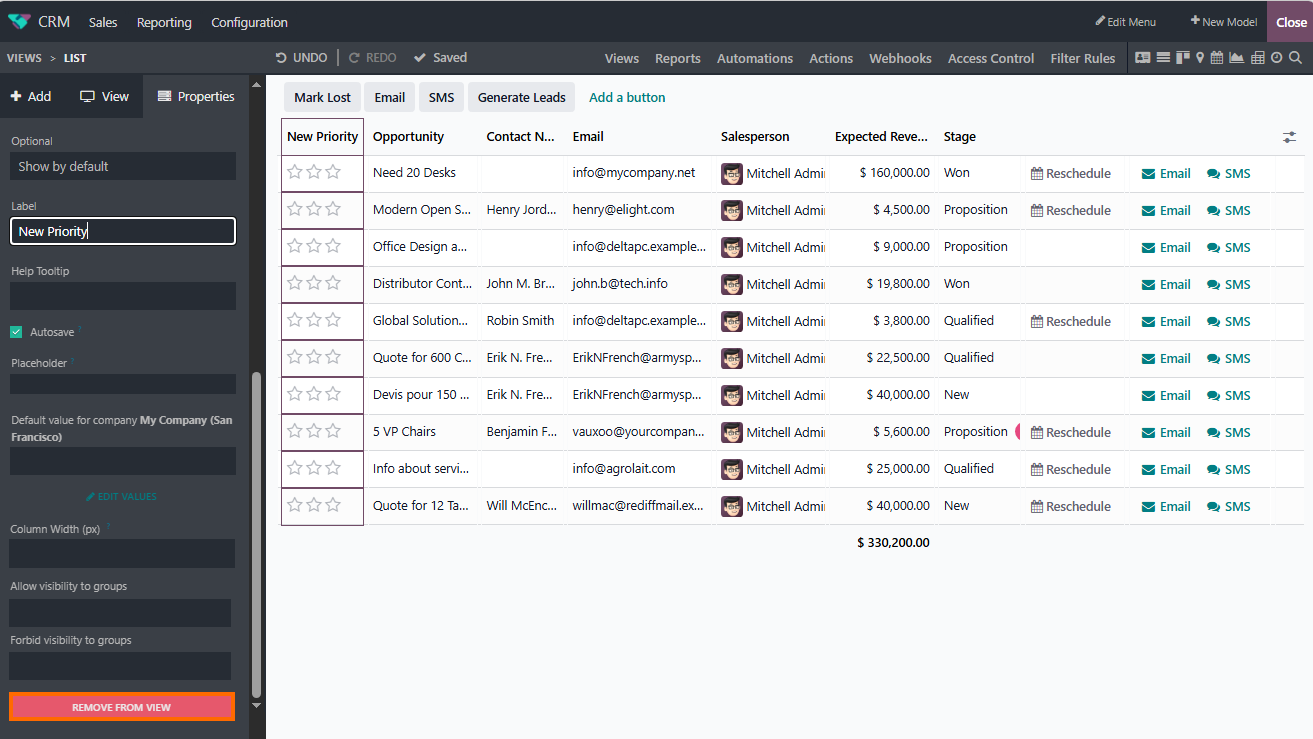
- If a field is added by mistake or no longer needed, you can easily remove it by clicking Remove from view. This approach keeps interface layouts clean and focused strictly on operational data.
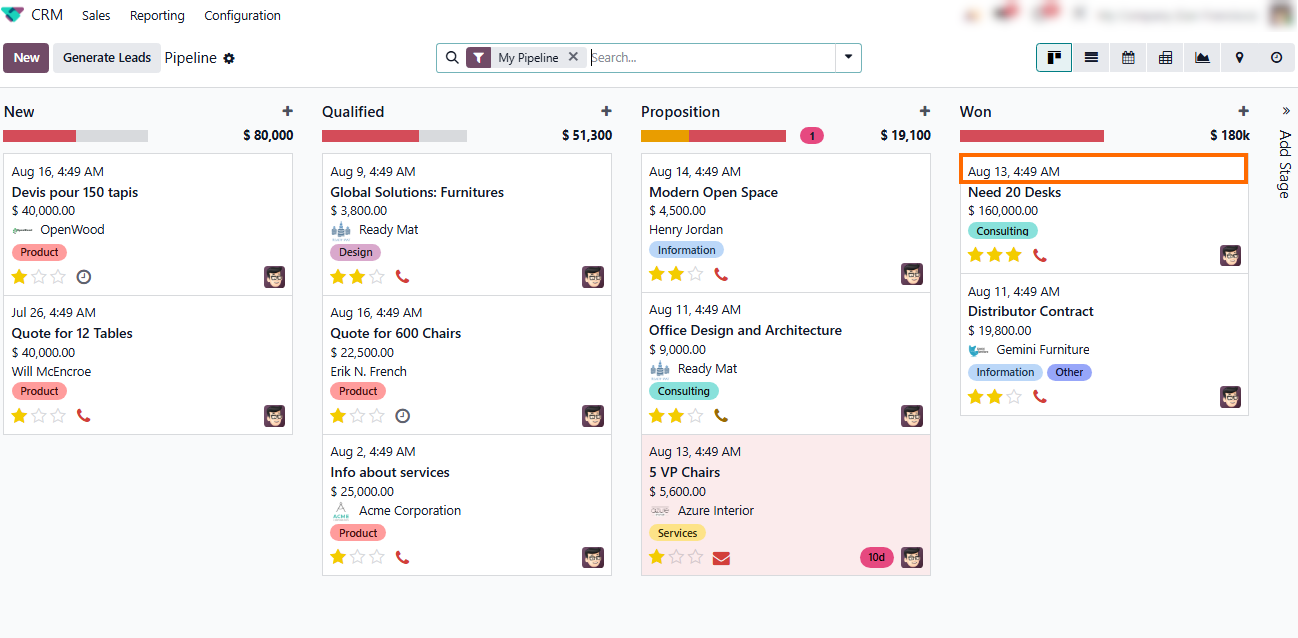
The newly added field then appears on the main CRM pipeline view, giving your sales team instant visibility into essential workflow parameters on the Kanban cards and
making key workflow information easier to track at a glance.
Simplifying Business Processes with Odoo
Automation
Odoo automation reduces manual work by connecting specific triggers with actions that would otherwise require employee input. Starting with native functionality helps keep workflows simple, while Odoo automation rules can handle processes that require more specific conditions or automated actions.
As workflows become more complex, Odoo Studio provides additional flexibility for adapting fields, models, and workflow logic without immediately moving to custom development. This allows Odoo workflow automation to evolve with changing processes while keeping the required changes within Odoo 19.
The right approach depends on the workflow. Use built-in features for straightforward tasks, automation rules for more defined processes, and Studio or custom development when additional logic or integrations are required. Start with the simplest approach that meets your needs, then expand the automation as your processes evolve.