In today’s fast-paced business world, managing cash flow effectively is critical to staying competitive. One powerful tool for achieving this is the post-dated cheque (PDC), a financial instrument that allows businesses to schedule payments for a future date, offering flexibility and security. While Odoo 18 Accounting doesn’t provide a default feature for PDCs, its robust journal system makes it easy to configure and manage these transactions. Whether you’re handling customer invoices or vendor bills, this guide will walk you through the process of setting up and managing PDCs in Odoo Accounting, ensuring your financial operations run smoothly. By the end, you’ll be equipped to leverage PDCs to optimize cash flow, reduce risks, and maintain accurate records.
Understanding Post-Dated Cheques in Odoo Accounting
Before we dive into the technical setup, let’s take a moment to understand what a post-dated cheque is and why it’s a valuable tool for businesses. A post-dated cheque (PDC) is a cheque issued with a future date, meaning it cannot be cashed until that date arrives. This makes PDCs ideal for scenarios where businesses or customers agree on delayed payments, such as installment plans, supplier agreements, or securing future transactions. In industries like retail, manufacturing, or services, PDCs provide an extra layer of financial planning, allowing businesses to align payments with cash flow needs while minimizing the risk of fraud or unauthorized withdrawals.
In Odoo 18, PDCs are managed through a dedicated journal, which acts as a centralized ledger for tracking these transactions. This approach ensures that PDC-related entries are separated from regular bank transactions, making reconciliation and reporting straightforward. Whether you’re a small business owner or a financial manager at a larger enterprise, mastering PDCs in Odoo Accounting can transform how you handle deferred payments. Let’s explore how to set this up step by step.
Setting Up a Journal for Post-Dated Cheques
The foundation of managing PDCs in Odoo Accounting lies in creating a dedicated journal. Journals in Odoo are like specialized ledgers that categorize transactions, ensuring clarity and organization in your financial records. By setting up a journal specifically for PDCs, you can track all post-dated cheque transactions separately, making it easier to monitor and reconcile them when the due date arrives. This setup is particularly useful for businesses that frequently deal with delayed payments, as it prevents confusion with other financial activities.
To create a PDC journal, follow these steps:
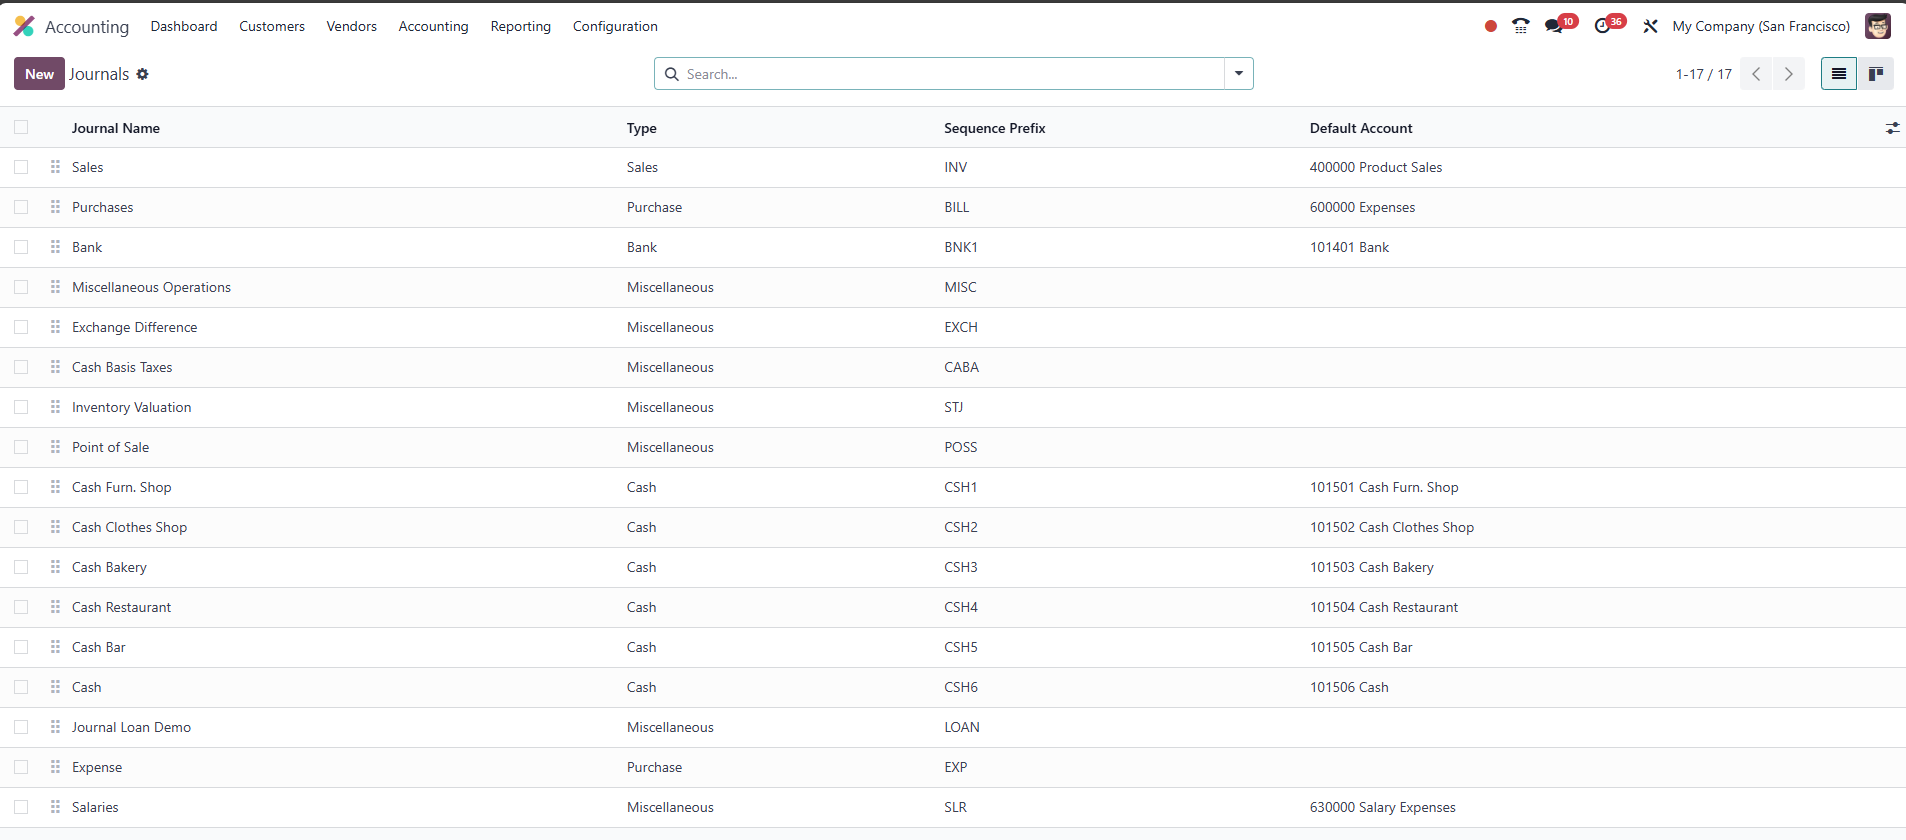
- Navigate to the Accounting module in Odoo 18 and go to the Configuration menu, then select Journals. You’ll see a list of existing journals, including their names, types, shortcodes, and default accounts.
- Click the New button to create a new journal.
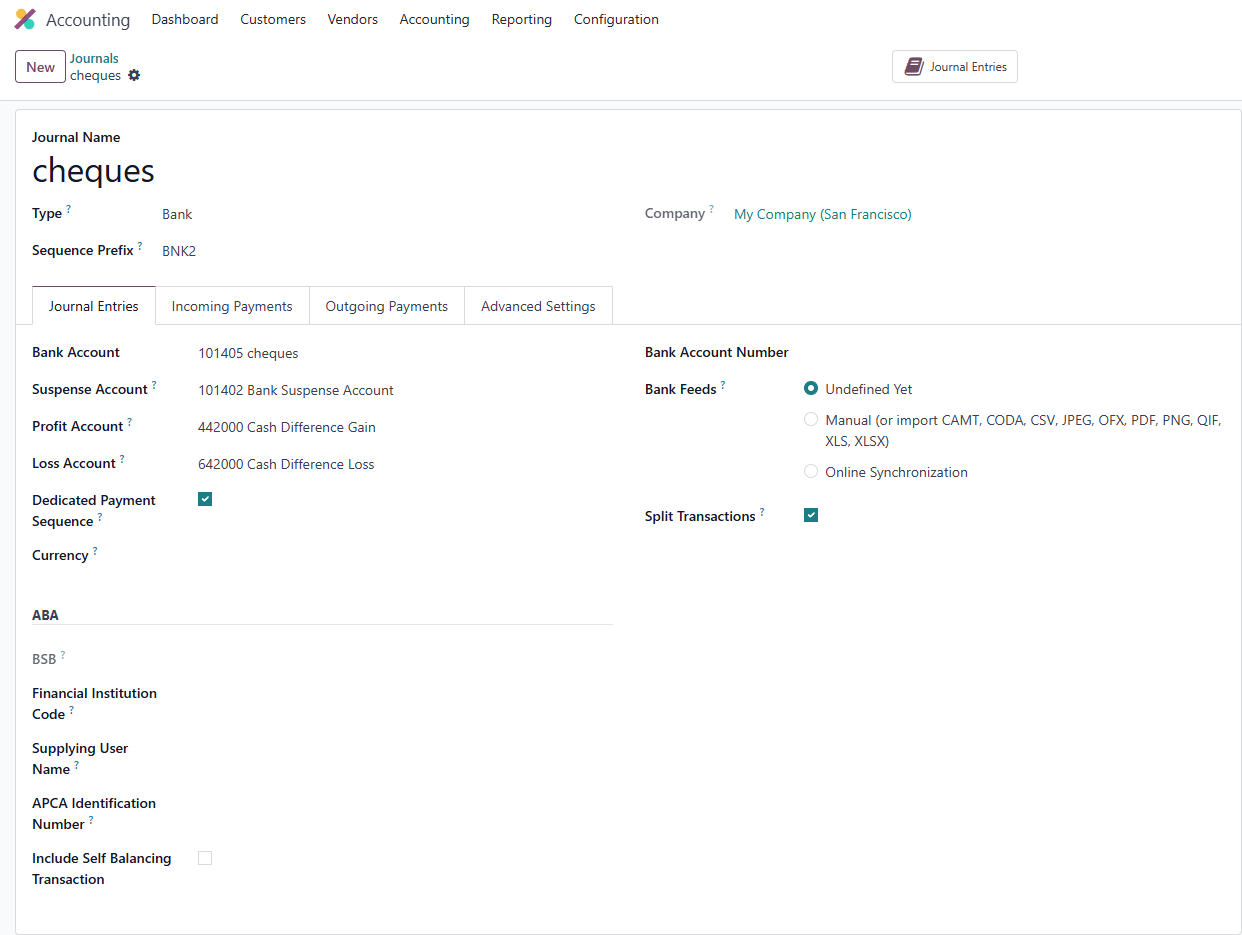
- Set the Journal Name to "Cheques " for easy identification.
- Choose Bank as the journal type, as PDCs are associated with bank accounts.
- In the Bank Account field, select or create a current asset account named "cheques".
- Odoo will automatically assign default Profit (income) and Loss (expense) accounts. Ensure the Suspense Account is set to a current asset account for temporary transactions.
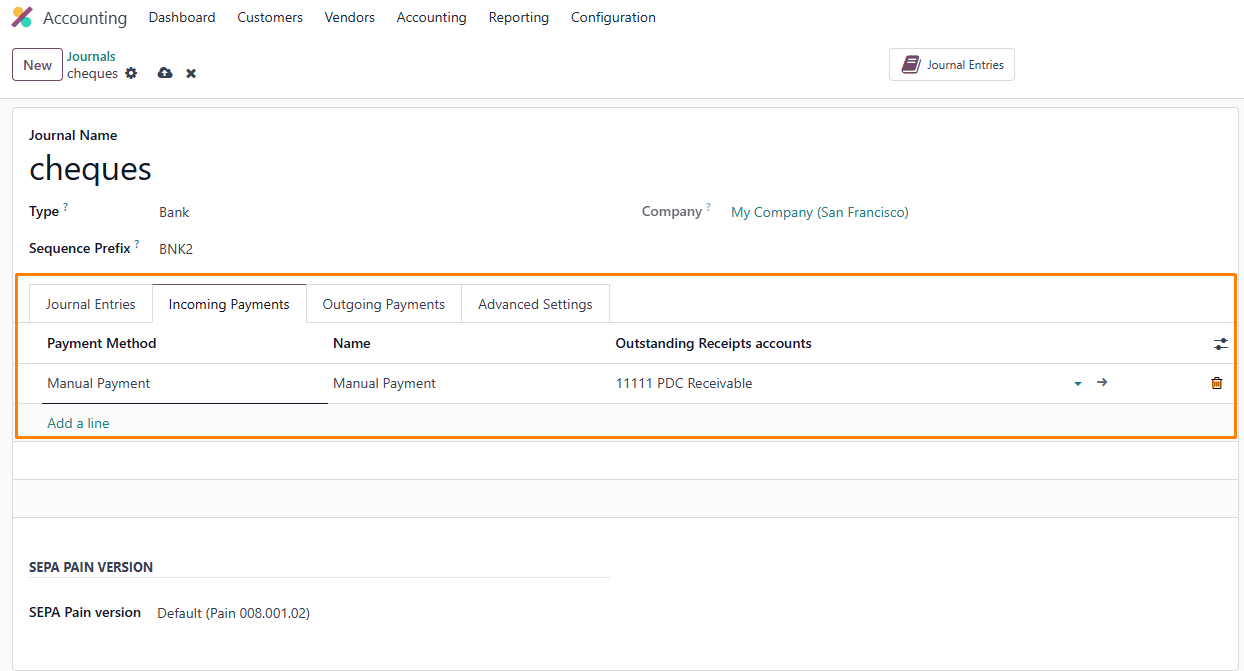
Next, configure the payment settings:
- In the Incoming Payments tab, set the payment method to Manual and assign the Outstanding Receipts Account to "PDC Receivable" (a current asset account).
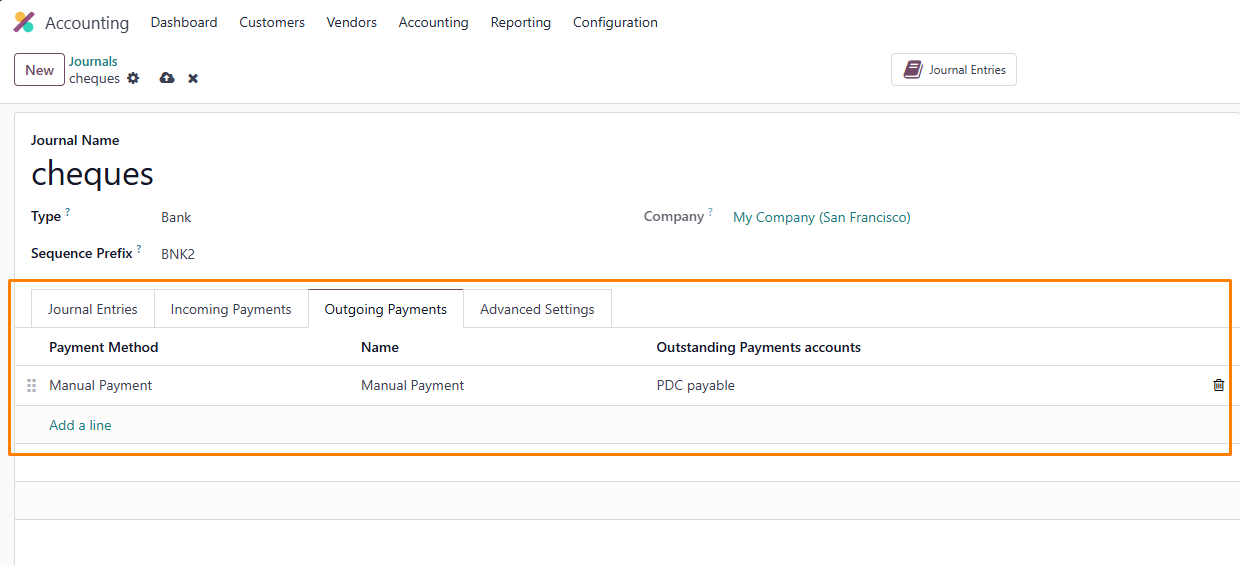
- In the Outgoing Payments tab, set the payment method to Manual and assign the account to "PDC Payable."
This journal setup creates a dedicated space for PDC transactions, ensuring they are tracked accurately and remain separate from other financial activities. It’s a simple yet powerful way to maintain control over your deferred payments.
Handling Post-Dated Cheques for Customer Invoices
Managing PDCs for customer invoices is a common use case for businesses that allow clients to pay with cheques dated for the future. This approach is particularly useful in industries like retail or services, where customers may need time to arrange funds. By configuring Odoo 18 to handle PDCs, you can ensure that these transactions are recorded accurately and reconciled seamlessly when the cheque clears.
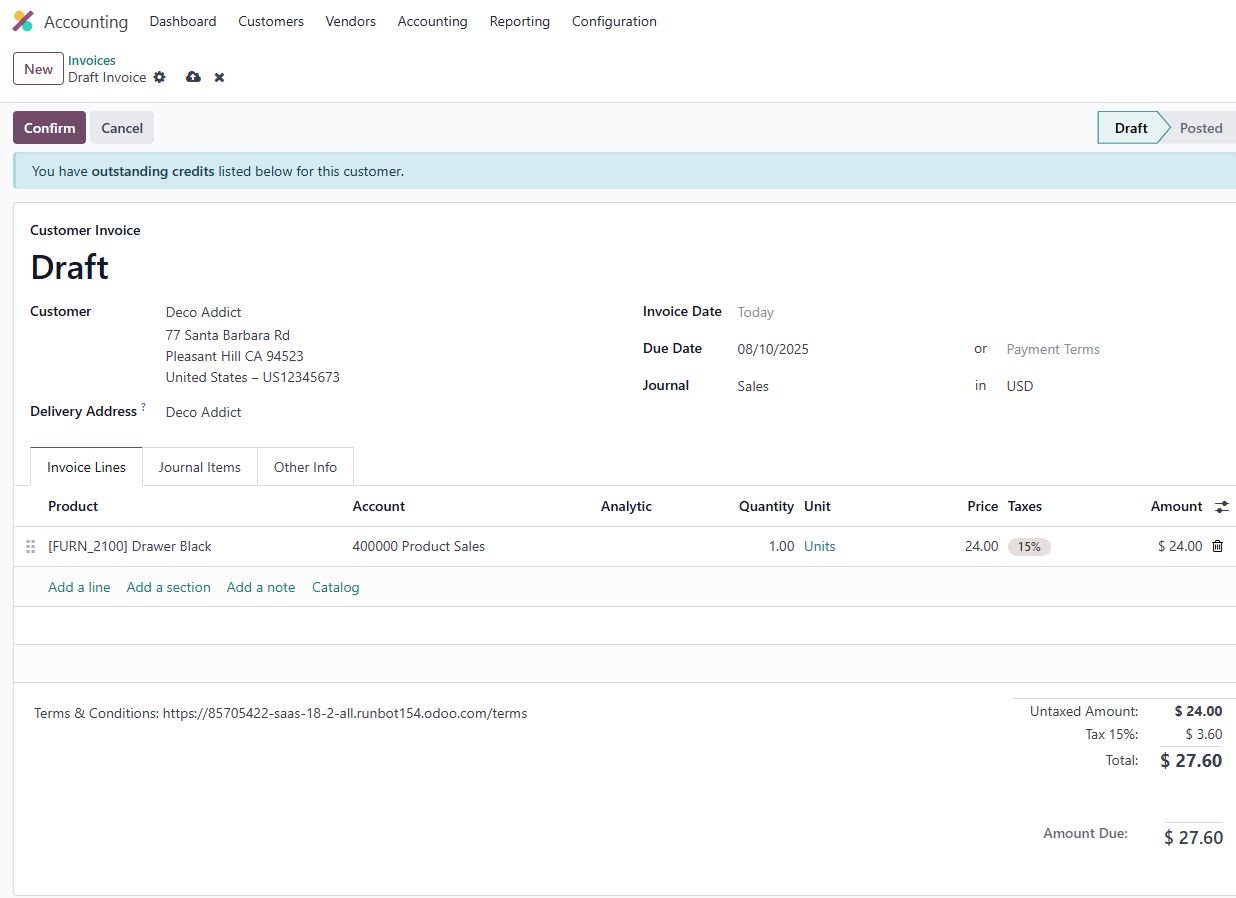
Step 1: Create a Customer Invoice
Start by creating an invoice in the Accounting module under Customer Invoices. Click New to open the invoice form. For example, set the Invoice Date to today and the Due Date to a future date. Add the products or services, specify the customer, and confirm the invoice. Once confirmed, the invoice moves from Draft to Posted status, and you can view the journal entries in the General Ledger under the Reporting menu.
Step 2: Record a PDC Payment
Assume the customer provides a post-dated cheque to settle the invoice. To record this:
- Go to the Customers menu in the Accounting module and select Payments.

- Click New to create a new payment.
- Set the Payment Type to Receive to indicate a customer payment.
- Select the customer, enter the invoice amount, and set the Payment Date to the invoice’s due date.
- Choose the Cheques journal you created.
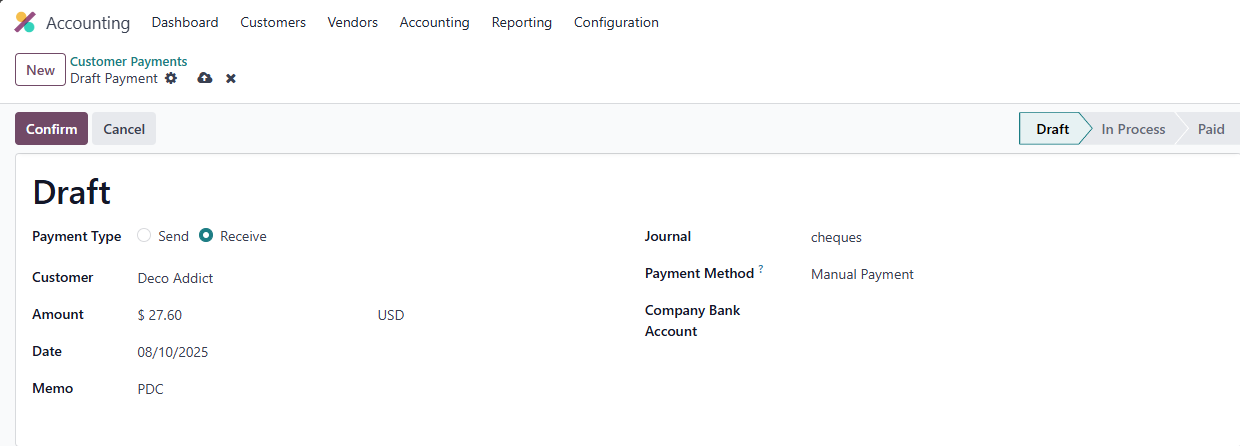
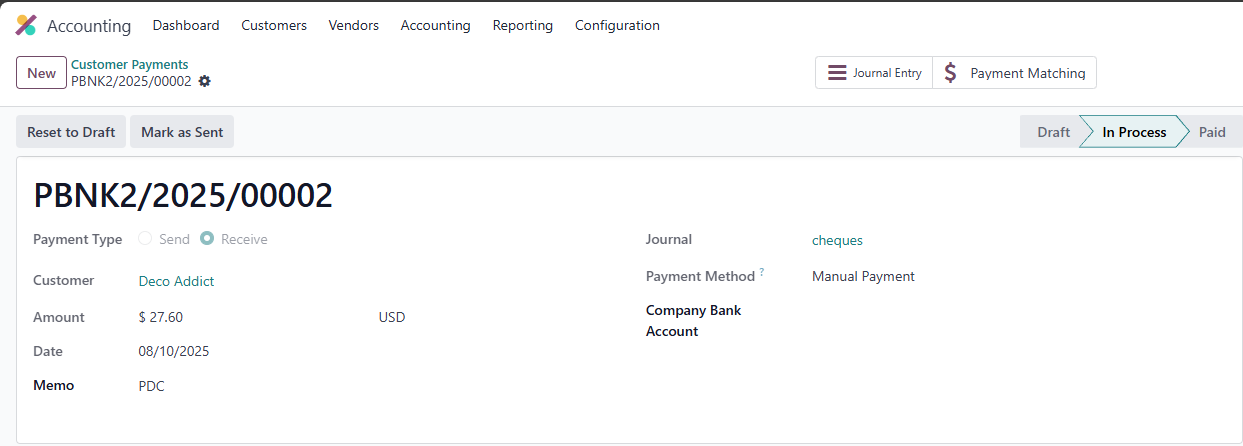
- Click Confirm to move the payment to In Progress, then Validate to set it to Posted. You can view the journal entry in the Journal Entry smart tab.
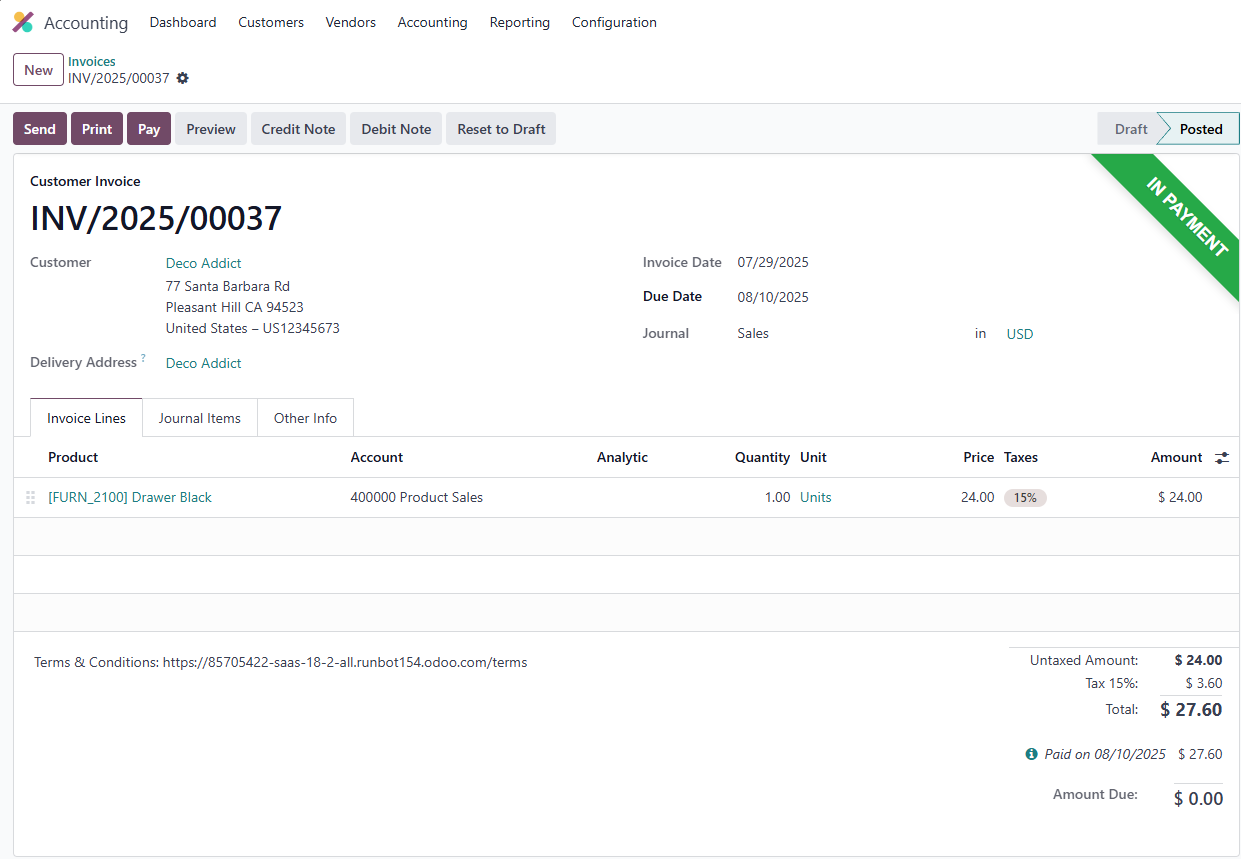
Step 3: Apply the PDC to the Invoice
- Return to the invoice. At the bottom, you’ll see the customer’s Outstanding Credits.
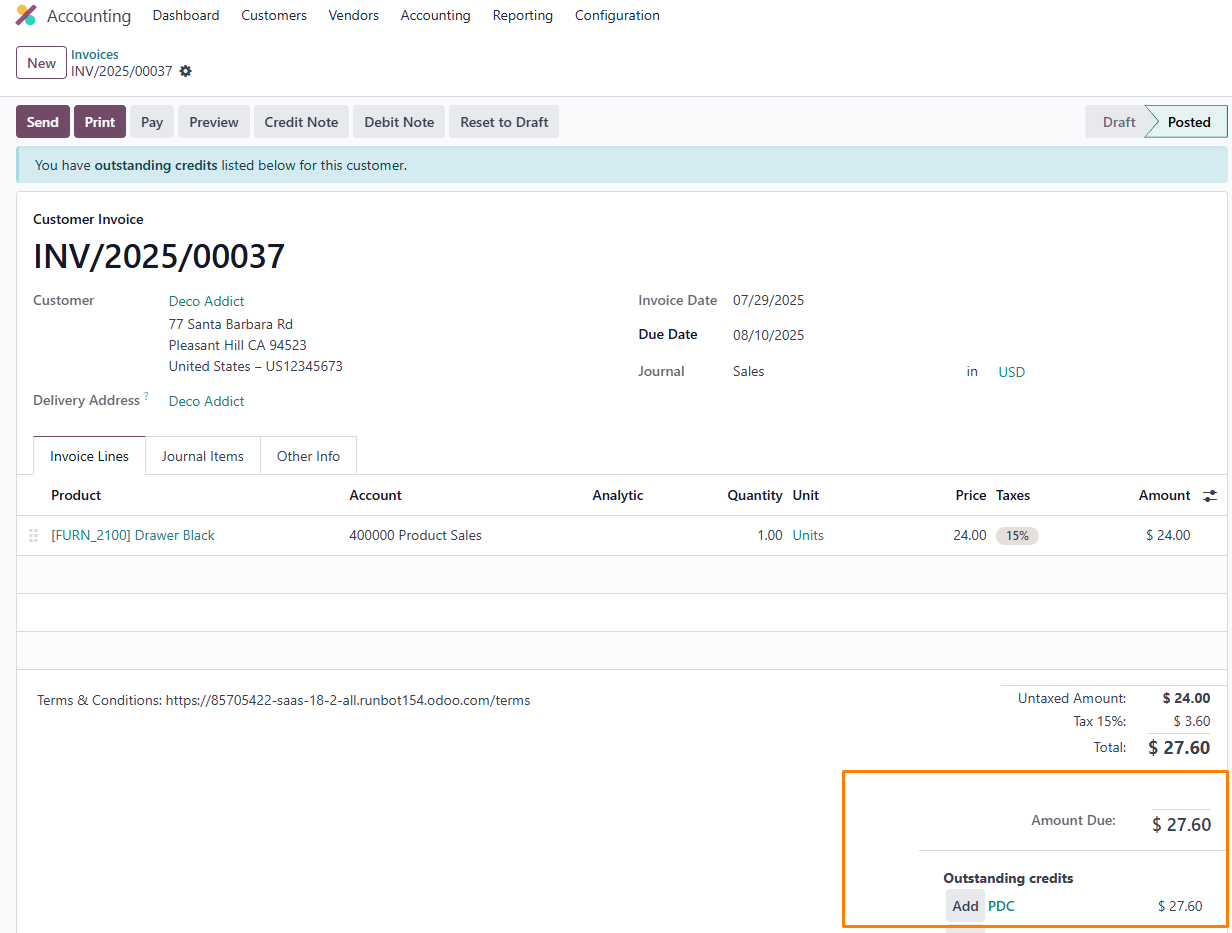
-
Click Add to apply the PDC payment to the
invoice. The invoice status will update to In Payment, indicating that
the payment is pending clearance.
Step 4: Reconcile with Bank Statement
When the cheque’s due date arrives:
- In theAccounting Dashboard, create a new Bank Statement for the customer.
- Enter the payment details, including the amount and the due date.
- Click Validate to confirm the statement.
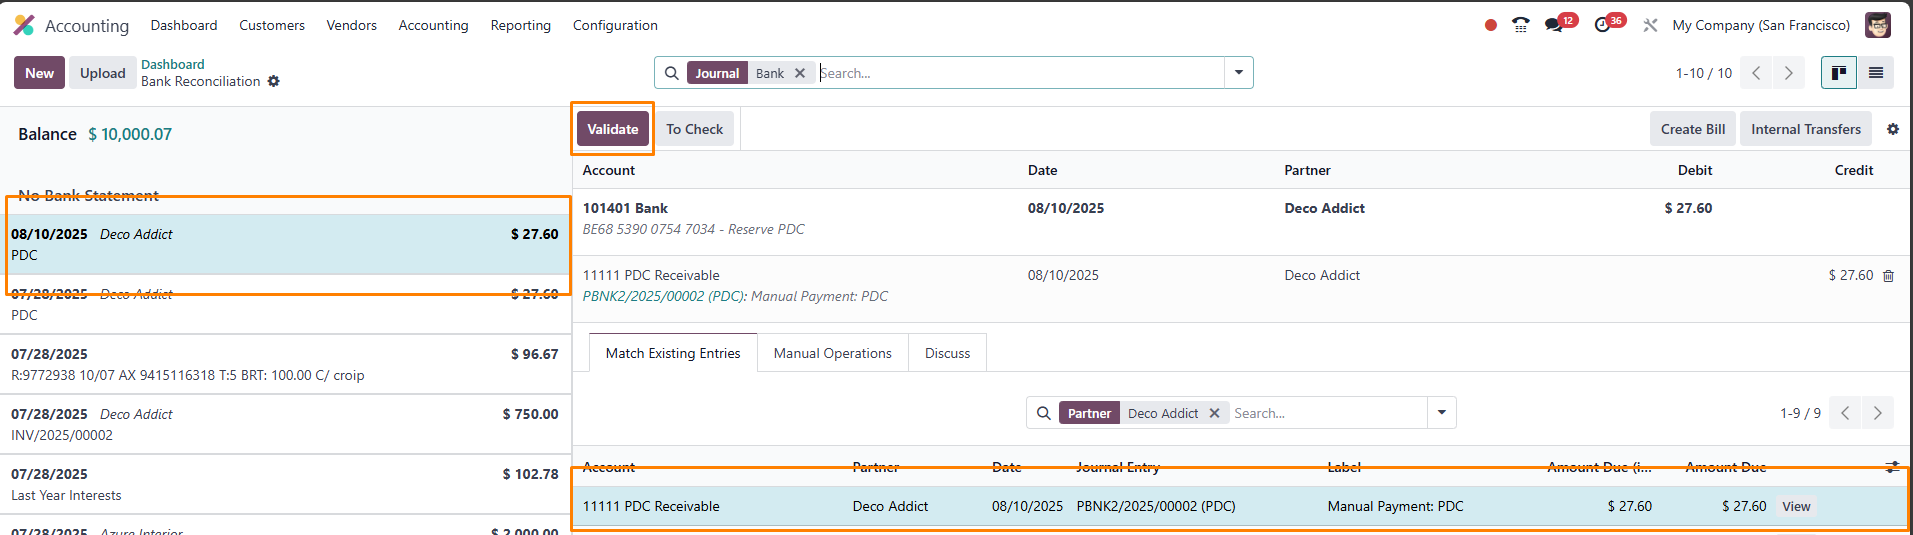
- Check the invoice status—it should now be Paid.
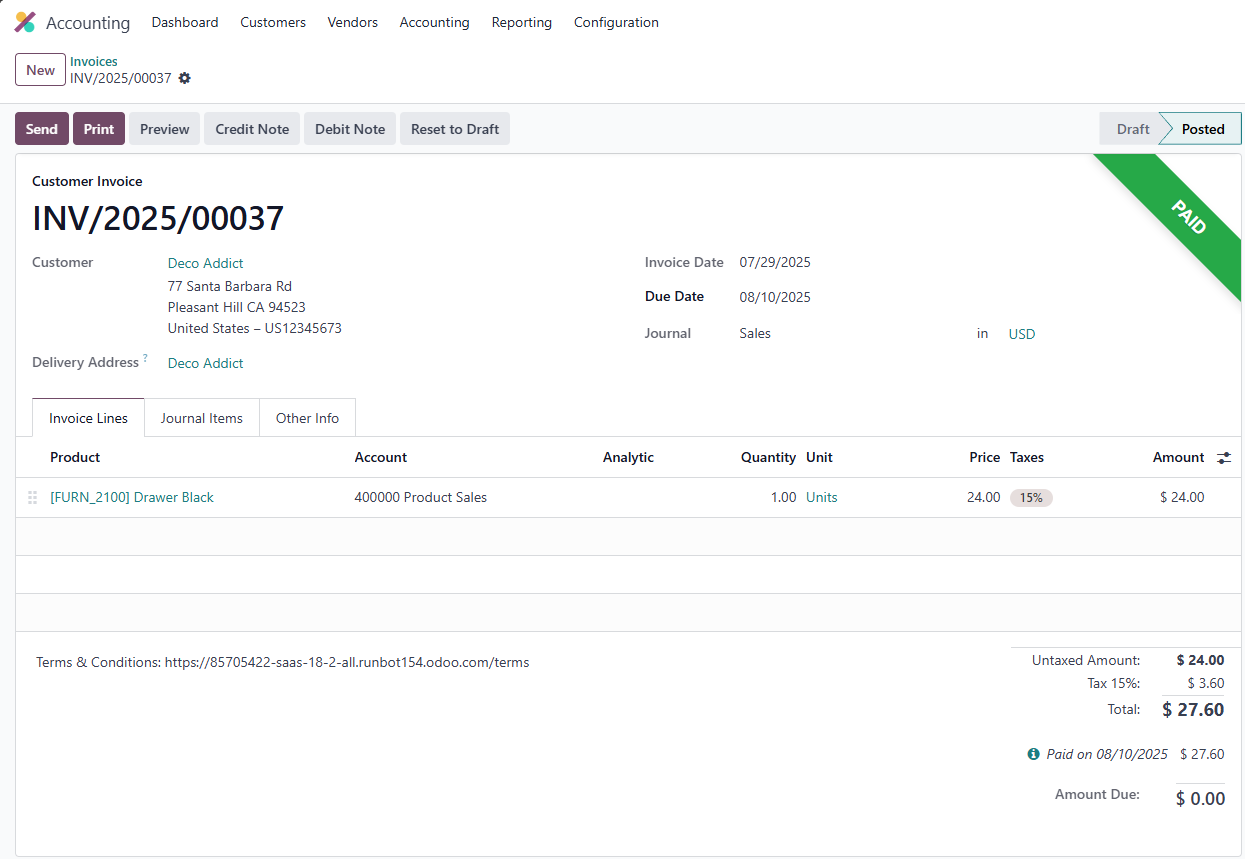
This process ensures that PDCs for customer invoices are tracked and reconciled efficiently, keeping your financial records accurate and up to date.
Managing Post-Dated Cheques for Vendor Bills
PDCs are equally valuable for managing payments to vendors, especially when you need to defer payments to align with your cash flow. This section covers how to handle PDCs for vendor bills in Odoo 18, ensuring you can maintain strong supplier relationships while optimizing your financial planning.
Step 1: Create a Vendor Bill
Navigate to the Vendors menu in the Accounting module and select Bills. Click New to create a bill. Set the Bill Date to today and the Due Date to a future date. Specify the vendor, add the products or services, and confirm the bill.
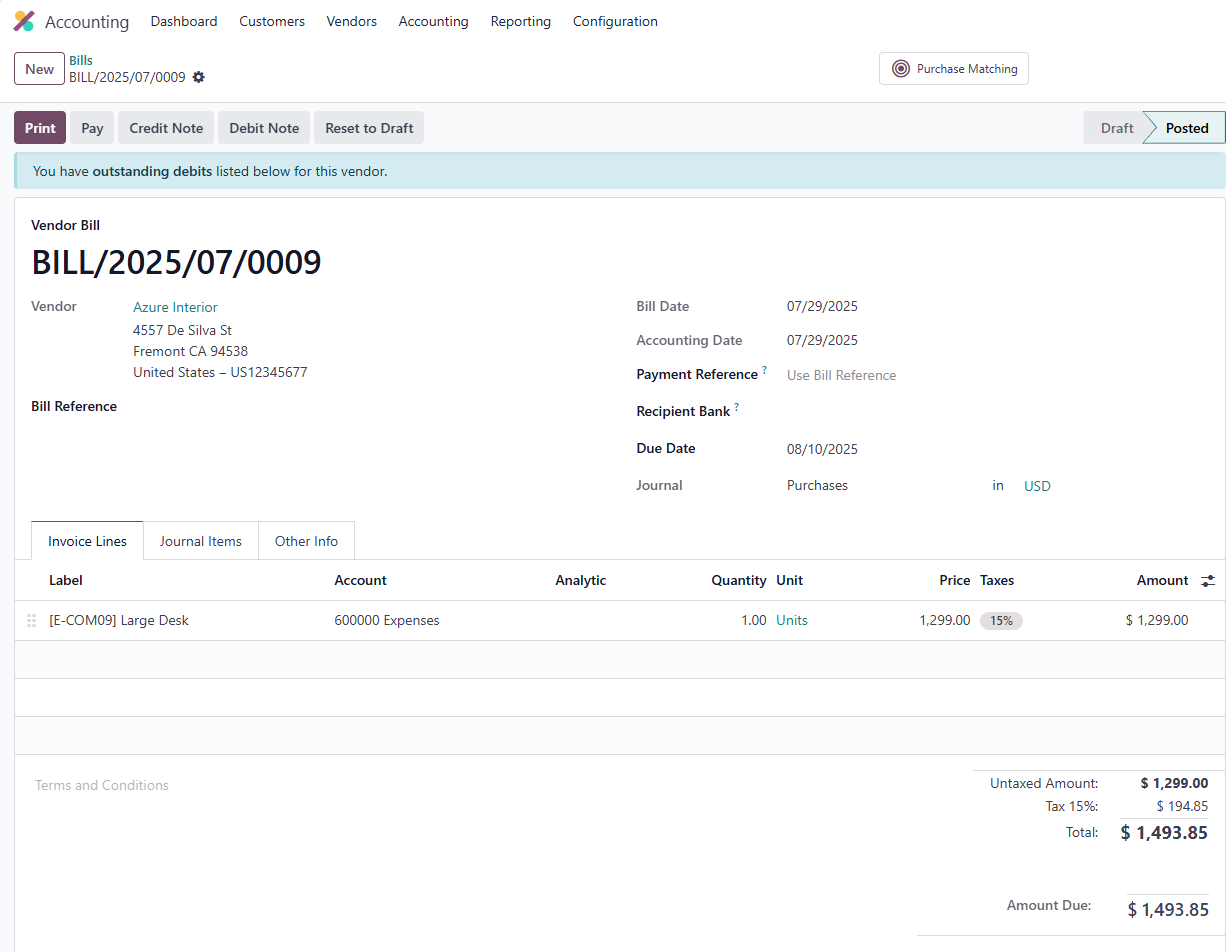
- Once confirmed, the bill moves to Posted status, and journal entries are visible in the Partner Ledger under the Reporting menu.

Step 2: Record a PDC Payment
If you issue a post-dated cheque to the vendor:
- Go to the Vendors menu and select Payments.
- Click New to create a new payment.
- Set the Payment Type to Send to indicate a vendor payment.
- Select the vendor, enter the bill amount, and set the Payment Date to the bill’s due date.
- Choose the Cheques journal.
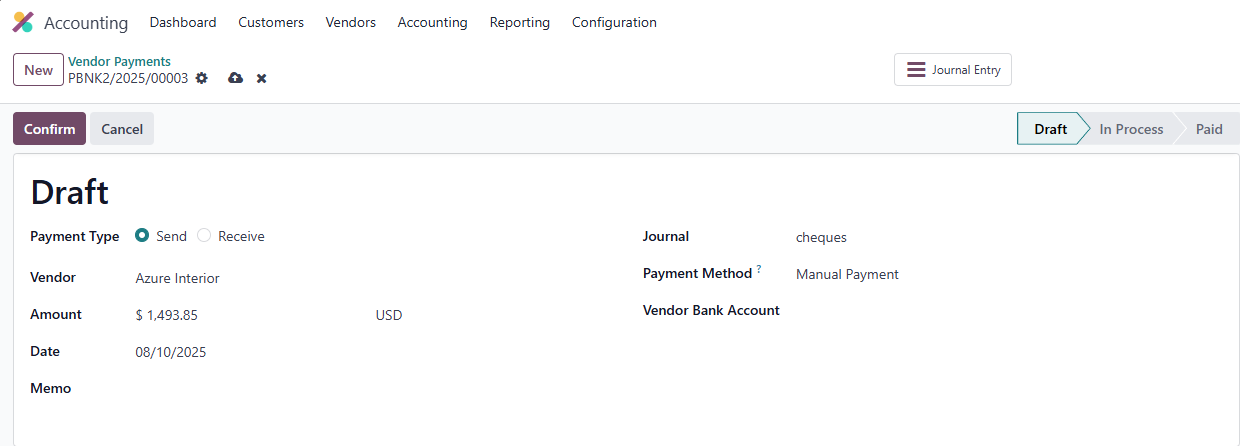
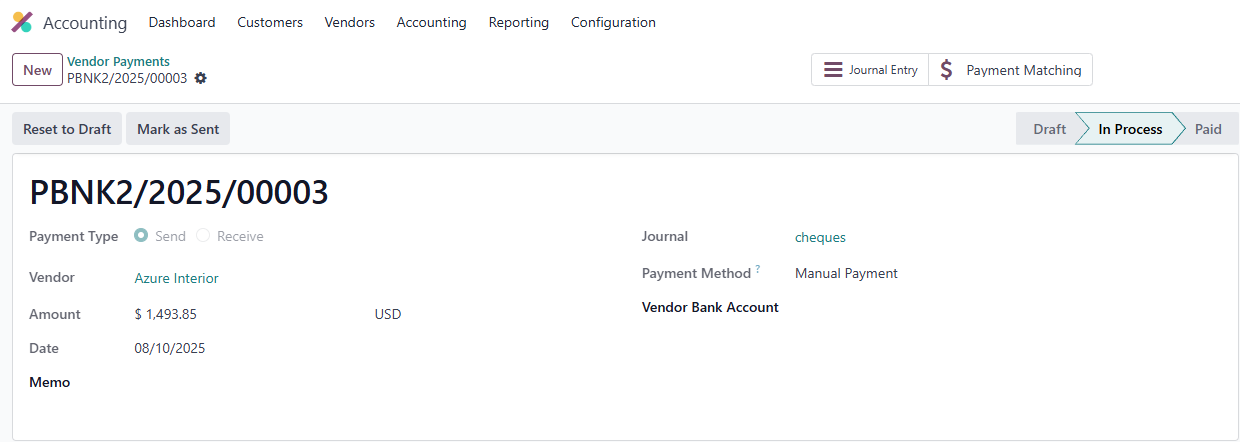
- Click Confirm to move the payment to In Progress, then Validate to set it to Posted. Check the Journal Entry smart tab for the entry.
Step 3: Apply the PDC to the Bill
- Return to the bill. At the bottom, you’ll see the vendor’s Outstanding Debits. Click Add to apply the PDC payment to the bill.
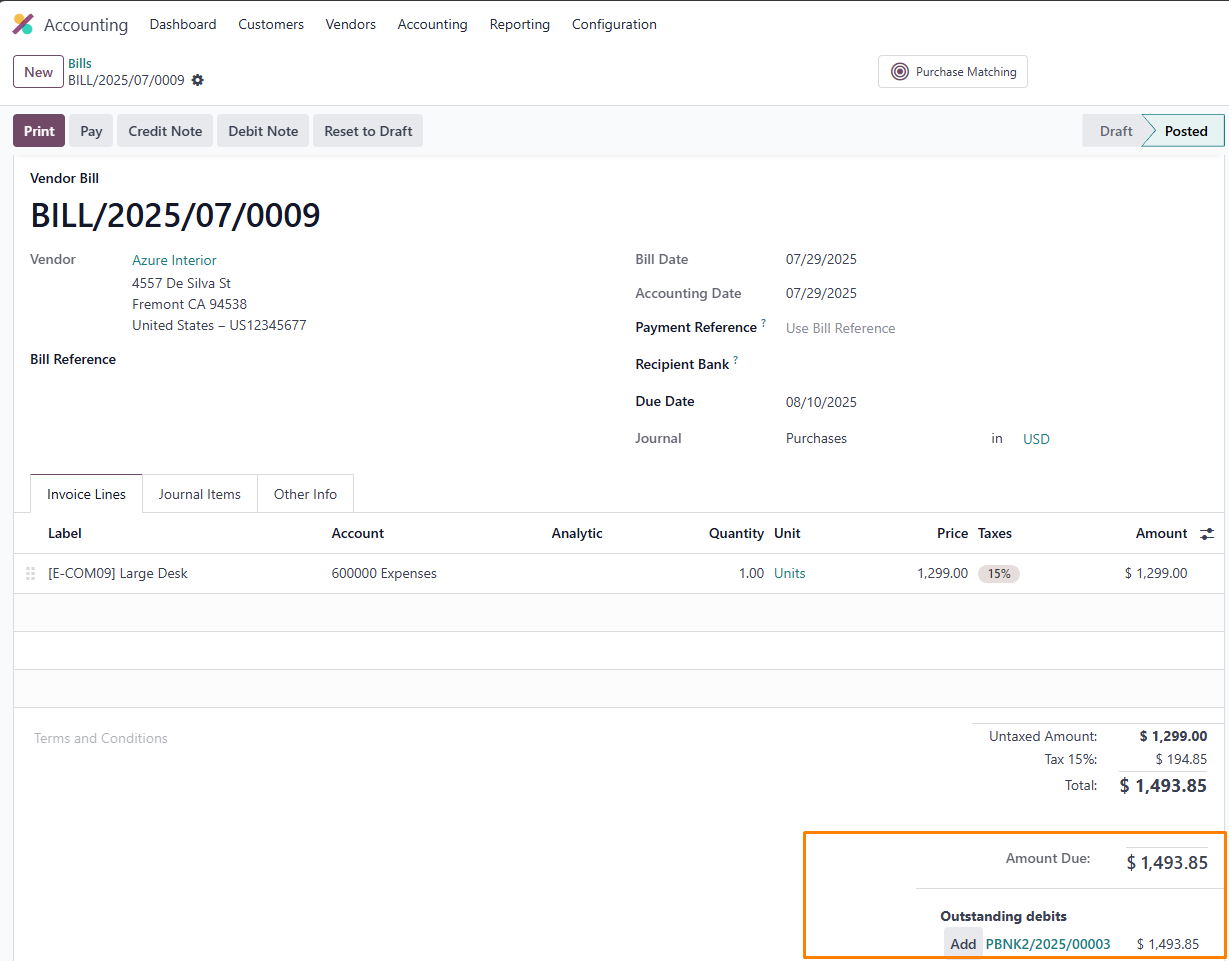
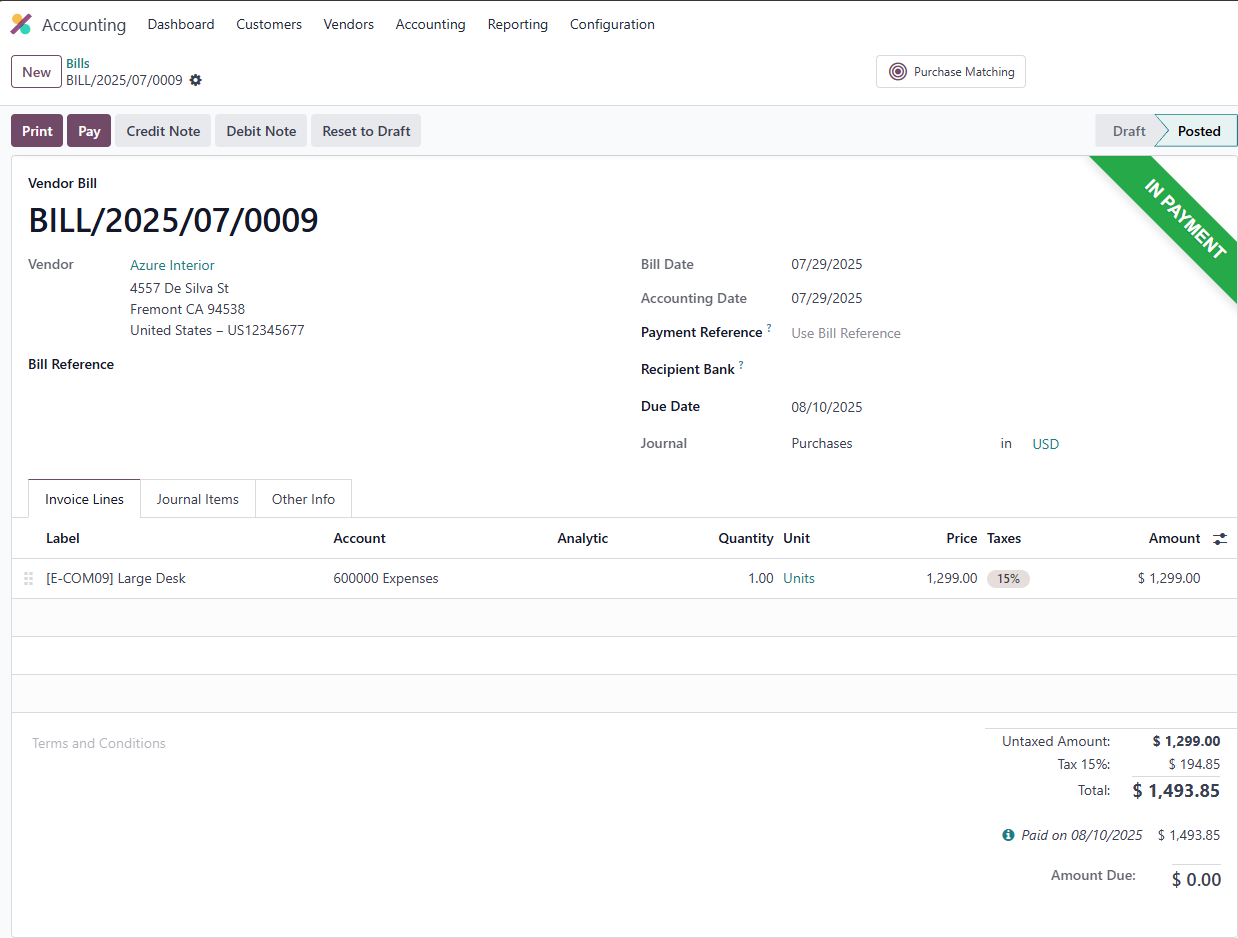
- The bill status will update to In Payment.
Step 4: Reconcile with Bank Statement
When the cheque’s due date arrives:
- In the Accounting Dashboard, create a new Bank Statement for the vendor.
- Enter the payment details, matching the PDC amount and date.
- Click Validate to confirm the statement.
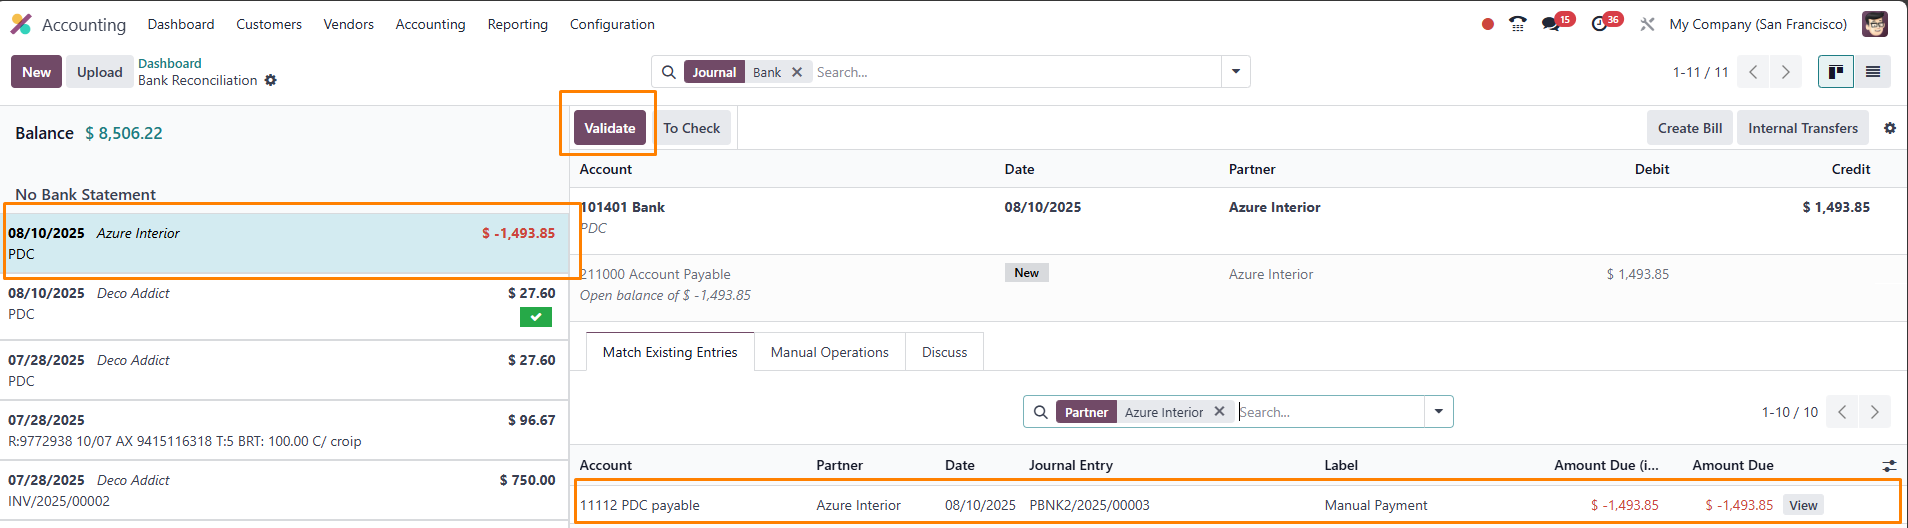
- Check the bill status—it should now be Paid.
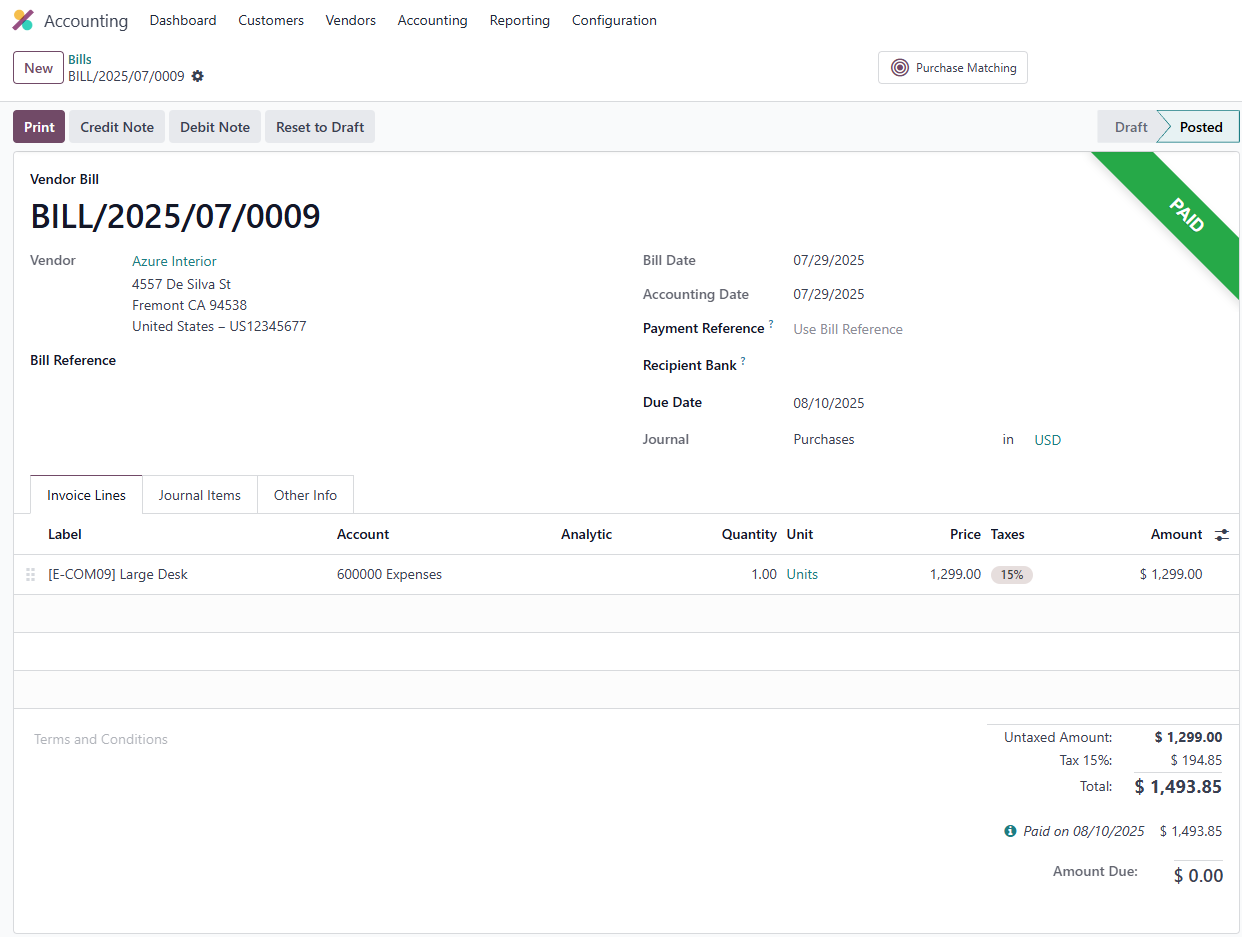
- This process ensures that vendor payments via PDCs are recorded and reconciled accurately, maintaining trust with suppliers and keeping your accounts in order.
Why Post-Dated Cheques Are a Game-Changer in Odoo Accounting
Post-dated cheques offer numerous benefits for businesses using Odoo Accounting. They allow you to schedule payments for a future date, aligning with your cash flow needs and avoiding immediate cash outflows. This is particularly valuable for small and medium-sized businesses that need to balance incoming and outgoing payments carefully. Additionally, PDCs provide a layer of security, as they cannot be cashed until the specified date, reducing the risk of unauthorized transactions.
By configuring a dedicated PDC journal in Odoo 18, you can streamline the tracking and reconciliation of these transactions, ensuring your financial records are accurate and organized. This setup is especially useful for businesses in industries like retail, manufacturing, or services, where delayed payments are common. With Odoo’s flexible journal system, you can customize PDC management to fit your specific needs, making it a powerful tool for financial efficiency.
Whether you’re a small business owner looking to simplify accounting or a financial manager at a larger enterprise, mastering PDCs in Odoo Accounting can save time, reduce errors, and enhance your financial strategy. Follow the steps in this guide to set up and manage PDCs like a pro, and explore Odoo’s other features to take your business to the next level.
For more Odoo Accounting tips and tutorials, subscribe to our blog or reach out to our team for expert support. Start optimizing your financial processes today!