Every business needs to grow and to do this, it needs to work on attracting new customers, brand awareness, maintaining audience interest, and many other functions. This is what marketing is for, but in the modern world all processes are digitalized and go online, this happens with marketing tools too. One of the modern and effective ways of interacting with the audience is Email marketing.
How to Choose an Email Marketing Tool?
There are many tools with which you can send emails to a specific audience, but today we will talk about one of the most convenient and popular tools for Email marketing – Odoo.
The Odoo service includes all the functionality you need for sending emails and marketing, which is convenient because you do not have to use anything extra. Some of the key features you will need include:
- Ready-made letter templates, with the ability to edit, as well as the ability to create your own templates.
- Create an unlimited number of mailing lists with an unlimited number of contacts in each of them.
- Detailed analytics of all stages of mailing, a large number of different filters, and the possibility of segmentation.
- A/B testing of mailings, with which you can compare the effectiveness of email templates and audiences and choose the best strategy.
- Dedicated server with high performance, which allows you to quickly send your newsletter to a large number of recipients.
- Ability to integrate with other modules and services, such as CRM.
How to Create and Set Up an Email Newsletter
Let’s see in practice how Email newsletters work in Odoo. As we said above, this service is quite simple and easy to use, and at the same time, it has wide functionality for EMail marketing. Let’s imagine that you have already decided on the audience, topic, and content of the newsletter and you just have to set it up in Odoo.
Creating a Letter Template for an EMail Campaign in Odoo
The first step is to create the mailing body and there are several ways – take a ready-made template or customize your own. Odoo gives you the opportunity to use a large number of ready-made templates for any event or news. Therefore, if you want to simplify the process as much as possible, you can use them, or slightly modify them, for example, by adding your logo.
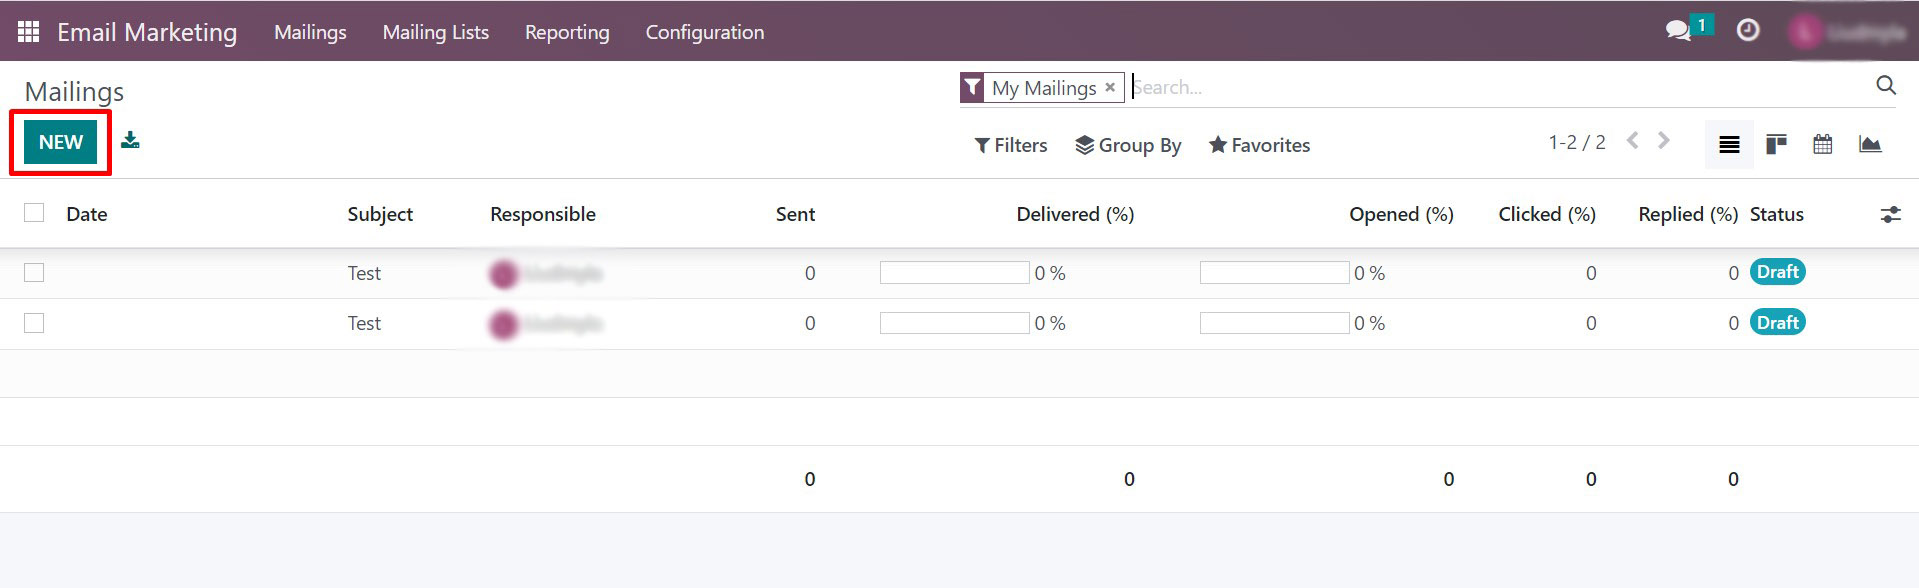
Click the button New in the upper left part of the screen to create a new newsletter:
After that, we get to the template selection menu for mailing. Odoo offers us a choice of:
- Plain Text
- Start From Scratch
- Welcome Message
- Event Promo
- Blogging
- Coupon Code
- Newsletter
- Big News
- Promotion Program
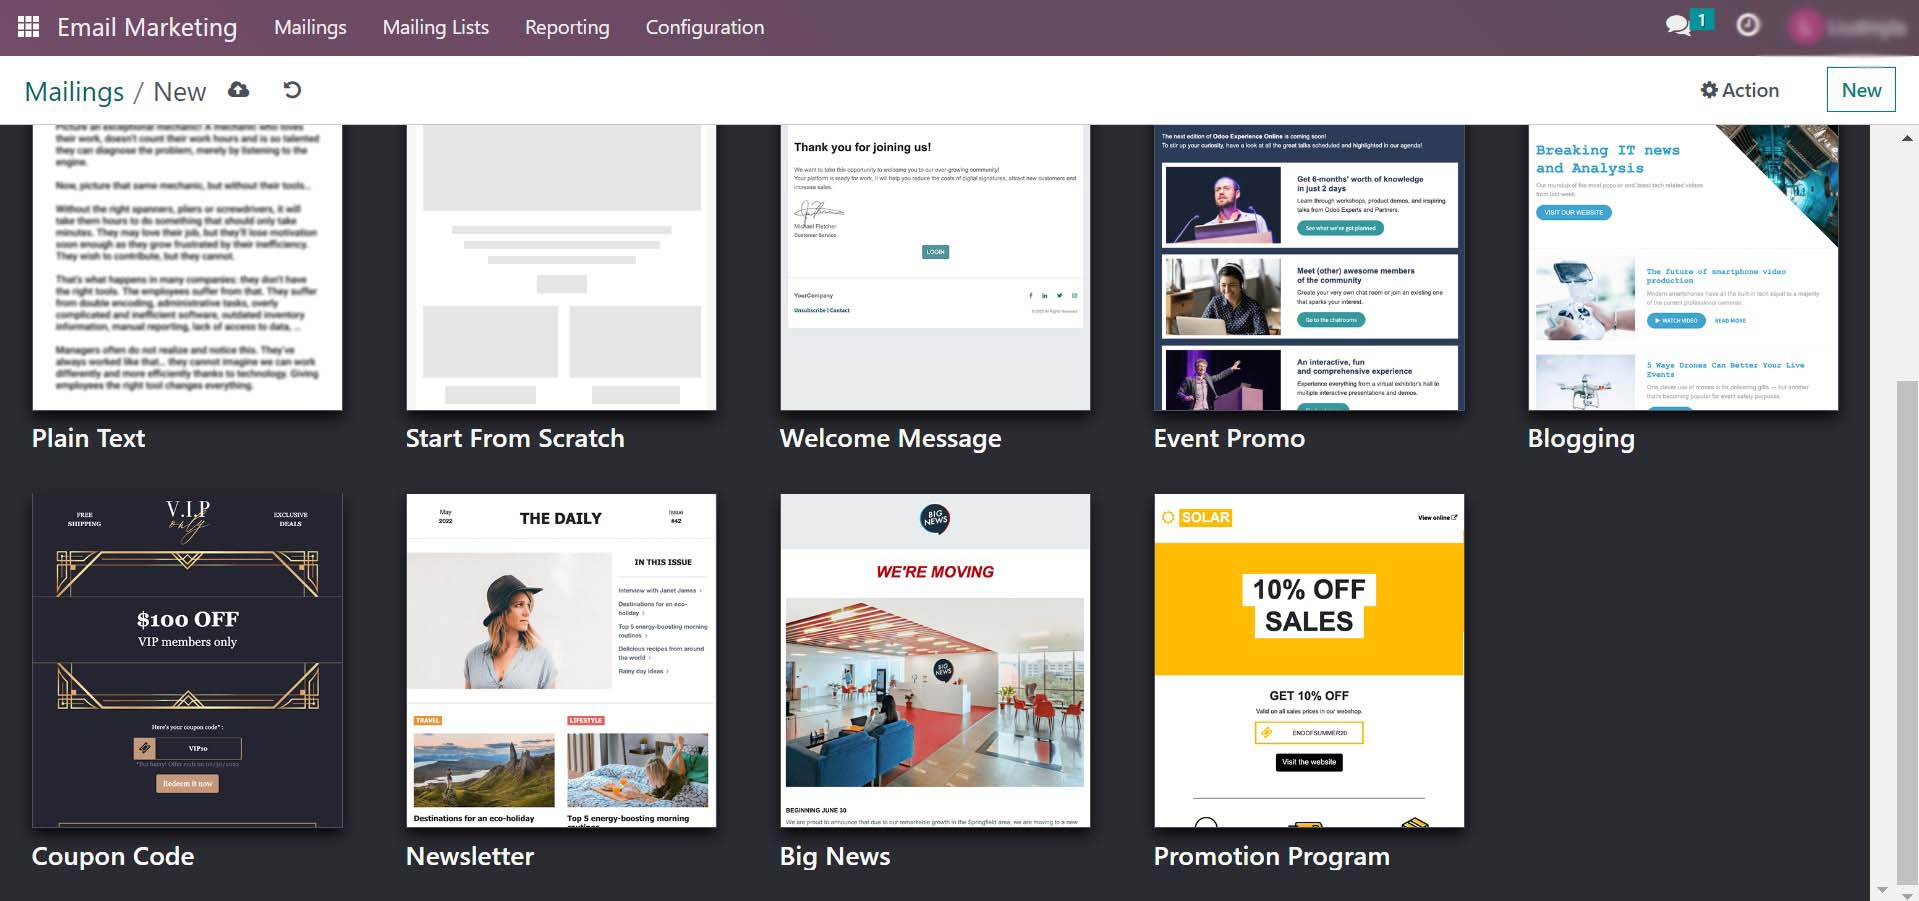
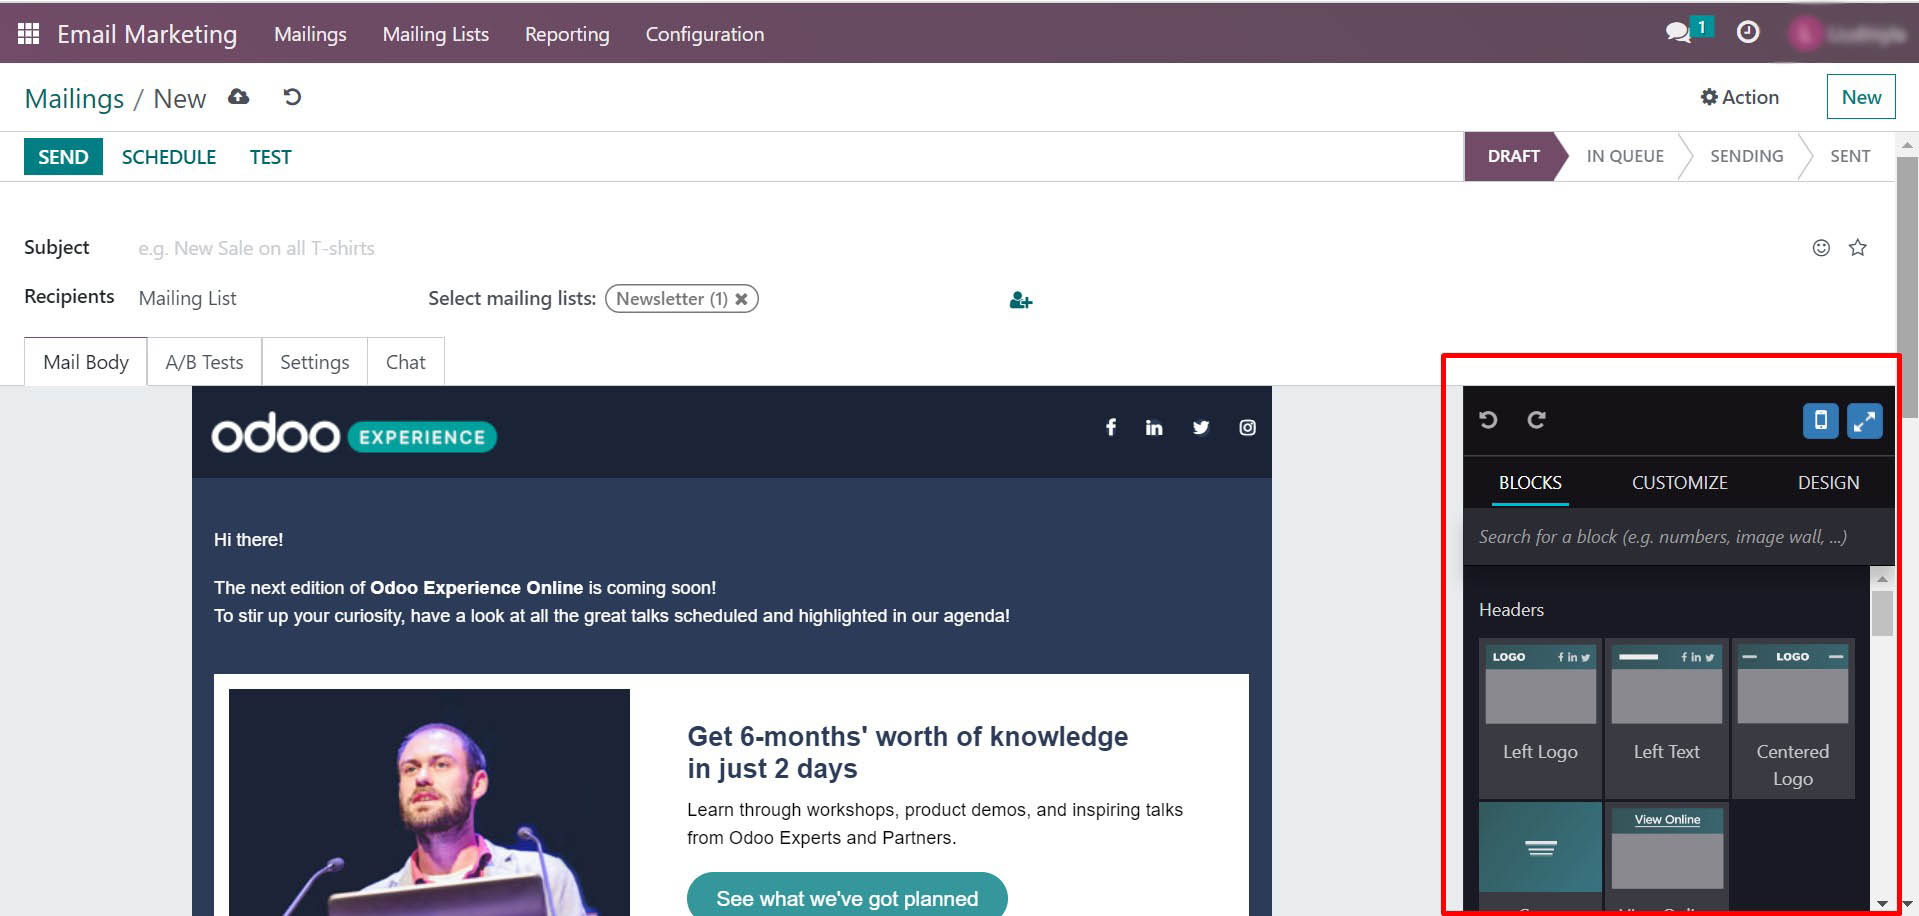
We chose the Event Promo template, this is how it looks in the standard form, let’s try to customize and change it. To do this, there is a panel with editing tools on the right, in which we see 3 sections:
- Blocks
- Customise
- Design
Blocks allows you to add new blocks to your template – header, footer, separator, call to action, and many more. With the help of this section, you can assemble any of your own letter templates as a constructor.
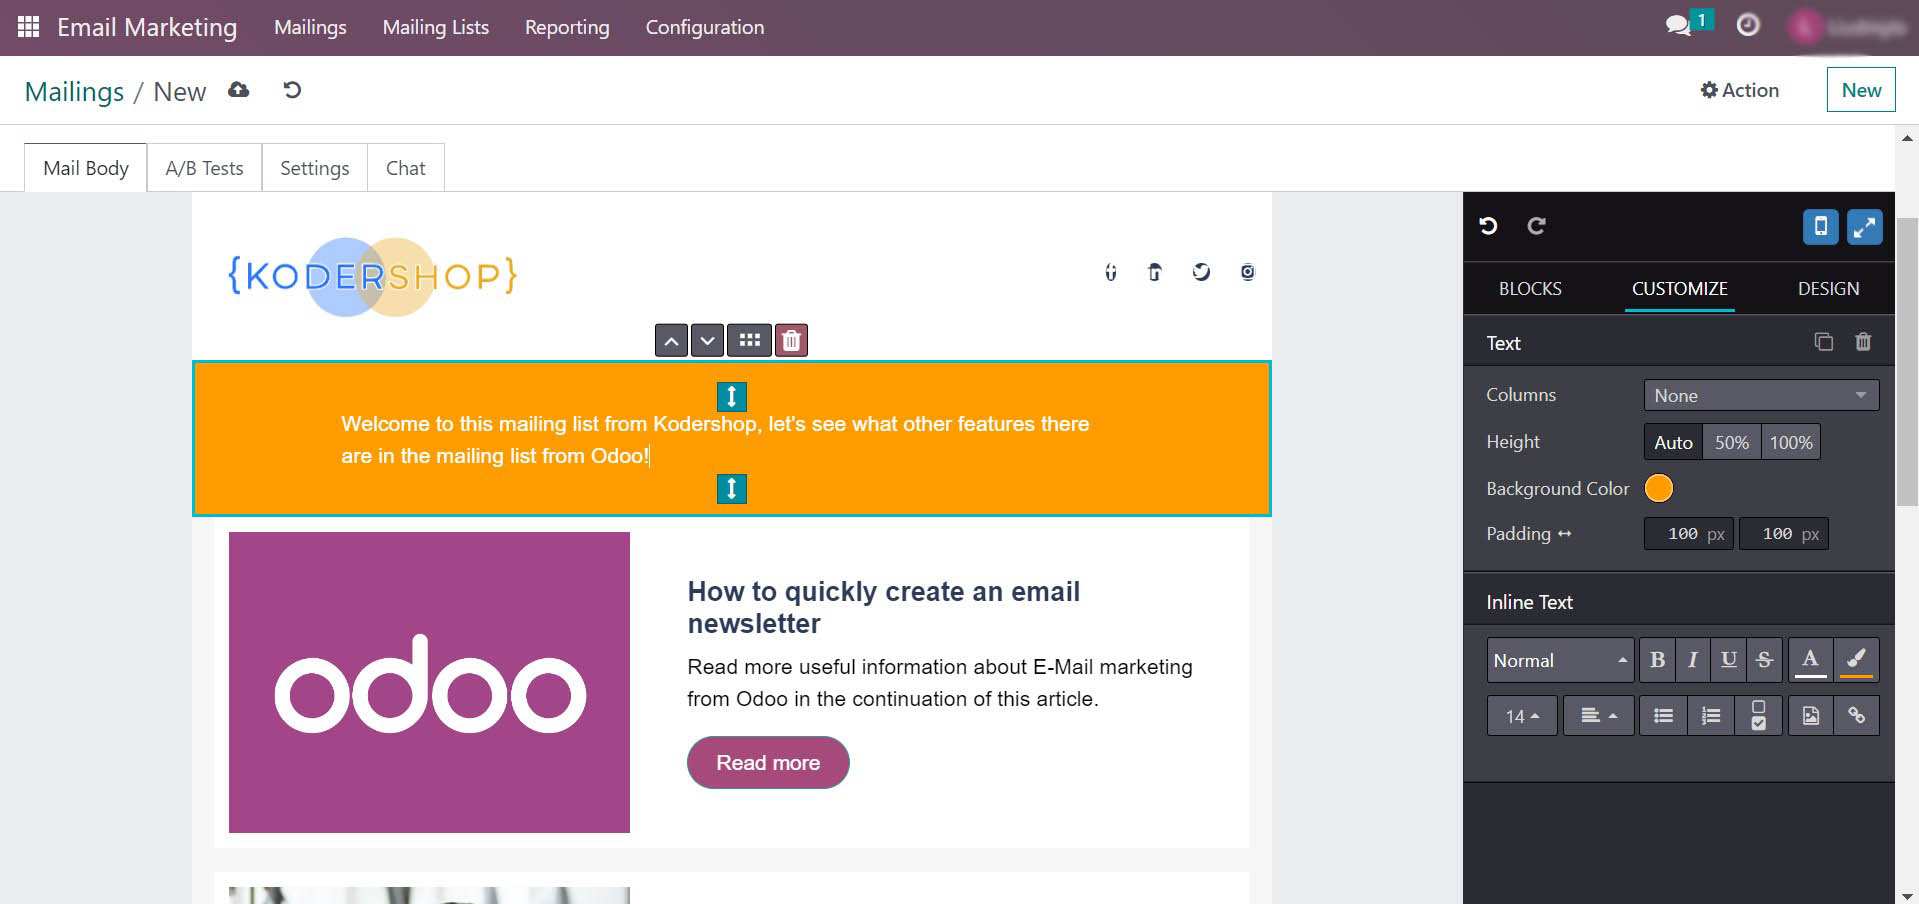
Customize is needed to change the current block or a new block you added from the section described above. In this block, you can set up padding, border, background color, replace or add an image, split the block into several parts, and much more. We can say that this block is responsible for the CSS of your letter.
Design is responsible for setting fonts and headings. You can also customize the design of buttons, separators, styles for links, background and size for the body of the entire template, and many other functions.
So, we changed the logo, the background color in the header, wrote our own texts, changed the color of the button, and edited the padding in the greeting. You can additionally change and set any styles in blocks and letters, depending on your needs.
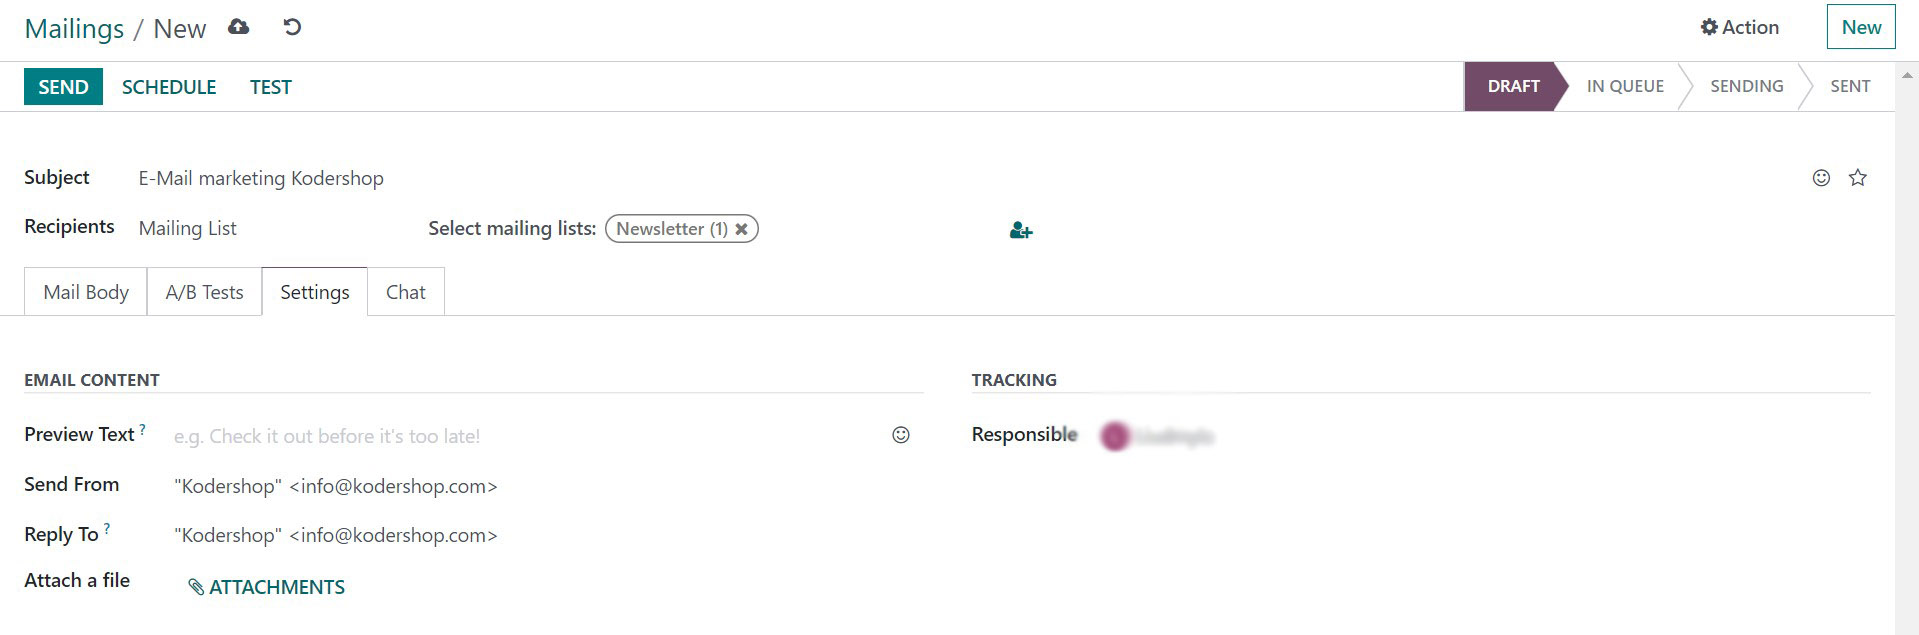
Let’s imagine we’re done with the email design and move on to the next step. Above the email template, we wrote a subject, and after that, we went to the Settings tab. There we indicate from which email the letter will be sent and to which email the answers will come. There is also a Preview Text feature, which in many mailboxes will appear right after the subject line and can serve as an extra clickbait. In our case, we left this field empty.
Working With Mailing Lists for Email Marketing and Contacts
Properly compiling and segmenting mailing lists is no less important than creating a beautiful and informative letter. It is important to understand that you must accurately define your audience and send useful information to them, otherwise, you will be sent to spam and this threatens to block your domain.
Many people look for the easy way and buy a database, in which case it is very likely that there will be a lot of invalid emails in it, in addition, you will not understand the interests of this audience and most likely you will spam information that is not interesting for people. Conversions of such mailings are close to 1% and they also threaten you with hits from spam traps. Such mailings are called cold mailings and are best avoided.
Also, people often write invalid mail or their mail becomes outdated. For example, when a person worked for a company, he had his own corporate email, then the person moved to another company, and his email was deleted, but it is still on your mailing list. In such cases, we recommend that you validate your email list before sending a newsletter to it.
How to Add Contacts to a Mailing List
Let’s move on to the next step – start working with our mailing lists. On the top panel, we select the Mailing Lists section. Go to it and click on the New button in the upper left corner. After that, we need to give a name to our list.
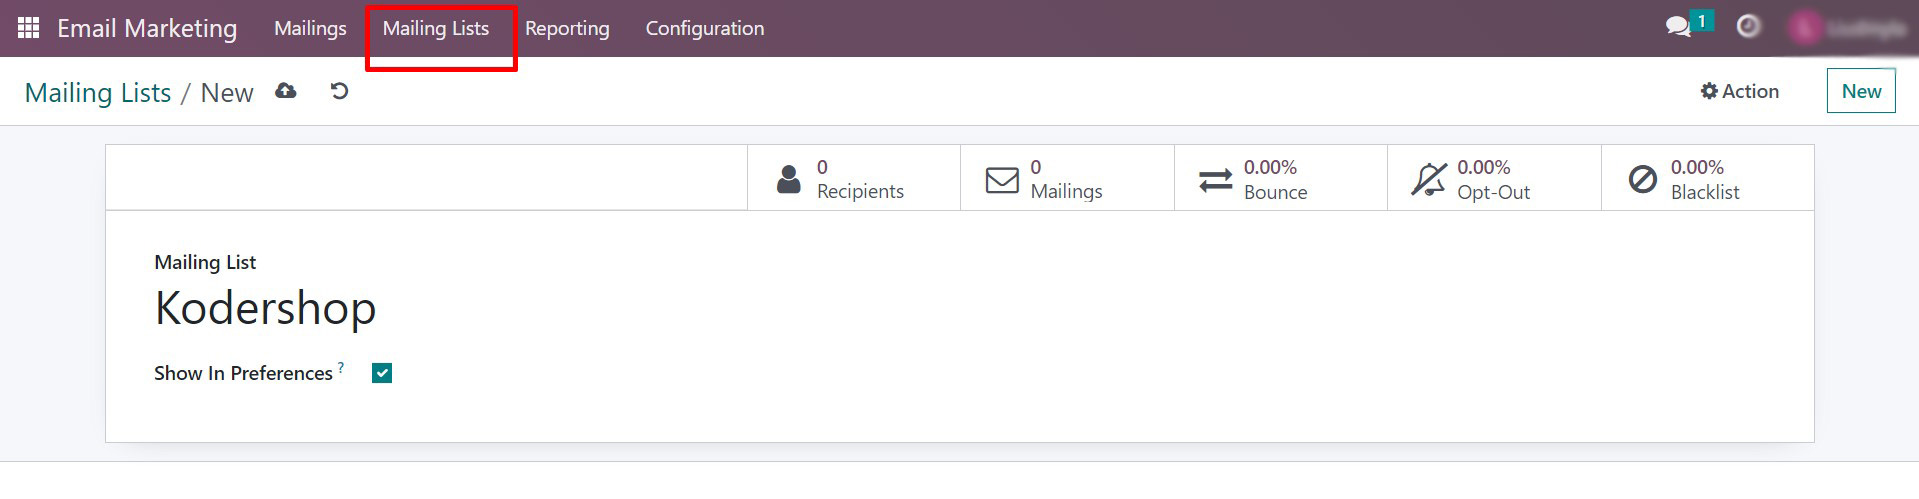
The list has been created and automatically saved, we can see it by going to the Mailing Lists tab again in the top menu. After you do this, you will see that there are 0 contacts in your list, now you need to start adding them to it. In the upper right corner, you will see the Import Contacts button.

Here you can enter a list of contacts manually or upload contacts in an Excel file
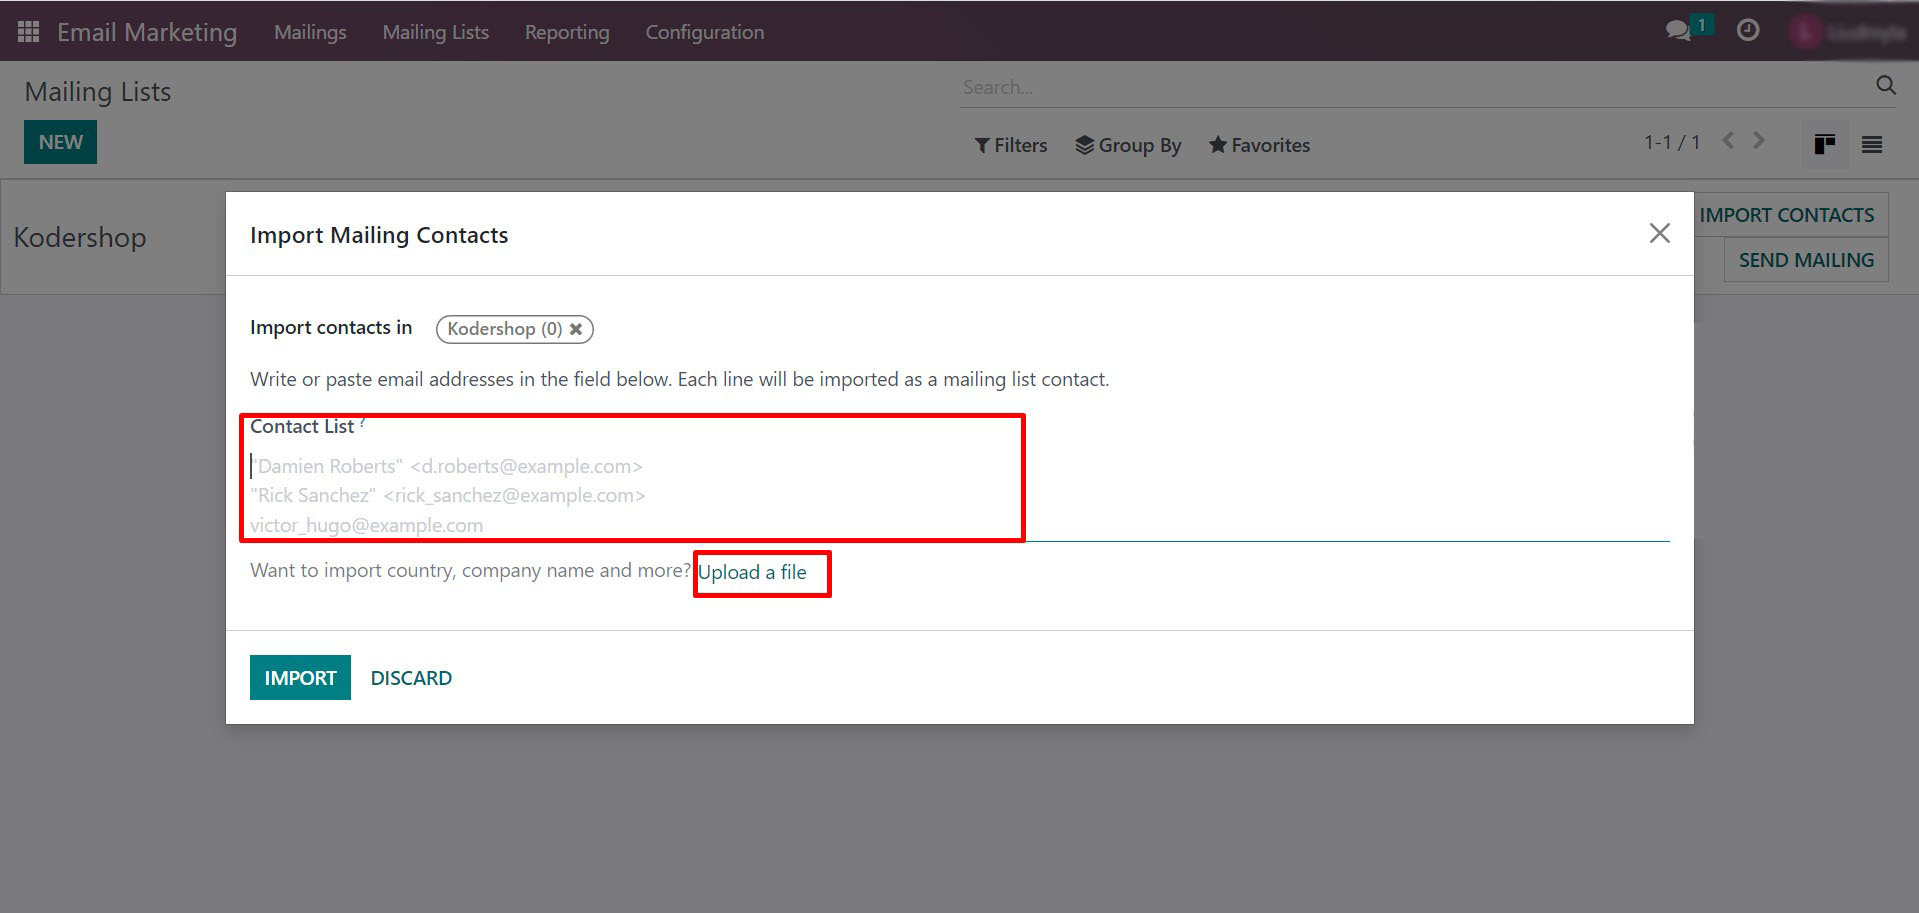
If you choose to download a file, then Odoo will offer you to download a template for contacts, it contains the fields:
- External ID
- Name
- Company Name
- Country
- Mailing List
You can edit these fields as you like – change, delete, or add new ones. The main condition is not to touch the first line, because it is needed to match information with Odoo.

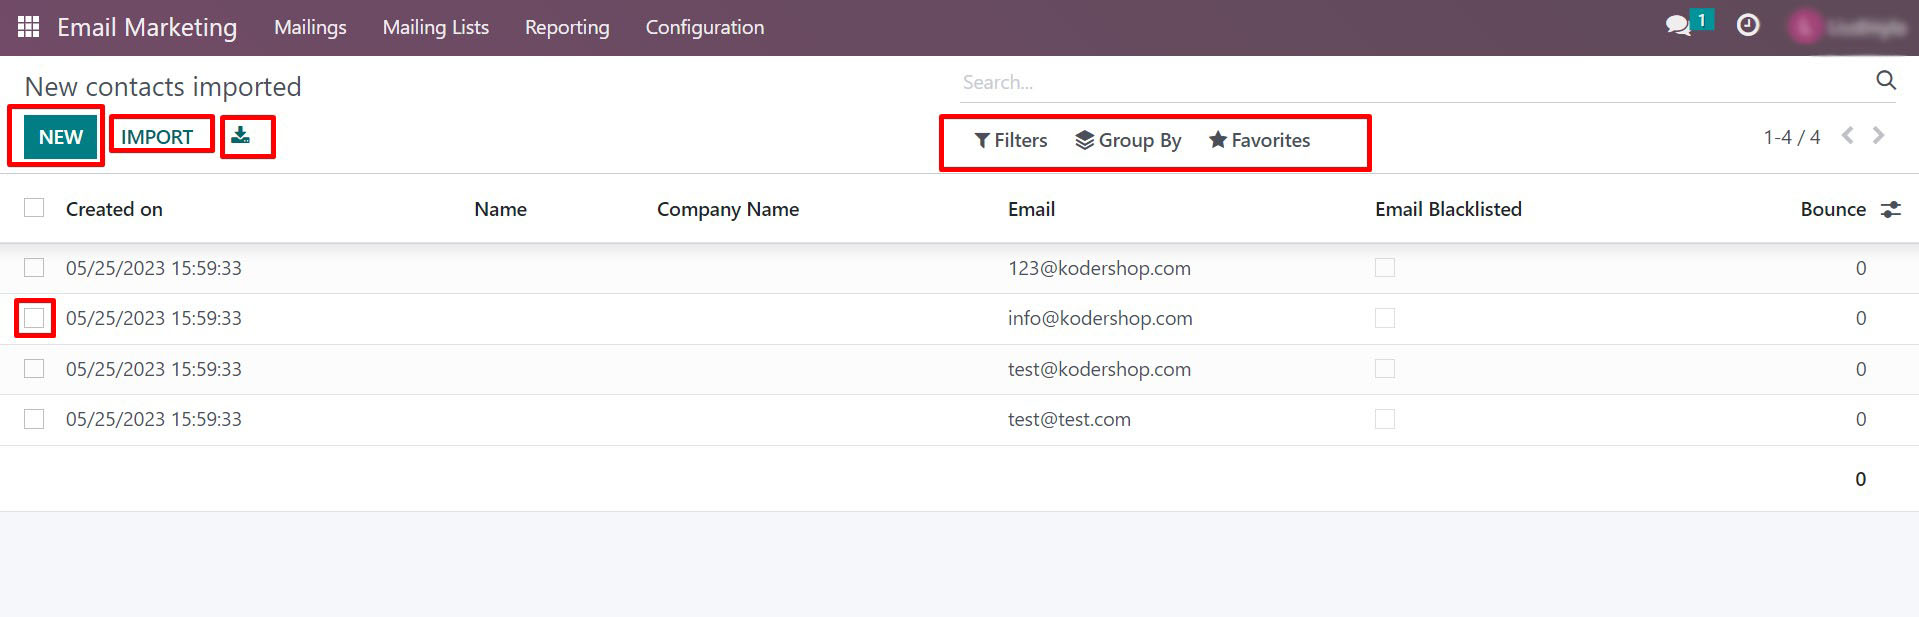
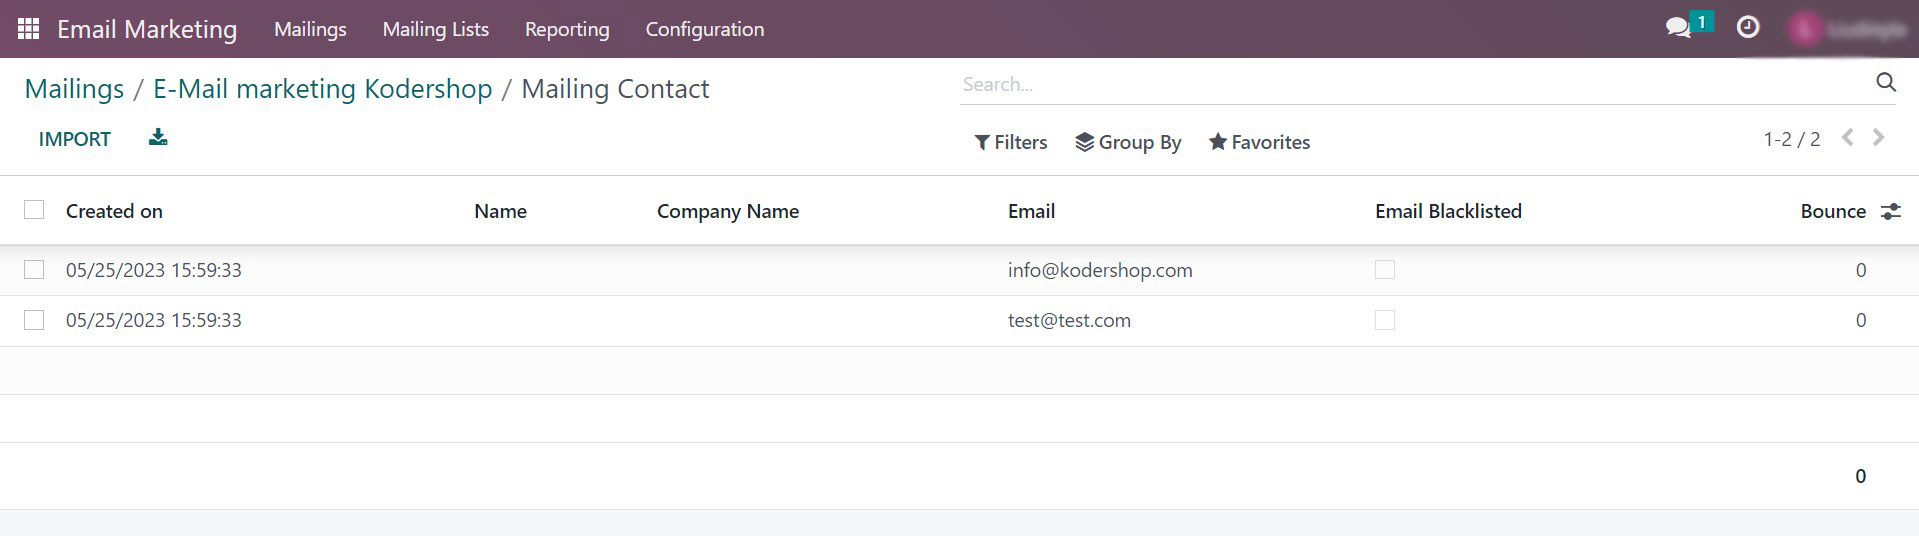
After you have imported the contacts to the mailing list, you can view them. You can also add more contacts to the list at any time, for this there is an Import button in the upper left corner. In addition, you can filter and group them in any order, you will find the tools for this in the top menu. You can also export the list or edit each contact individually.
Sending Email Newsletter
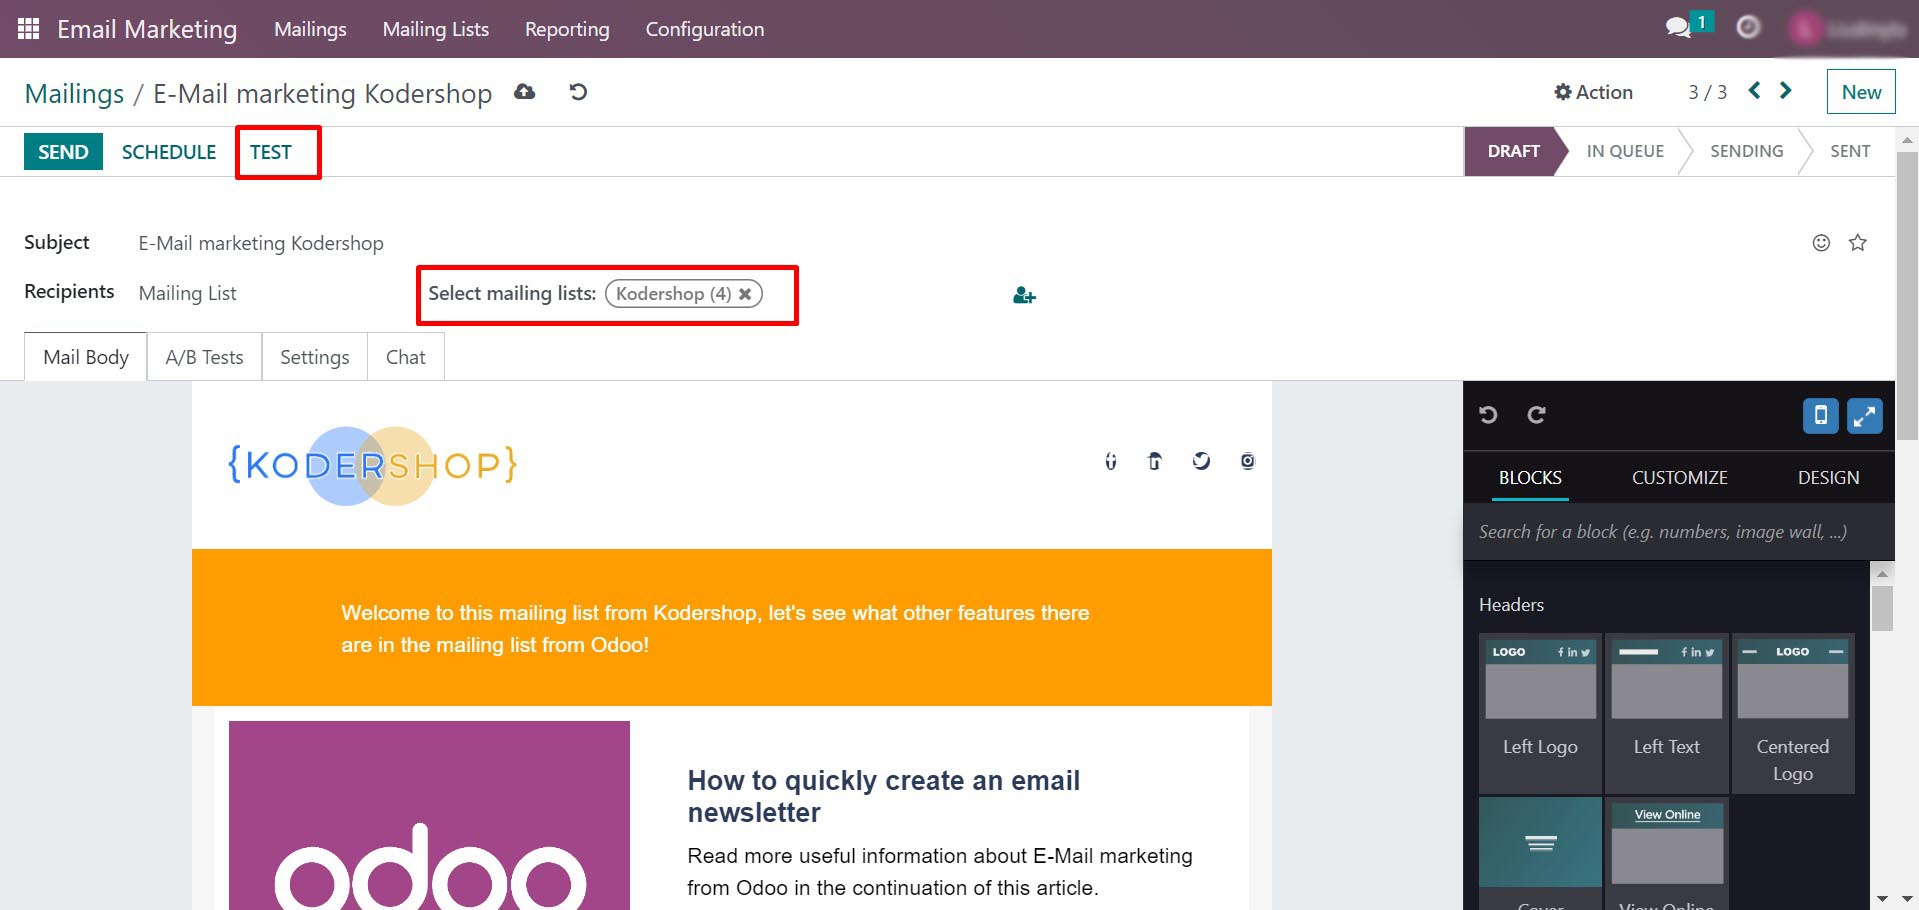
So, all the settings are done, now you can go to the main thing – let’s send our newsletter. To do this, we click on Mailings in the top menu and return to our letter. Open it and in Select Mailing Lists select the mailing list we created.
It is important to send a test email before you send out a mailing list to all the emails in the list. In a test email, you need to check:
- How it looks in different browsers and email clients
- Have the blocks moved apart?
- Are the fonts displayed correctly?
- Have all the pictures loaded and are the links working?
It happens that different browsers display the email template differently, because they are designed to work with websites, and they use a different code processing technology. For example, in a mailing letter, CSS is not in a separate file, but in the letter itself. Only after you make sure that everything works and is displayed correctly, you can send the newsletter. To select a test send, select the Test button in the upper left menu.
After checking the test letter, the moment we were waiting for came – sending a newsletter to all emails. To do this, we go to the top menu and press the Send button there. Odoo will ask you if you are sure you want to send the newsletter, to confirm click the Sent To All button.
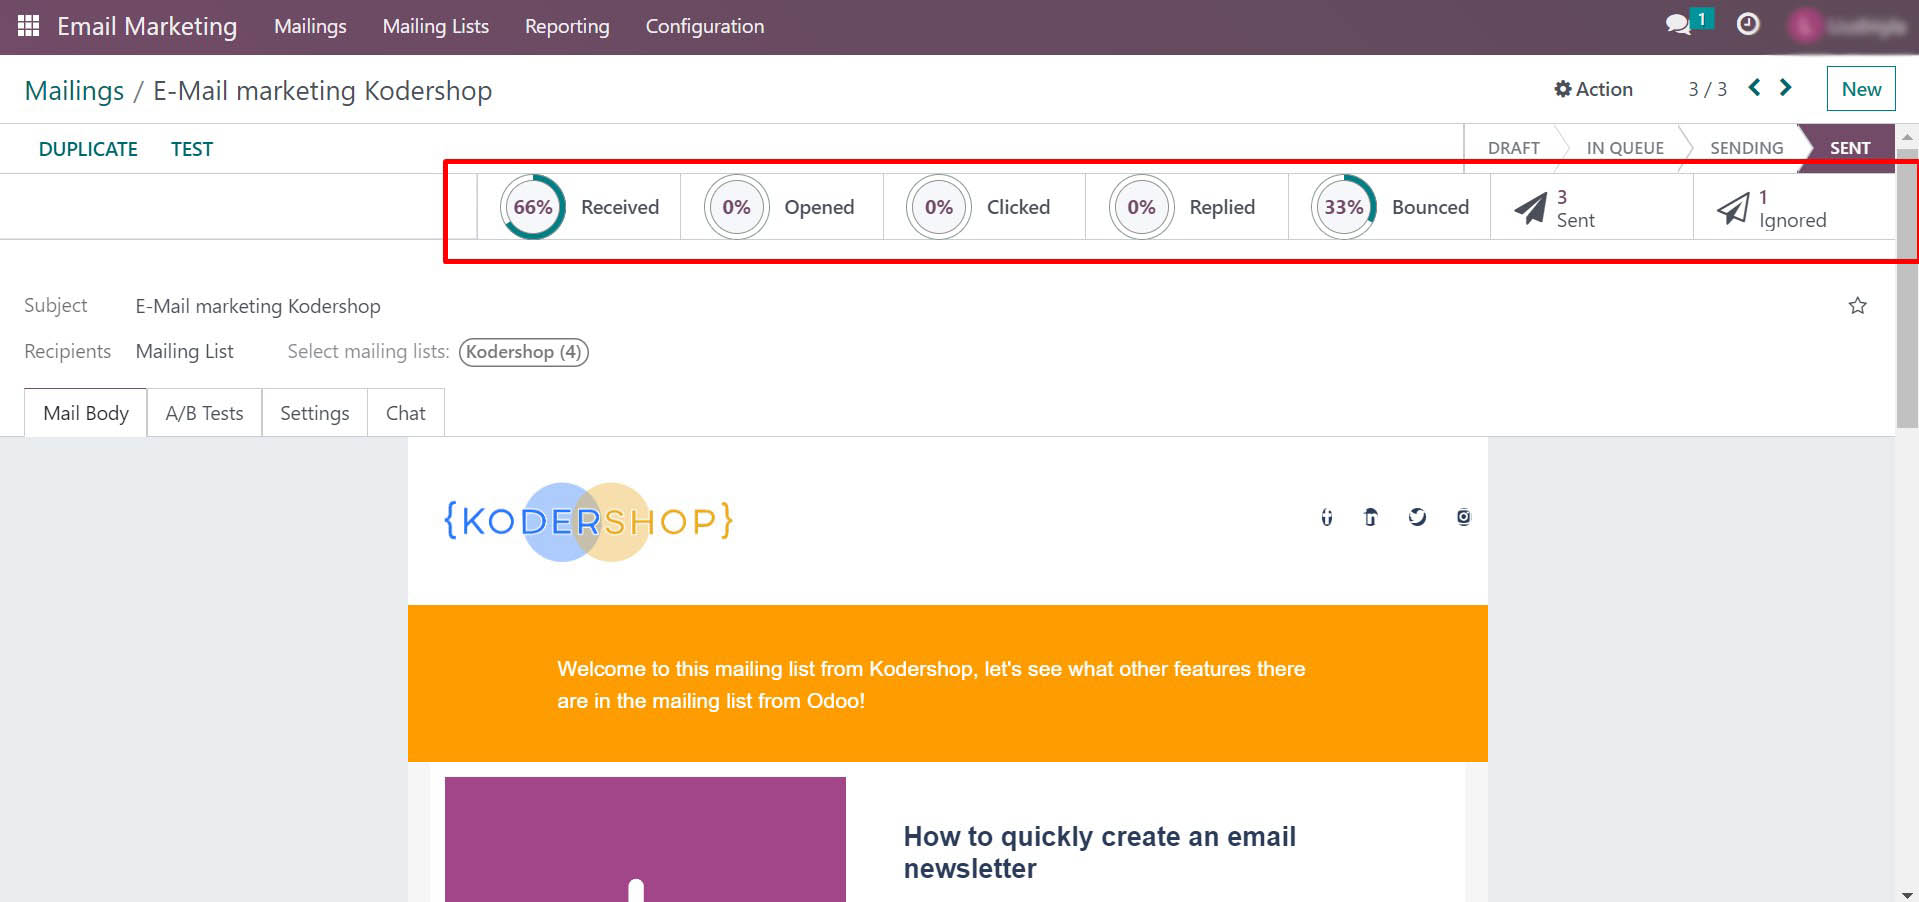
After sending, a bar will appear at the top of the screen, which will show the status of the mailing and the first analytics.

The mailing list may be in the queue for some time, as you can see in the screenshot above. You need to wait and periodically refresh the page to check the status.
Newsletter Analytics in Email Marketing
An important part of email marketing is analytics. The first plus from working with it is the cleaning of the contact list after mailing. For example, you can segment all emails to which letters are not delivered and remove them from the mailing list. The second benefit is the ability to further segment your mailing list based on loyalty to your brand, interests, and more. For example, people who clicked on an article about Property Management Software are interested in the area of leasing and you can invite them to an event where there will be an online demonstration of your software for landlords next time. People who rarely open your letters are unlikely to want additional mailings and we will disturb them less often.
How Mailing Analytics Works in Odoo
In Odoo, you can view analytics in several ways at once. Reports can be visualized and filtered in a way convenient for you, and extensive sorting and grouping options will help you quickly and conveniently work with mailing lists. You can view the first version of the report simply by clicking on your newsletter and opening it. The percentage shows the number of emails sent, opens, clicks, responses, etc.
You can view the details by clicking on any indicator you are interested in and Odoo will give you a detailed list. For example, as we see in the screenshot below, we have opened the list of sent emails.
The second option to view analytics is in the top menu. Click on Reporting and you will be taken to the advanced analytics option, which has a large number of visualizations and graphs. In the upper left corner is the Measures button, which will help you switch the graph to the metric you need. In the upper right corner, you can find buttons to switch between graphical and non-graphical displays of reports.

Finally
Email marketing solves many business tasks and is a modern tool for interacting with your audience. Choosing the right email marketing tool is just as important as choosing the right content for your email. Odoo solves all the tasks you need without any extra steps, as it has a simple and intuitive interface, as you saw after reading this article.
We can tell you more and test mailings in Odoo. We can also give you a demo and you can test the convenience of this email marketing tool yourself.